

Last Updated on February 19, 2023
What to do when using edible paint for cookies? Keep in mind that colorful and decorative sugar cookies are perfect for any occasion. However, using royal icing for decorating sugar cookies is time-consuming. Suppose you want a convenient way to make colorful sugar cookies; try painting with food coloring instead. Painting with food coloring is quick, and you can create a design as simple or as intricate as you like.
What You Will Need: Edible Paint for Cookies
Ingredients for the Painted Sugar Cookies
- 2 and 1/4 cups of the spoon and leveled all-purpose flour
- 1/2 tsp of baking powder
- 1/4 tsp of salt
- 3/4 cup of softened unsalted butter, softened to room temperature
- 3/4 of granulated sugar
- One large egg at room temperature
- 2 tsp of pure vanilla extract
- 1/4 -1/2 tsp of almond extract (this is optional)
For the Royal Icing
- 4 cups of sifted powdered sugar
- 3 tbsp of meringue powder
- 9-10 tbsp of water at room temperature
Equipment
- Mixing bowls
- Measuring cups
- Measuring spoons
- Electric mixer
- Rubber spatula
- Rolling pin
- Cookie-cutter of your choice
- Piping bag
- Piping tip no. 3
- Scribe tool or toothpick
- Food coloring (gel), you can choose any color you like, depending on the design you wanted to paint.
- Vodka or grain alcohol
- Paint palette
- Food-grade brushes (thin artist brush, round brush, and flat brush)
- Paper towel
- Bowl of water (for rinsing the brushes)
74 PCs Piping Bags and Tips-48 Numbered Piping Tips & Pastry bags with Pattern Chart & EBook

Step by Step: Edible Paint for Cookies
For the Sugar Cookies
Step 1
First and foremost, prepare a medium-sized bowl. After that, whisk together the flour, baking powder, and salt. Then, set it aside.
Step 2
Afterward, take your electric mixer attached with a paddle attachment. After that, make sure to set your mixer to high speed. And ensure to beat the sugar and butter in a large bowl. Remember, mix until it becomes smooth and creamy, for about two minutes. Then, add the egg, vanilla, and almond extract (optional). Next, beat at high speed for a minute until well combined. Ensure to scrape the bowl’s sides and bottom with a rubber spatula. And beat again to combine well.
Step 3
Then, pour your flour mixture into your wet mixture. And mix on low until all combine well. Remember, the dough will be soft. But, if it is too soft, add a tablespoon of flour.
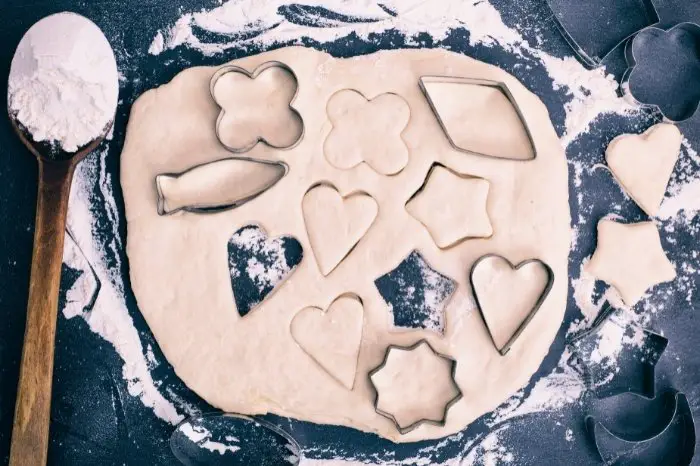
Step 4
After that, divide your cookie dough into two. Then, place each dough into a lightly dusted parchment paper or a silicone mat. With that, lightly dust your rolling pin. And roll out your dough to 1/4-inch thick. Because of this, you can use more flour if the dough is too sticky. The rolled-out dough can be in any shape. However, make sure it is 1/4-inch thick.
Step 5
Next, lightly dust one rolled-out dough with flour. And put parchment on top to prevent sticking. After that, place the second rolled-out cookie dough on top of the parchment. Then, cover it with cling wrap. And place it inside the refrigerator for 1 to 2 hours.
Step 6
Once chilled, make sure to preheat the oven to 350 degrees Fahrenheit. After that, line 2 or 3 of your large baking sheets with parchment paper. Then, gently and carefully remove the top dough from the refrigerator.
Step 7
Next, cut your cookies using the cookie cutter of your choice. Afterward, roll the dough again. And continue to cut out the cookies as much as you can. With this, repeat the process with the second dough. Then, reuse the scraps and roll them out to cut more cookies.
Step 8
After that, arrange your cookies 3 inches apart on the baking sheets. Then, bake your cookies for about 11 to 12 minutes. Or bake it until they become lightly browned around the edges. Then, rotate your baking sheet halfway throughout baking if your oven has hot spots.
Step 9
If the cookies cook entirely, take them out of the oven. And ensure to cool them on the baking sheet for 5 minutes. After 5 minutes, transfer them to a wire rack to cool completely.
For the Royal Icing
Step 1
Before anything else, beat the sugar, meringue powder, and water using a mixer with a whisk attachment at high speed. Make sure to use a large bowl. Because of this, make sure to mix for about 2 minutes.
Step 2
When lifting the whisk, the icing should be smooth and should drizzle down. If you think that your icing is too thick, you can add more water. If you think that the icing is too thin, ensure to add more sifted powdered sugar.
Step 3
Afterward, put your royal icing on a piping bag with a no.3 piping tip. Take your cooled sugar cookies and ice your cookies. Then, use your scribe tool or toothpick to shape the icing. After that, allow the royal icing to dry completely. In this regard, leaving it to dry overnight is preferable.
For Painting the Sugar Cookies
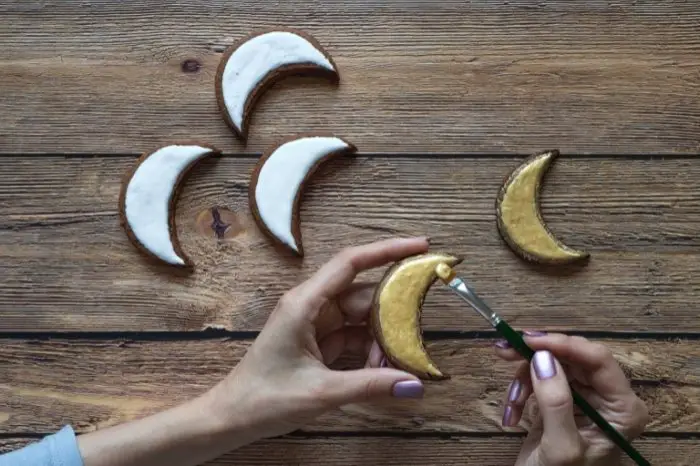
Step 1
Prepare your sugar cookies with dry royal icing. Then, mix food coloring with vodka or grain alcohol.
Step 2
After that, carefully dip your brush into the paint. And blot it on a paper towel. Next, paint in layers. With that, start with using a light color paint layer when doing your design. Also, keep a photo of your design as a reference.
Step 3
Next, use the thin artist’s brush to paint the fine details. You can also use a damp brush to remove any mistakes if needed.
Step 4
Once satisfied with your design, let the cookies dry completely. Serve and enjoy!
What Color Are Fortune Cookies?
If you take a look at traditional fortune cookies, they’re usually a yellowish-brown color. Some people say they even have an orange undertone. However, nowadays, you can buy fortune cookies in a whole range of colors including black, blue, brown, gold, green, orange, pink, purple, red, silver, white and yellow. They also come in different flavors too, such as cinnamon, raspberry, lemon, banana, cappuccino, orange, mint, blueberry, cherry, chocolate, coconut, etc.
You can even buy chocolate-covered fortune cookies! Online stores like Fancy Fortune Cookies are the best place to buy fun varieties and flavors.
How to Make 3 Color Cookies?
Cookies with 3 colors are often called rainbow cookies, and they have 3 different layers of color. They’re relatively easy to make. The ingredients you’ll need are:
- 8 oz of almond paste
- 1 cup of butter
- 1 cup of white sugar
- 4 large eggs
- 2 cups of all-purpose flour
- 6 drops of red food coloring
- 6 drops of green food coloring
- 1/4 cup of raspberry jam
- 1/4 cup of apricot jam
- 1 cup of melted chocolate chips
Now all you need to do is:
- Line three trays with parchment paper and preheat your oven to 350F.
- Grab a bowl and add the paste, butter, sugar, and egg yolks.
- Mix well until smooth and then add the flour.
- At this point, you should have a dough.
- In a separate bowl, beat the egg whites until you have stiff peaks, and then fold them into your dough.
- Make 3 portions out of the dough and dye one red and one green, and leave the other as it is.
- Add each dough to each prepared pan and bake for around 8-10 minutes.
- Cool on wire racks.
- Lay a piece of plastic wrap down and add your green layer of cake, top with raspberry jam, then add the plain layer.
- Top with apricot jam and then add your pink layer of cake.
- Wrap in plastic wrap entirely and leave in the fridge for at least 8 hours.
- Now top with the melted chocolate and then leave to the firm in the fridge.
- Cut into squares and serve.
How to Color Royal Icing Without Food Coloring?
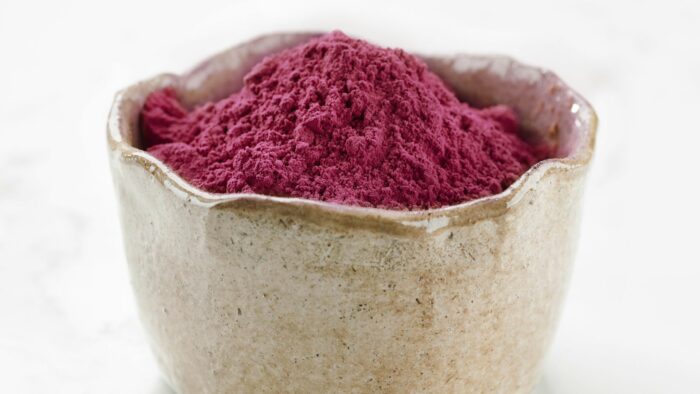
You can color any icing with natural food products, instead of food coloring. For example:
- If you’re looking to make pink, you’d need beet juice or strawberry juice.
- For red, you can use beet powder.
- For oranges, you can use sweet potato or carrot powder.
- For yellow, you can use saffron or turmeric.
- For green, you can use matcha.
- For blue, you can use blueberry juice.
- For brown, you can use cocoa, coffee, or tea
- For gray or black, you can use activated charcoal.
What Type of Food Coloring is Best For Royal Icing?
When it comes to coloring royal icing, the best type of food coloring to use is gel colors. Not only are they vibrant and bright, but they don’t contain too much liquid too; which is a bonus for royal icing. Gel colors don’t change the texture or taste of the royal icing much too.
How to Make Nude Color Royal Icing?
To make a nude color, start with white royal icing as a blank canvas. Using a toothpick, add a small amount of brown food coloring, and a small amount of pink food coloring. Swirl into your frosting until you have the color you’re looking for. If your icing is too dark, lighten it with white, and if it’s too light, add more brown food coloring.
How Do You Make Silver Color With Royal Icing?
To make a silver color with royal icing, it’s best to paint directly onto your rolled royal icing onto the baked goods. To make silver, all you need to do is add a small amount of luster dust, along with alcohol-based products like vodka, and then paint on with an artist-grade brush. Shades that I’d recommend are Nu Silver, Moonstone, and Silver Foliage.
Tips and Tricks For Painting Cookies With Food Coloring
When painting your sugar cookies, make sure that you have a smooth surface of royal icing as a canvas. If you happen to have wet icing, then it tends to absorb the paint. In addition to that, your cookies will be blotchy and ruined.
Moreover, to avoid porous royal icing, do not over-mix. With that, mix it at medium-low speed for not more than five minutes. Likewise, do not over-thin out your icing. After that, add your powdered sugar to a tablespoon until you reach a fifteen to twenty-second count.
Additionally, dry your sugar cookies completely. Likewise, dry your iced cookies in front of a fan if needed before painting them. Furthermore, to store your painted cookies, store them in an airtight container at room temperature. With that, the cookies will stay soft for about five days.
Also, to store them longer, cover the cookies and refrigerate them. Because of this, they will last up to ten days. Moreover, use alcohol instead of water for painting the cookies. The main reason is that alcohol evaporates more quickly than water. For this reason, it will not cause the icing to dissolve when painting the cookies.
How to Make Edible Paint
There are many ways to make edible paint, but here is my favorite way of doing so. For this edible paint recipe, you’ll need the following ingredients:
- 2 cups of confectioners’ sugar
- 1 1/2 tablespoons of meringue powder
- 1/2 cup of warm water
- food coloring of your choice, to decorate
- water, to decorate
Now all you need to do is:
- Grab a bowl and add the following ingredients: confectioners’ sugar and meringue powder. Mix well and then add around 1/2 of the warm water.
- Mix well and beat on high for a few minutes until the mixture turns glossy. Add more warm water if you find your royal icing is too thick.
- Remove spoonfuls of icing for every color that you’re using and add them to a palette/container.
- With the rest of the icing, add the remaining 1/2 of the warm water gradually and then add to a piping bag.
- Pipe an outline and then use your piping bag of white icing to fill the outline. Leave to dry.
- Add a toothpick amount of food coloring to each of your spoonfuls of icing and mix well, and use as needed.
- To paint your cookies, add your food coloring to a paint palette, along with a small amount of water. Use a paintbrush as needed and then leave it to dry.
How to Paint Your Own Easter Cookies
Paint your easter cookies, it’s super easy. And you’ll just need the following ingredients:
For the cookies:
- 1 cup of white sugar
- 4 cups of all-purpose flour
- 2 cups of butter
- 1 egg
- 1 tablespoon of orange zest
For the icing:
- 6 cups of confectioners’ sugar
- 3 egg whites
- 1/2 teaspoon of vanilla extract

Now all you need to do is:
- Gather all of the ingredients you need for this recipe and preheat your oven to 350F. You’ll also need to line a baking sheet with parchment paper.
- Add the butter and sugar to a bowl and cream until pale in color and fluffy. Then, add in the egg and orange zest. Mix well until fully combined.
- Gradually add the flour and mix until a dough begins to form. Then lightly dust a surface with flour and knead your dough until flexible and smooth. Cover in plastic wrap and chill for at least 30 minutes.
- Remove your dough and then roll it to around 1/8 inch thick. Roll into Easter shapes and then bake in the center of your preheated oven for around 14-16 minutes.
- Remove from oven and leave to cool before decorating.
- To make your icing, add the sugar, egg whites, and vanilla to a bowl. Mix for around 5 minutes and then add to a piping bag. Pipe the outline and then fill the middle of the cookie with the icing too. Leave to dry for at least 6 hours.
- Once dry, grab a paint palette and add a small amount of food coloring in each space. Then add a drop or two of water into each space and mix.
- Use a paintbrush to paint onto your cookies as desired. Leave to dry for around an hour before eating. Serve and enjoy!
Conclusion
I hope this post has helped you to become more familiar with how to make edible paint for cookies. It’s fairly easy to do, but the skill of painting well on cookies does take some practice! Do you have any tips or tricks when it comes to making edible paint for cookies? If so, please feel free to let me know in the comments below. And remember, sharing is caring!
Edible Paint for Cookies: Fun Food Art Recipe
Equipment
- Mixing bowls
- Measuring cups
- Measuring Spoons
- Rolling Pin
- Cookie-cutter of your choice
- Piping Bag
- Piping tip no. 3
- Scribe tool or toothpick
- Food coloring (gel), you can choose any color you like, depending on the design you wanted to paint.
- Vodka or grain alcohol
- Paint palette
- Food grade brushes (thin artist brush, round brush, and flat brush)
- Paper towel
- Bowl of water (for rinsing the brushes)
Ingredients
For the Painted Sugar Cookies
- 2 and 1/4 cups of the spoon and leveled all-purpose flour
- 1/2 tsp of baking powder
- 1/4 tsp of salt
- 3/4 cup of softened unsalted butter softened to room temperature
- 3/4 of granulated sugar
- One large egg at room temperature
- 2 tsp of pure vanilla extract
- 1/4 -1/2 tsp of almond extract optional
For the Royal Icing
- 4 cups of sifted powdered sugar
- 3 tbsp of meringue powder
- 9-10 tbsp of water at room temperature
Instructions
For the Sugar Cookies
- First and foremost, prepare a medium-sized bowl. After that, whisk together the flour, baking powder, and salt. Then, set it aside.
- Afterward, take your electric mixer attached with a paddle attachment. After that, make sure to set your mixer to high speed. And ensure to beat the sugar and butter in a large bowl. Remember, mix until it becomes smooth and creamy for about two minutes. Then, add the egg, vanilla, and almond extract (optional). Next, beat at high speed for a minute until well-combined. Ensure to scrape the bowl's sides and bottom with a rubber spatula. And beat again to combine well.
- Then, pour your flour mixture into your wet mixture. And mix on low until all combine well. Remember, the dough will be soft. But, if it is too soft, add a tablespoon of flour.
- After that, divide your cookie dough into two. Then, place each dough into a lightly dusted parchment paper or a silicone mat. With that, lightly dust your rolling pin. And roll out your dough into 1/4-inch thick. Because of this, you can use more flour if the dough is too sticky. The rolled-out dough can be in any shape. However, make sure it is 1/4-inch thick.
- Next, lightly dust one rolled-out dough with flour. And put parchment on top to prevent sticking. After that, place the second rolled-out cookie dough on top of the parchment. Then, cover it with cling wrap. And place it inside the refrigerator for 1 to 2 hours.
- Once chilled, make sure to preheat the oven to 350 degrees Fahrenheit. After that, line 2 or 3 of your large baking sheets with parchment paper. Then, gently and carefully remove the top dough from the refrigerator.
- Next, cut your cookies using the cookie cutter of your choice. Afterward, roll the dough again. And continue to cut out the cookies as much as you can. With this, repeat the process with the second dough. Then, reuse the scraps and roll them out to cut more cookies.
- After that, arrange your cookies 3-inch apart on the baking sheets. Then, bake your cookies for about 11 to 12 minutes. Or bake it until they become lightly browned around the edges. Then, rotate your baking sheet halfway throughout baking if your oven has hot spots.
- If the cookies cook entirely, take them out of the oven. And ensure to cool them on the baking sheet for 5 minutes. After 5 minutes, transfer them into a wire rack to cool completely.
For the Royal Icing
- Before anything else, beat the sugar, meringue powder, and water using a mixer with a whisk attachment at high speed. Make sure to use a large bowl. Because of this, make sure to mix for about 2 minutes.
- When lifting the whisk, the icing should be smooth and should drizzle down. If you think that your icing is too thick, you can add more water. If you think that the icing is too thin, ensure to add more sifted powdered sugar.
- Afterward, put your royal icing on a piping bag with a no.3 piping tip. Take your cooled sugar cookies and ice your cookies. Then, use your scribe tool or toothpick to shape the icing. After that, allow the royal icing to dry completely. In this regard, leaving it to dry overnight is preferable.
For Painting the Sugar Cookies
- Prepare your sugar cookies with dry royal icing. Then, mix food coloring with vodka or grain alcohol.
- After that, carefully dip your brush into the paint. And blot it on the paper towel. Next, paint in layers. With that, start with using a light color paint layer when doing your design. Also, keep a photo of your design as a reference.
- Next, use the thin artist brush to paint the fine details. You can also use a damp brush to remove any mistakes if needed.
- Once satisfied with your design, let the cookies dry completely. Serve and enjoy!
Notes

Zarah is an experienced pastry chef whose creations have delighted countless customers. With a passion for baking, Zarah has developed a unique style that combines classic techniques with modern flavors. Her desserts are consistently crafted with the finest ingredients, and her attention to detail is evident in the stunning and delectable results. Zarah has a wealth of experience in the pastry kitchen, and loves to share her knowledge with others. Whether it is teaching a class or creating a custom cake for a special occasion, Zarah is committed to making sure every customer is satisfied.