
Last Updated on January 6, 2023
How to use candy melts and molds? It is indeed necessary that you learn how to use candy molds to create edible cake decorations. Likewise, homemade candies and toppers for cupcakes.
Furthermore, knowing the proper usage of candy molds is useful if you want to decorate your cakes. In addition to that, cupcakes are for any occasion. Or if you plan on starting your own dessert business. However, just like any skill, using candy molds requires practice and finesse.
How To Use Candy Melts And Molds?
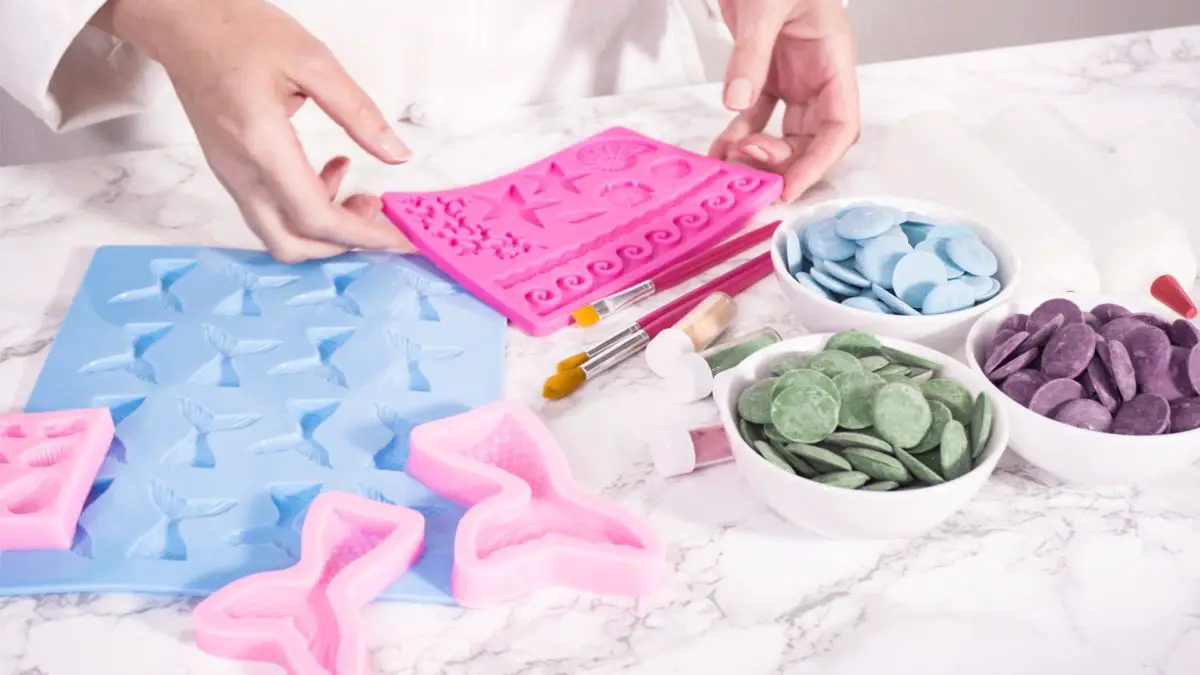
For beginners, knowing the difference between plastic and silicone molds is important. Clear plastic molds are reusable and easy to clean. In addition to that, they are easy to use, and you need to flex and release them. Also, they come in different varieties of designs suitable for lollipops, candy cups, and many more.
On the other hand, silicone molds are a bit more pricey than clear plastic molds. For that reason, they are more of an investment. Besides, they are easy to use and dishwasher safe.
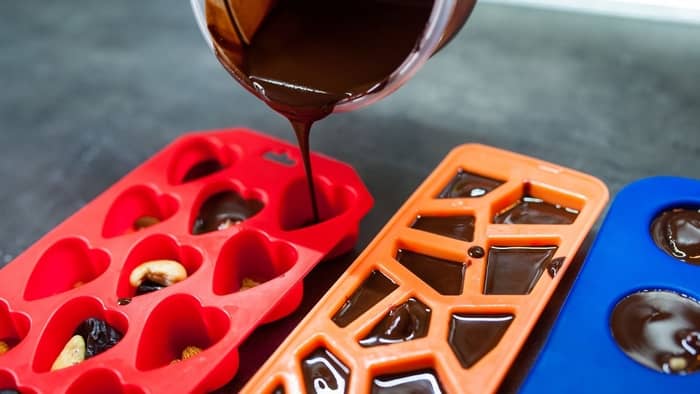
When using candy melts, you need to follow the package instructions. Then, once melted, you may use a spoon, piping bag, or a plastic squeeze bottle. Use them to fill your desired molds. Afterward, tap your mold gently to remove any air bubbles.
After that, place your filled mold inside the refrigerator or freezer. Store them until your candy sets and firms. However, if there are dark-looking parts in your candy, it may indicate that your candy is still soft. With that, be patient when making these candies. In addition to that, allow them to set for a longer period.
When the candy sets completely, you may now unmold your candy by turning your candy. Or it could be chocolate mold over about an inch from a flat surface. Likewise, you may flex or tap the mold to loosen them.
Find useful tips to melt candy melts
Candy mold ideas
Suppose you find that your candies are too plain. Because of that, you want to add more color to them. Besides that, if you want a more detailed design, fill your piping bag with your melted candy melts. Afterward, cut a tiny hole off the tip of your bag. Then, pipe the details you want, but remember to dry each color you add. Make sure to do this before putting another on top.
Also, if you want to add nuts and dried fruits to the center of your candy, melt your candy melts. Make sure to do it as directed. And then place them in a piping bag. Because of that, be sure to fill each cavity of your mold halfway.
Afterward, tap to allow the air bubbles to escape. Then, place one piece of nut or dried fruit in each cavity of your mold. After that, fill the rest of your mold cavity with more melted candy melts. Next, tap again lightly. And make sure to put it inside your refrigerator or freezer to set.
If you want to make a layered candy:
- Before anything else, melt two or more colors of candy melts. Then, place each color inside a piping bag.
- Afterward, pipe in your desired layers. And tap the mold after each layer. Doing this ensures that all the air bubbles release completely.
- Finally, chill to set. As a result, the layered candy will look good from the side.
Things to consider for candy molds
Moreover, if you want to take it up a notch, you can try bracing the mold at an angle. Make sure to do this while chilling.
Also, if you want to add a filling inside your candies with caramel, likewise, any filling you desire. Make sure to fill each cavity of your mold with less or halfway. And use a decorator brush to paint the sides of your mold cavity to the top edge. Do that until no light can pass through it.
Afterward, make sure to refrigerate for a few minutes to set. And then fill each cavity with your desired filling. Remember, ensure that your filling is at room temperature or cold. Consequently, a warm or hot filling can melt all your hard work.
Then, leave 1/8 inch below the edge. And top it off with your melted candy melts. Next, tap your mold to release air bubbles and refrigerate. If your candies won’t release easily, refrigerate for more minutes. Or until the bottom of your mold looks frosted.

Additionally, you have to have candy lollipop molds with a notch for lollipop sticks. Do this if you want to make candy lollipops. With that, pipe-melted candy melts halfway through each mold cavity. And tap it gently. Then, insert your lollipop stick in the notch. And twirl it around to cover it completely. Keep in mind that this technique will ensure that your stick will grip firmly into your candy.
Afterward, fill each mold cavity with melted candy melts, tap, and refrigerate until set. Next, check if you frosted the underside of your mold. If it is, tap the mold on your counter. And pick it up using the lollipop stick.
How To Make Chocolate Molds With Candy Melts?
Ingredients
- Chocolate molds of your choice
- Melted candy melts
- Squeeze bottles or piping bags
- Wax paper
Step-by-step instructions
Step 1
Place your candy melts inside the plastic squeeze bottle. Then, the heat inside the microwave at 15-second increments. Do it until the candy melts completely melt. Afterward, shake your squeeze bottle a bit. Doing this ensures that there are no lumps.
Step 2
Next, squeeze your melted candy melts into each mold cavity. After that, squeeze at the center of each cavity. And make sure to refrain from moving your squeeze bottle around.
Step 3
Then, stop squeezing your plastic bottle when the mold cavity is about 3/4 full. Bear in mind, refrain from filling into the corners.
Step 4
After that, hold the edges of your chocolate mold. And gently tap into your table or counter. With this, the melted candy melts will spread into the empty corners. And it will allow air bubbles to escape to avoid having little dots on your candy. Once you fill your molds with melted candy melts, place your molds inside the refrigerator or freezer. Afterward, let it firm for about ten minutes. Or until your candy sets entirely.
Step 5
Lastly, take a sheet of wax paper on the table. And gently flip your chocolate mold. So with that, make sure to tap your chocolate mold lightly. As a result, the candy pieces will begin popping out.
How Do You Use Metal Candy Molds?
Using metal candy molds is much like using silicone or plastic candy molds. All you need to do is:
- Melt your candy melts and add the liquid to a squeezy bottle, or something that you can easily pour from and control.
- Before you begin, ensure the metal candy mold is clean and completely dry.
- Now squeeze candy into each cavity. You shouldn’t fill more than around 2/3 of the cavity.
- Tap the edges of the mold to ensure it’s smooth and there are no bubbles.
- Leave to harden at room temperature, or in the fridge or freezer.
Metal candy molds are great as they cool down your candy much more quickly than other molds, such as silicone or plastic ones. Another bonus of metal candy molds is that they’re long-lasting; an investment in metal molds is a great, durable one. Metal is also super easy to clean in comparison to other materials.
How Do You Use Polycarbonate Chocolate Molds?
Using polycarbonate chocolate molds is similar to using any other type of mold.
- Add your melted candy to a squeezy bottle and start adding the liquid to each cavity, once the mold is completely dry and clean. Remember not to fill each cavity more than around 2/3 full. Tap the edges gently to smoothen the chocolate.
- Leave to harden and then remove from the molds by gently pressing the shapes out.
Polycarbonate chocolate molds are great for easily releasing and they also add a real shine to the finished products. The other advantage is that you can watch as your chocolate hardens, and can tell exactly when it’s ready to remove, depending on the color.
How Long Will Candy Melts Last?
The typical shelf life of candy melts is around 18 months since they were made. Candy melts usually have a stamped number on the packaging which tells you when the product was manufactured. Candy melts should be stored in a cool, dry place to ensure they have the best shelf life possible. If you use some of the candy melts and have some leftovers in your pocket, just transfer them to a sealable bag, or airtight container and store them in a cool, dry place. This way, they’ll last around 3-6 months, once opened.
What Temperature Does Candy Melt?
Candy begins to melt anywhere between 86F and 90F. This is lower than body temperature, which is why quite often candy will melt in your hands as you’re eating it. For the quickest possible way of melting candy, the temperature should be between 104F and 113F.
How to Clean Up Candy Melts?
As soon as you no longer need to use whatever the candy melts were melted in, place the bowl straight into a dish of hot (the hotter the better) soapy water and leave it to soak. After around ten minutes or so, the bowl should be almost clean and easy to wipe off with a cloth or a sponge. Ensure you do this right away, as the harder the candy melts become, the more difficult it becomes to clean them effectively.
What Can I Mix With Candy Melts?
If you’re looking for ways to make your candy melted more exciting, there are a few simple ways to do so. Before you begin, ensure the candy melts are completely melted and that no lumps are remaining. Here are a few ways to spice up your candy melts.
- Adding oil-based extracts or flavorings. While candy melts are usually vanilla flavored, adding your own extract can make them taste more homemade.
- Cocoa powder. This a quick way to add sweetness and additional flavor to your candy melts
- Sprinkles. Fun, easy to do, and absolutely delicious!
- Shortening or coconut oil. Great ways to thin your candy melts, if needed.
Tips And Tricks: How To Use Candy Melts And Molds
Avoid overheating your candy melts, or you will end up with lumps. In addition to that, avoid over-filling your mold cavities. As a consequence, you will have a mess.
Moreover, refrain from rushing to remove your candy pieces. Because of this, allow them to set completely. If you do not, they will melt and break. Also, refrain from greasing your chocolate molds with shortening and oil sprays. It will hinder the details of the mold from transferring onto your melted candy melts properly.
How To Make Chocolate Molds With Candy Melts?
Equipment
- Chocolate molds of your choice
- Squeeze bottle or piping bags
- Wax paper
Ingredients
- Melted candy melts
Instructions
- Place your candy melts inside the plastic squeeze bottle. Then, the heat inside the microwave at 15-second increments. Do it until the candy melts completely melt. Afterward, shake your squeeze bottle a bit. Doing this ensures that there are no lumps.Melted candy melts
- Next, squeeze your melted candy melts into each mold cavity. After that, squeeze at the center of each cavity. And make sure to refrain from moving your squeeze bottle around.
- Then, stop squeezing your plastic bottle when the mold cavity is about 3/4 full. Bear in mind, refrain from filling into the corners.
- After that, hold the edges of your chocolate mold. And gently tap into your table or counter. With this, the melted candy melts will spread into the empty corners. And it will allow air bubbles to escape to avoid having little dots on your candy. Once you fill your molds with melted candy melts, place your molds inside the refrigerator or freezer. Afterward, let it firm for about ten minutes. Or until your candy sets entirely.
- Lastly, take a sheet of wax paper on the table. And gently flip your chocolate mold. So with that, make sure to tap your chocolate mold lightly. As a result, the candy pieces will begin popping out.

Zarah is an experienced pastry chef whose creations have delighted countless customers. With a passion for baking, Zarah has developed a unique style that combines classic techniques with modern flavors. Her desserts are consistently crafted with the finest ingredients, and her attention to detail is evident in the stunning and delectable results. Zarah has a wealth of experience in the pastry kitchen, and loves to share her knowledge with others. Whether it is teaching a class or creating a custom cake for a special occasion, Zarah is committed to making sure every customer is satisfied.