
Last Updated on January 14, 2023
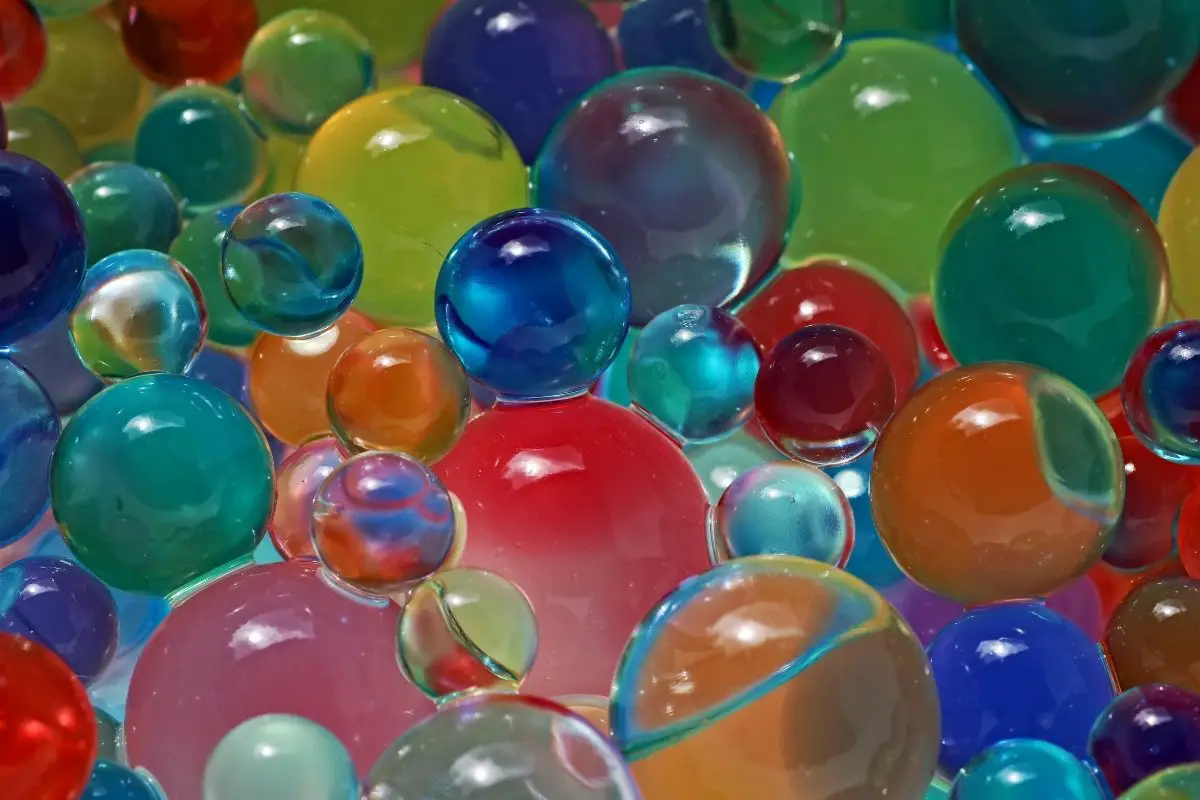
From baby showers to wedding cakes, you can indeed apply this candy bubbles edible recipe to add a pop of color wherever you desire it. In this regard, before serving, make sure to take the bubbles off the cake.
Also, it would be best if you lathered up the balloon with a thin coat of shortening. This enables you to take the balloon out from under the firmed gelatin. Although you may be tempted to slather the balloon with shortening entirely, you need to ensure that you only add a thin layer.
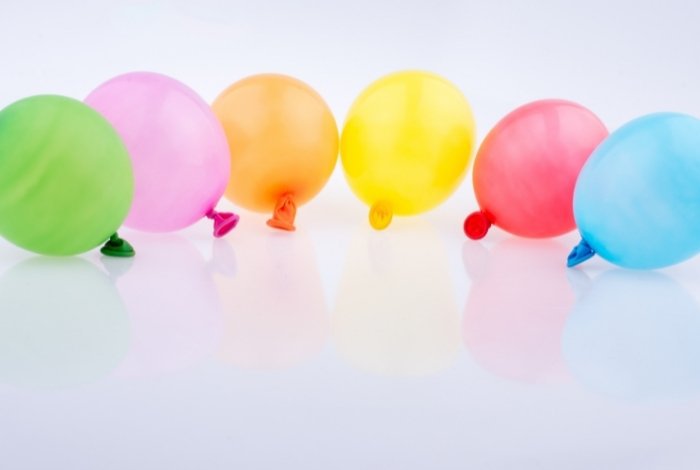
Use Small Balloons for Edible Candy Bubbles
You want the balloons to be circular. Try not to get too stressed; just do your best to shape them into the perfect circle shape. It also helps greatly to tie the knot high up on the neck of the balloon. In addition to that, when blowing them up, be sure to leave a bit of room to work with.
What You Will Need: Candy Bubbles Edible Recipe
Ingredients
- 6 tbsp of unflavored gelatin
- 12 tbsp of cold water
- Gel food coloring
- 3 tbsp shortening
- Edible glitter
Equipment
- Small balloons
- Lollipop sticks
- Powdered gelatin
- Heatproof bowl
- Spoons
- Paper towels
- A flat piece of styrofoam
- Scissors
Pyrex Glass Mixing Bowl Set (3-Piece Set, Nesting, Microwave, and Dishwasher Safe)

Step-by-Step Instructions: Candy Bubbles Edible Recipe
Step 1
In a bowl, add twelve tablespoons of cold water, then pour in six tablespoons of unflavored gelatin powder. Afterward, gently tilt the bowl to incorporate the contents in the bowl. After that, allow it to bloom for approximately three minutes.
Step 2
When the mixture firms up, place the bowl into the microwave for twenty seconds. After that, ensure the gelatin is warm and very fluid. Then, stir in the edible glitter until it completely dissolves.
Step 3
Then, inflate your balloon to the desired size. Afterward, knot a tie high up at the balloon’s neck to make a spherical shape. Keep in mind that this method helps push the air forward once the balloon is in the desired shape; slip a lollipop stick.
Step 4
Afterward, use a paper towel to coat each balloon with an ample amount of shortening; this way, it is easier for you to remove it.
Step 5
Next, dip the balloon into the melted gelatin. Roll until the balloon is thoroughly coated. Make sure not to coat the knotted part if you want to add more glitter.
Step 6
After that, pierce the lollipop sticks upright in flat Styrofoam to dry. Apply the same steps to the rest of the balloons. A coating would take at least twelve hours to set. I would not recommend making more than two layers because it will cause it to become chunky.
Step 7
Afterward, let it dry overnight; before popping the balloon, make sure it is dry. Use a pair of scissors to deflate the balloons. Because of this, it will indeed begin to shrink away from the sides.
Step 8
These candy bubbles are best prepared at least a day before using them. Also, store the bubbles in an airtight container, in a cool, dry place.
Additional Information for Edible Candy Bubbles Recipe
Tips and Tricks for Edible Candy Bubbles Recipe
The gelatin and water ratio should always be two parts water and one part gelatin. Do not worry about the gelatin shrinking because that is normal as it hardens. While trying to remove the balloon, it will make sounds as if it’s breaking.
Always keep the gelatin warm because it is difficult to dip the balloons if it cools off too much. Besides, it reaches a kind of gloopy texture if excessively cooled. In addition to that, pay attention to the gelatin since no one likes an uneven and lumpy gelatin bubble. For that reason, make sure to heat it if it gets extremely thick.
Also, it would be best if you made edible candy bubbles in advance because it is time-consuming. You can store the bubbles in an airtight container for several days. Additionally, you can even utilize a fan to help the edible candy bubbles dry faster if needed.
Candy Bubbles Edible: Incredible Recipe
Equipment
- Small balloons
- Lollipop sticks
- Powdered gelatin
- Heatproof bowl
- Spoons
- Paper towels
- A flat piece of styrofoam
- Scissors
Ingredients
- 6 tbsp of unflavored gelatin
- 12 tbsp of cold water
- Gel food coloring
- 3 tbsp shortening
- Edible glitter
Instructions
- In a bowl, add twelve tablespoons of cold water, then pour in six tablespoons of unflavored gelatin powder. Afterward, gently tilt the bowl to incorporate the contents in the bowl. After that, allow it to bloom for approximately three minutes.
- When the mixture firms up, place the bowl into the microwave for twenty seconds. After that, ensure the gelatin is warm and very fluid. Then, stir in the edible glitter until it completely dissolves.
- Then, inflate your balloon to the desired size. Afterward, knot a tie high up at the balloon’s neck to make a spherical shape. Keep in mind that this method helps push the air forward once the balloon is in the desired shape; slip a lollipop stick.
- Afterward, use a paper towel to coat each balloon with an ample amount of shortening; this way, it is easier for you to remove it.
- Next, dip the balloon into the melted gelatin. Roll until the balloon is thoroughly coated. Make sure not to coat the knotted part if you want to add more glitter.
- After that, pierce the lollipop sticks upright in flat Styrofoam to dry. Apply the same steps to the rest of the balloons. A coating would take at least twelve hours to set. I would not recommend making more than two layers because it will cause it to become chunky.
- Afterward, let it dry overnight; before popping the balloon, make sure it is dry. Use a pair of scissors to deflate the balloons. Because of this, it will indeed begin to shrink away from the sides.
- These candy bubbles are best prepared at least a day before using them. Also, store the bubbles in an airtight container, in a cool, dry place.
Notes
How to Make Jolly Rancher Bubbles
One of the most viral food sensations on TikTok right now is the Jolly Rancher bubbles. While they don’t involve balloons, and you can’t exactly decorate a cake with them, they are edible candy bubbles – and they’re super easy to make! The only ingredients and equipment you’ll need for this recipe are:
- a cupcake liner
- a straw
- Jolly Rancher candy
Now all you need to do is:
- Add a single piece of Jolly Rancher candy to a cupcake liner and place it on a microwavable plate. Microwave for around 15 seconds and check the consistency.
- Place back into the microwave for an additional 15 seconds. At this point, the candy should be melting and begin to bubble. This is when you know the candy is ready.
- Stir with the end of your straw and get some of the Jolly Rancher candy onto the straw. Blow from the other end of the straw, and the Jolly Rancher bubbles will come flying out!
- You can use varying colors and flavors of Jolly Rancher – and the bubbles will taste exactly like this delicious candy. Enjoy!
Bubble Gum Flavored Bubbles Recipe
Making flavored bubbles is so much fun, and bubble gum flavoring is my favorite – but in reality, you can use any. For this recipe, you’ll need the following ingredients:
- 2 tablespoons of powdered gelatin
- 1-2 drops of food coloring
- 1-2 drops of bubble gum flavoring
- 4 tablespoons of cold water
- 1/8 tablespoon of pearl luster dust
- clear vegetable shortening
and the following equipment:
- small paintbrush
- wire rack
- small balloons
Now all you need to do:
- Fill your balloons with around 1/4 of air and tie a knot to keep them secure.
- Once secured, use your paintbrush to add a thin layer of shortening and coat the balloon. Wipe some of the shortenings away with a paper towel; it should be a very thin layer.
- Add the gelatin, food coloring of choice, bubble gum flavoring, cold water, and luster dust to a bowl. Mix well and leave for around 5 minutes. Place in the microwave for around 10 seconds to melt entirely. Leave to cool slightly before moving to the next step.
- Place one balloon into the gelatin (hold by the knot) and cover entirely; rotate and cover the sides. Let any excess fall back into the bowl and place the balloon into your wire rack. Repeat with the rest of the balloons and leave them to dry. Dip balloons in for a second time after around 5 minutes and leave to try for around 24 hours.
- After 24 hours, you can remove the balloon. Cut a hole near the knot of the balloon and pull the balloon out carefully (double dipping the balloons with gelatin will help to make a stronger shell). Repeat for all balloons and keep them in an airtight container, in a cool, dry place. Enjoy!
Conclusion
I hope this post has helped you to become more familiar with the candy bubbles edible variety. They can be fiddly to make, but once you get the hang of it, practice makes perfect. Do you have any tips or tricks when it comes to making edible candy bubbles? If so, please feel free to let me know in the comments below. Sharing is caring!

Zarah is an experienced pastry chef whose creations have delighted countless customers. With a passion for baking, Zarah has developed a unique style that combines classic techniques with modern flavors. Her desserts are consistently crafted with the finest ingredients, and her attention to detail is evident in the stunning and delectable results. Zarah has a wealth of experience in the pastry kitchen, and loves to share her knowledge with others. Whether it is teaching a class or creating a custom cake for a special occasion, Zarah is committed to making sure every customer is satisfied.