Last Updated on February 20, 2022
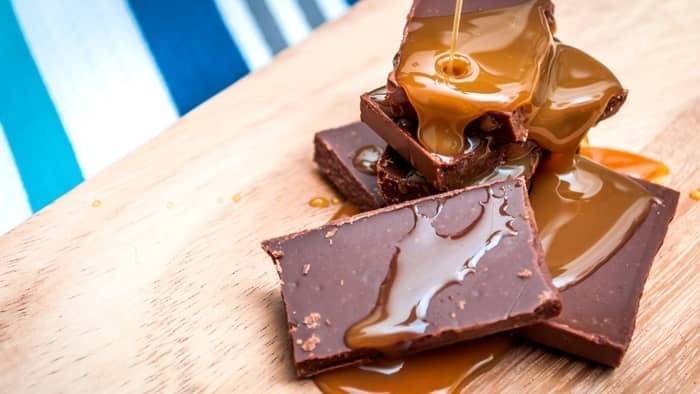
If you are a lover of candy, then you will love chocolate-covered caramel candy. It is the perfect balance of chocolate and caramel that makes for an irresistible treat. There are several ways you can enjoy this flavor combination, each as delicious as the next.
Though you can buy chocolate-covered caramel candy at the store, you can also make your own at home. It is a great candy to serve at events and even makes a great party favor. It is a sweet treat that everyone will enjoy.
How To Make Your Own Chocolate Covered Caramel Candy
Chocolate-covered caramel candy makes for a sweet and chewy treat the whole family can enjoy. You can use pre-packaged caramel or even make your very own.
Though making caramel can be intimidating, it can actually be easier than you think. With the help of a kitchen thermometer, you can make store-quality caramel at home.
For simple homemade chocolate-covered caramels, use store-bought caramel squares. Melt a semi-sweet bar of baking chocolate and dip your caramel squares in the chocolate using a toothpick. Then, let your candies dry on a sheet of parchment paper.
To make homemade chocolate-covered caramels from scratch, heat one cup of sugar, one cup of butter, and one cup of corn syrup over medium heat. Bring the ingredients to a boil and cook without stirring for seven minutes. Then, add one can of sweetened condensed milk and stir constantly until the temperature reaches 245 degrees Fahrenheit.
Remove the caramel mixture from heat and stir in one teaspoon of vanilla. Pour the caramel into an 8×8-inch greased square pan and let it sit for eight hours.
Cut the caramel into half-inch squares or alternatively roll into balls. Melt together 2 1/2 cups of chocolate chips with two tablespoons of shortening. Dip the caramels in the chocolate and then let them set on parchment paper.

Tips
To make your candies even tastier, sprinkle some sea salt on top of the chocolate. The balance of sweet and salty makes it extra tasty.
To speed up the process of the chocolate and caramel setting, you can place the candies in the fridge. When making the caramel, a thermometer is a must, as you don’t want to over or under cook it.
When making your candies, you can use milk, dark or semi-sweet chocolate. All of them will result in a delicious sweet treat perfect for any sweet-tooth craving.
Store your candies in an airtight container at room temperature. Keep them in a dry area away from the sunlight, as they are prone to melting. They will last for around two to four weeks at room temperature as long as you properly store them.
You don’t have to store your candies in the fridge, but it may be a good idea if you live in a warm, humid environment. Before eating, let them come to room temperature as they can get hard in the fridge.
You can also individual wrap the candies then place them in a Ziploc bag and freeze them for up to one year. Let them defrost at room temperature for a couple of hours before eating.
Chocolate covered caramel candy calories
The number of calories in chocolate-covered caramel candies will vary by recipe and by serving size. However, in general, the candies will have between 40-80 calories per piece.
A typical serving will be about two pieces, though some smaller pieces will have a serving size of three to four. So, in a serving size, you can expect to have around 80-160 calories.
Peter’s Caramel Loaf – 5 lb Loaf
Chocolate Covered Caramel Apples
Chocolate-covered caramel apples are a delicious twist on traditional caramel apples. They are simple to make and are an incredible tasting snack.
To make them, first, thoroughly wash off your apples and then dry them off. The best apples to use include Granny Smith, Fiji, and Honey Crisp.
Attach a popsicle stick to your apples and then dip them in your caramel sauce. Place the apples on a baking sheet lined with parchment paper and let them fully dry. It is generally best to use caramel melts from the store as homemade caramel can be too thin.
Once the caramel is fully set, you can dip your apples in melted chocolate. You can use milk, dark or semi-sweet chocolate to dip your apples.
After dipping your caramel apples you can return them to the baking sheet to let them dry. In addition, you can also add toppings such as sprinkles, M&Ms, crushed candy, or crushed cookies.
Store the chocolate caramel apples in an airtight container at room temperature for three to four days. You can also store your apples in the fridge for one week.
A Delicious Sweet Treat
Whether for giving out as a present or serving at a party, homemade chocolate caramel candies make a great treat that everyone will love. For something even more special, you can make chocolate-covered caramel apples that are sure to be a hit. Both combine the delicious combination of chocolate and caramel, making for a chewy treat.
Depending on how much time you have, you can use store-bought caramel squares or make your own from scratch. Making your own caramel is easier than you think, as it only requires a few ingredients and a candy thermometer. Though it can be time-consuming to make, the end results are well worth the wait.
Do you have any questions regarding making chocolate-covered caramel candy? If so, please ask any questions regarding making your own candies at home in the comment section below.
FAQs
How to Make Chocolate Covered Caramel Candy?
To make chocolate covered caramel candy, you can use homemade or store-bought caramel squares. Dip the caramel squares in melted chocolate, such as dark, milk or semi-sweet. Then let the candies dry on parchment paper and top with sea salt if desired.
Can You Freeze Chocolate Caramel Candy?
You can freeze chocolate caramel candy for up to one year. Wrap each candy in plastic wrap and then place them in a Ziploc bag or an airtight container. When ready to eat, allow the candies to defrost at room temperature.

Ever since she was a young girl, Anna has been a lover of desserts. As an adult, she enjoys
baking a variety of desserts from cakes, cookies, brownies, bread, and more from scratch. She
enjoys sharing her passion for baking with others who also have a sweet tooth. From properly
measuring ingredients to making sure they are the correct temperature, Anna knows the
importance small details can make in baking. She wants to share her experience with others in
hopes they can make the most delicious baked goods. When she’s not busy blogging, Anna
enjoys trying new recipes in the kitchen.


