
Last Updated on February 19, 2023
You may want to know the answer to how to transport ice cream cone cupcakes. Let’s take a closer look. Please know that the easiest method is to carry them in a tin foil-lined muffin tin. In addition to that, you can utilize the same muffin tin you made them in. Likewise, where you cooled them in. Also, you are free to decorate them still in the muffin tin.
Moreover, you can gift wrap a box to have a better-looking presentation. After that, you can create X shapes for every cone. Then, place the cones in the X shapes in the box carefully.
How to Transport Ice Cream Cone Cupcakes
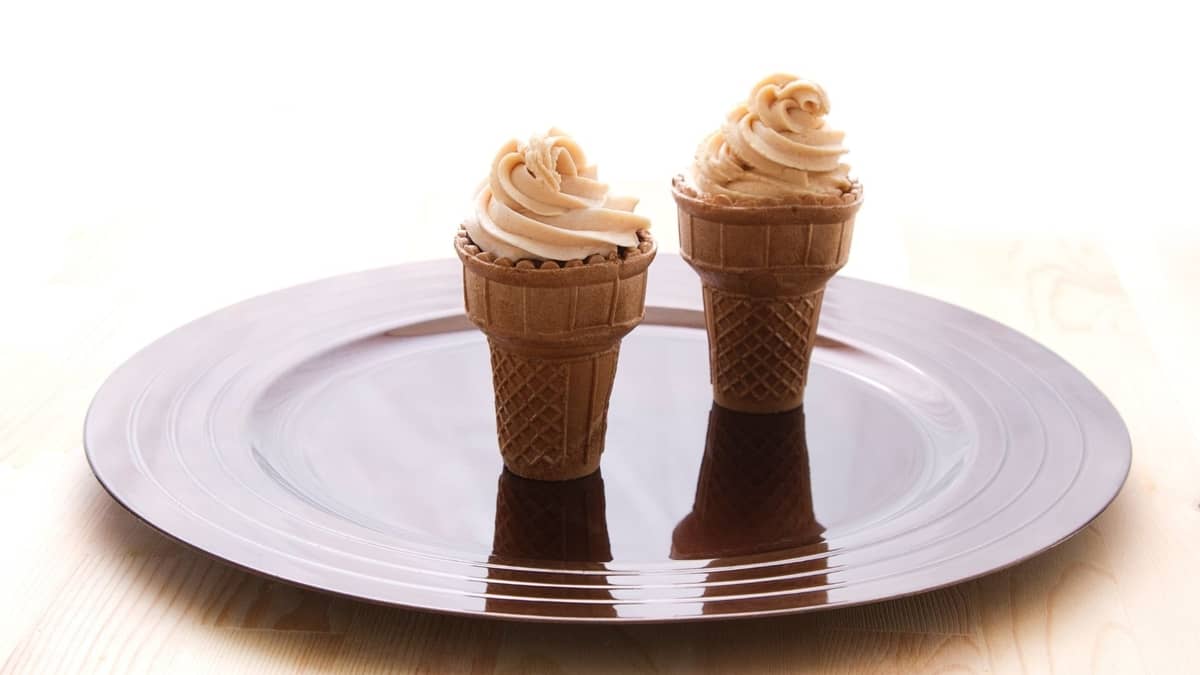
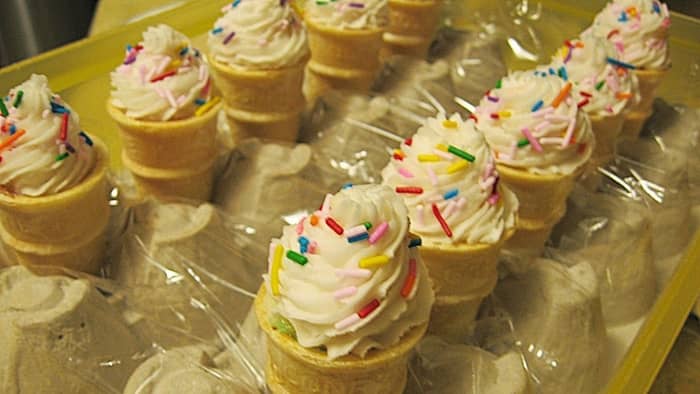
Essentially, ice cream cone cupcakes are famous desserts for school functions and birthday parties. For the most part, they are convenient to create. And it is sure to make your kids crave them.
However, its downside is that it is hard to transport without the cones falling over. Not only that but also the icing tends to mess up. Do not worry too much because there are products on the market to hold the cones upright. Though, bear in mind that it tends to be costly; needless to say, they only have a single purpose.
As a great alternative, you might as well create your version of a transporting device. With that, you can utilize items you have around your home. In so doing, you get to save tons of money.
You could, however, make your transporting device for little to no money with items you probably have around the house.
In most cases, there are different techniques to transport ice cream cone cupcakes. If you want to know how to transport cupcake cones less expensively, please consider the following methods.
Egg Cartons: Transporting Ice Cream Cone Cupcakes
First and foremost, you should clean two empty Styrofoam egg cartons. The reason is that they will be the holders of two dozen cupcakes. In this regard, the most convenient way you can do this is to wash them under running water. After that, make sure to utilize dish detergent.
Additionally, you want to ensure that you clean the egg cartons thoroughly. The main reason is that eggshells can have salmonella. So with that, it would help to leave the cartons to dry completely. Remember, it is essential to do this before you proceed with the next step.
Afterward, turn the egg cartons upside down. In that regard, the carton’s top is down, while the carton’s bottom part is up. Then, be sure to utilize a knife when cutting the egg-shaped domes off the cartons’ bottom. After that, make sure to insert the bottom of the cones into the holes you made.
Shirt Boxes
For starters, go ahead and select two shirt boxes that are about 2 to 2 1/2 inches deep. Bear in mind that shirt boxes are usually the boxes that local department stores wrap clothing in. Then, utilize tape to connect the two halves of the boxes.
Afterward, make sure to utilize the ice cream cone’s bottom when tracing twelve circles on every box using your pencil. Keep in mind that the circles should be relatively bigger when compared to the ice cream cone’s bottom.
Also, you want to have two rows of six holes in every box. With that, be sure to utilize a knife when starting to cut the circles. Then, use scissors to finish it. Afterward, be sure to insert the cones’ bottom into the holes. The main reason is that the holes should be near the cones’ size to hold them correctly.
Cereal Boxes
To start, make sure to use two full-sized, empty cereal boxes. Doing so creates holders for two dozen cone cupcakes. Also, be sure to remove the plastic lining bags.
Afterward, utilize the ice cream cone’s bottom when tracing twelve circles on every box using your pencil. As mentioned, the circle should be relatively bigger when compared to the cones’ bottom. Also, you will need two rows of six holes in every box.
Then, utilize your knife to cut the circles and use your scissors when finishing it. Afterward, be sure to insert the cones’ bottom into the holes. As usual, the holes should be near the cones’ size to hold them in place.
Learn more about Should Cupcakes Be Refrigerated Overnight
How to Make Ice Cream Cone Cupcakes?
Before anything else, be sure to preheat the oven to 350 degrees Fahrenheit. After that, prepare the pan. Then, cut X shapes into the muffin slots. Afterward, put the ice cream cones into the holes. And set them aside.
Then, add the brown sugar, granulated sugar, and butter to your medium-sized mixing bowl. Remember, whip it till fluffy and light. And slowly add your eggs. With that, make sure to do it one at a time. Also, add it together with the vanilla. Afterward, mix for about two minutes.
Next, add the baking powder and flour to the mixing bowl. Then, combine it well. After that, add your milk; mix till the milk incorporates well.
Afterward, pour the batter into the ice cream cones. With this, make sure to leave space at the top. Keep in mind that this is for the cupcakes to rise. Then, put the filled cones into the muffin tin. Also, remember to put pieces of tin foil around the cones. Doing so helps keep them in place.
Finally, you can bake for about twenty to twenty-five minutes. Likewise, you can use the toothpick method to check if it is ready. Then, you can top it with a few of your favorite sprinkles, strawberry slices, and buttercream icing.
Tips and Tricks For Cupcakes in Cones
For starters, you can always bake it in a foil-lined muffin tin. Not only does it offer effortless transport in the oven, but also it makes less mess. Keep in mind that the baking sheet alone results in a lot of clean-up involved.
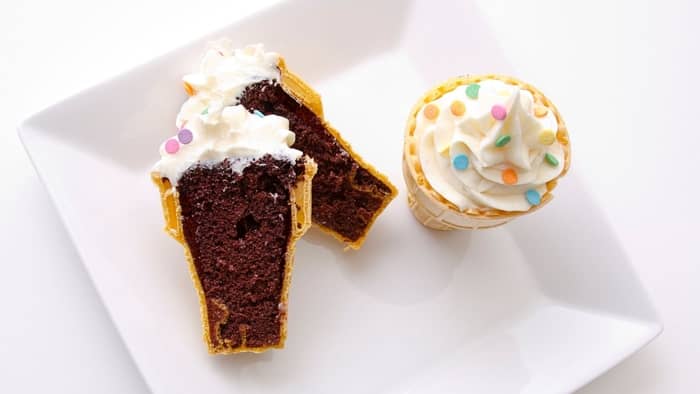
You always have the choice to use a store-bought cake mix or make the cake batter from scratch. Also, be sure to fill every cone 3/4 full with batter. Doing so prevents the ice cream cone cupcakes from spilling over, especially during baking.
Moreover, you can swap your batter with your preferred cake batters. With that, you can bake lemon, Funfetti, or chocolate cake into the ice cream cones. Likewise, you can fill the cones with your favorite brownie batter.
Furthermore, you can change the frosting colors and cake varieties, including the sprinkles, for different holidays. In that regard, for St. Patrick’s Day, you can go with green frosting. In addition to that, you can choose a red velvet cake for Valentine’s Day. At the same time, you could add pumpkin sprinkles whenever it is Halloween.
Funfetti Ice Cream Cone Cupcake Recipe
I’ve found that the best ice cream cone cupcakes are the Funfetti variety. They’re easy to make, and above all, absolutely delicious. For these cupcakes, you’ll need the following ingredients:
For the cupcakes:
- 24-36 ice cream cones
- 1 cup of whole milk
- 1 1/2 sticks of cubed butter
- 2 3/4 cups of sifted cake flour
- 1 1/2 cups of white sugar
- 1/2 cup of rainbow sprinkles
- 4 egg whites
- 1 egg
- 1 tablespoon of baking powder, plus 1 teaspoon
- 1 teaspoon of salt
- 2 teaspoons of vanilla extract
- 1/4 teaspoon of almond extract
For the frosting:
- 3 1/2 sticks of softened butter
- 3 cups of sifted powdered sugar
- 2 teaspoons of vanilla extract
- 3 tablespoons of milk
- 1/4 teaspoon of salt
Now all you need to do is:
Step 1: Preheat oven and gather ingredients
Gather all of the ingredients you need for this recipe and add your ice cream cones to a baking pan. You’ll also need to preheat your oven to 350F.
Step 2: First mix
Add around 1/3 of the milk, egg, egg whites, vanilla extract, and almond extract. Mix well and set aside.
Step 3: Second mix
Add the cake flour, sugar, baking powder, and salt to a bowl and mix well for around 30 seconds. Carefully add the cubed butter; mix as you go. Once mixed, pour in the rest of the milk and mix for a further 2 minutes. Be sure to scrape the sides of the bowl as you go.
Step 4: Fold
Add the egg mixture in 3 stages, on a medium speed. Then fold in the rainbow sprinkles until evenly distributed in the batter.
Step 5: Fill and bake
Fill each cone around 3/4 full and place it into the center of your preheated oven for around 16-18 minutes.
Step 6: Cool
Remove from oven and leave to cool completely before adding your frosting.
Step 7: Make the frosting
To make your whipped frosting, add the butter to your mixture and mix for around 6-8 minutes until the batter is smooth and pale in color.
Step 8: Beat
Gradually add the powdered sugar, along with the milk, salt, and vanilla extract. Beat the frosting for a further 5-6 minutes. At this point, it should be light and fluffy.
Step 9: Enjoy!
Add frosting to the top of your cooled ice cream cone cupcakes. Serve and enjoy!

How to Store Ice Cream Cone Cupcakes Overnight
If you want to make your ice cream cone cupcakes in advance, you absolutely can. It’s best to keep them in the refrigerator with a loose covering.
Best Ice Cream Cone Cupcake Holder
There are many ice cream cone holders, but I’ve found that the best cupcake cone baking rack is the one from Wilton. Wilton is without a doubt, the best baking brand available for ingredients and equipment. Their Cupcake Cones Baking Rack, 12-Cavity Ice Cream Cone Cupcakes Holder costs around $13 and can be used many times.
How to Keep Ice Cream Cone Cupcakes Crispy
There is an easy way to keep your ice cream cone cupcakes crispy, all you need to do is once baked, remove them from the oven and make a hole in the base of the cone. This will give the steam a way to come out. You should also leave the cupcake cones to cool completely.
Conclusion
I hope this post has helped to answer the question: of how to transport ice cream cone cupcakes and given you an idea of how to make the best ice cream cone cupcakes. They’re super easy to store and transport once you have the right methods. Do you have any tips or tricks when it comes to transporting ice cream cone cupcakes? If so, please feel free to let me know in the comments below. And remember, sharing is caring!
Funfetti Ice Cream Cone Cupcake Recipe
Ingredients
For the Cupcakes
- 24-36 ice cream cones
- 1 cup whole milk
- 1 1/2 sticks cubed butter
- 2 3/4 cups sifted cake flour
- 1 1/2 cups white sugar
- 1/2 cup rainbow sprinkles
- 4 egg whites
- 1 egg
- 1 tbsp baking powder plus one teaspoon
- 1 tsp salt
- 2 tsp vanilla extract
- 1/4 tsp almond extract
For the Frosting
- 3 1/2 sticks softened butter
- 3 cups sifted powdered sugar
- 2 tsp vanilla extract
- 3 tbsp milk
- 1/4 tsp salt
Instructions
- Gather all of the ingredients you need for this recipe and add your ice cream cones into a baking pan. You'll also need to preheat your oven to 350F.
- Add around 1/3 of the milk, egg, egg whites, vanilla extract and almond extract. Mix well and set aside.
- Add the cake flour, sugar, baking powder and salt to a bowl and mix well for around 30 seconds. Carefully add the cubed butter; mixing as you go. Once mixed, pour in the rest of the milk and mix for a further 2 minutes. Be sure to scrape the sides of the bowl as you go.
- Add the egg mixture in 3 stages, on a medium speed. Then fold in the rainbow sprinkles until evenly distributed in the batter.
- Fill each cone around 3/4 full and place into the center of your preheated oven for around 16-18 minutes.
- Remove from oven and leave to cool completely before adding your frosting.
- To make your whipped frosting, add the butter to your mixture and mix for around 6-8 minutes until the batter is smooth and pale in color.
- Gradually add the powdered sugar, along with the milk, salt and vanilla extract. Beat the frosting for a further 5-6 minutes. At this point, it should be light and fluffy.
- Add frosting to the top of your cooled ice cream cone cupcakes. Serve and enjoy!

Zarah is an experienced pastry chef whose creations have delighted countless customers. With a passion for baking, Zarah has developed a unique style that combines classic techniques with modern flavors. Her desserts are consistently crafted with the finest ingredients, and her attention to detail is evident in the stunning and delectable results. Zarah has a wealth of experience in the pastry kitchen, and loves to share her knowledge with others. Whether it is teaching a class or creating a custom cake for a special occasion, Zarah is committed to making sure every customer is satisfied.