
Last Updated on March 26, 2022
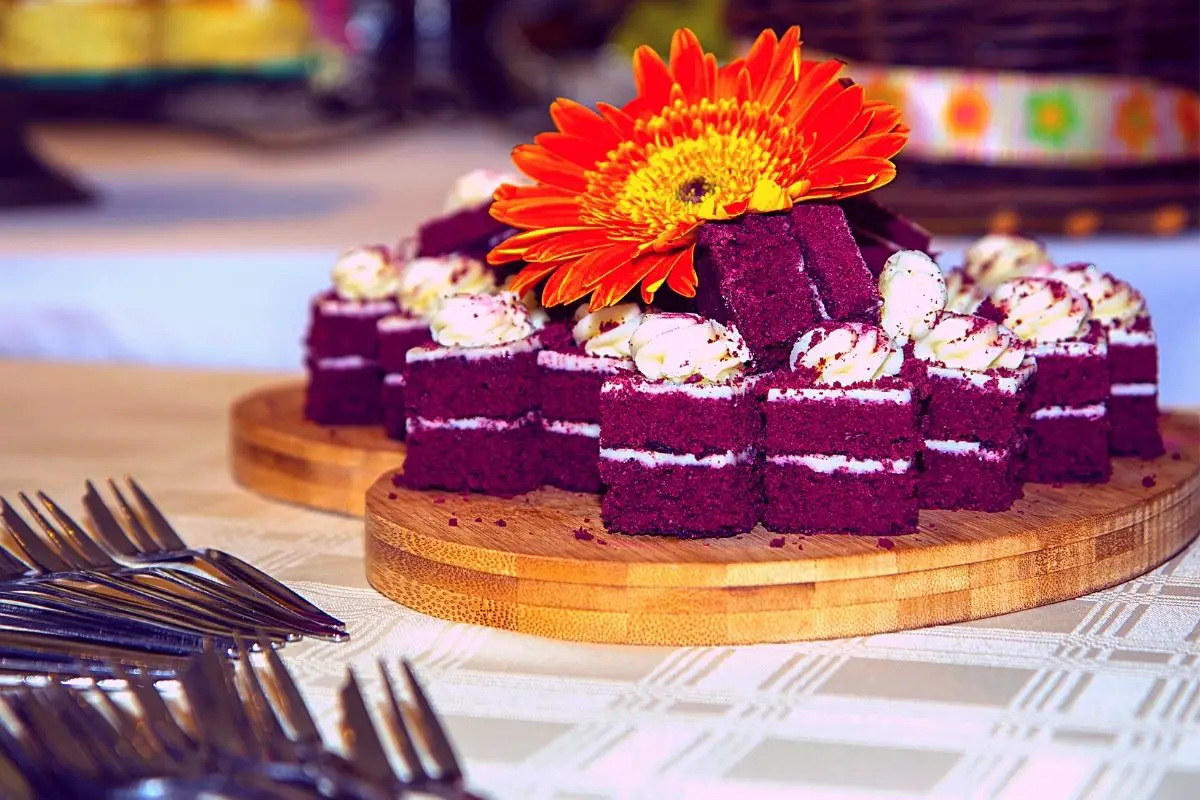
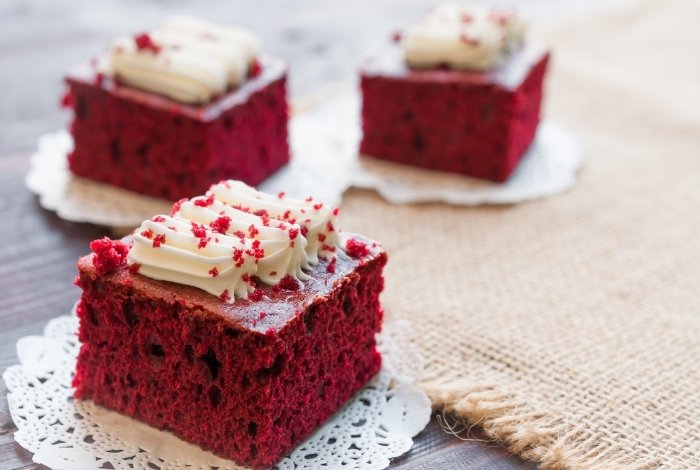
If you are a lover of red velvet, this delicious red velvet Oreo cake squares recipe is a must-have. It is the perfect combination of the two. Whether for a birthday party or bake sale, you can’t go wrong with this recipe of rich red velvet and Oreos.
The great thing about this recipe is that is easy to make, so you don’t need any prior baking experience to make it. It is the perfect recipe for sharing, as the squares are just the right serving size. All your friends and family will surely love this tasty recipe.
What You Will Need To Follow These Instructions
Ingredients:
- 1 box red velvet cake mix
- 1 large egg
- 1/2 cup butter, melted (1 stick)
- 2 tablespoons milk
- 1/4 teaspoon salt
- 16 Oreos
- 7 Hershey’s Cookies ‘N’ Creme Bars
- Melted chocolate of choice, for drizzling
Equipment:
- 9×9 inch pan
- Parchment paper
- Large mixing bowl
- Whisk
- Two microwave-safe bowls
- Rubber spatula
- Wire rack
- Fork
Fiesta Mixing 8-Piece Microwave Safe Bowl & Lid Set

Step by Step Instructions to Make Red Velvet Oreo Cake Squares
Step One: Prepare the Pan and Preheat the Oven
Preheat the oven to 350 degrees Fahrenheit. Line the baking pan with parchment paper.
Step Two: Make the Cake
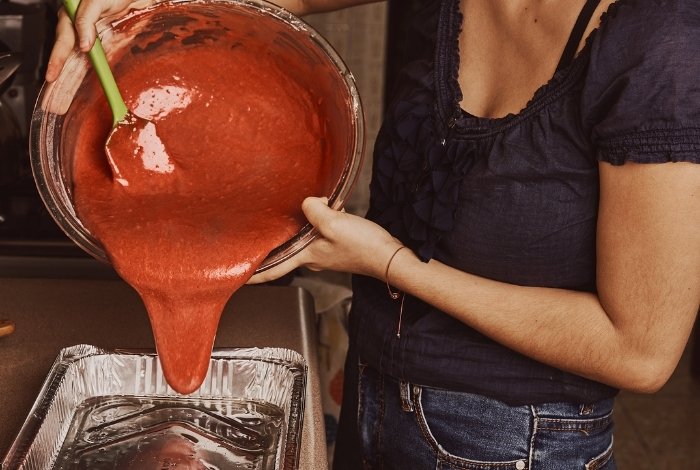
In a large mixing bowl, combine the red velvet cake mix, egg, melted butter, milk, and salt. Mix the ingredients together until fully incorporated.
Step Three: Add the Oreos
Pour the cake mix into the prepared pan. Using a rubber spatula, spread the cake batter until smooth. Add the Oreos in an even layer and gently press them down so they are slightly sunk into the batter.
Step Four: Bake the Red Velvet Oreo Cake
Bake the cake for 30-35 minutes, or until a toothpick inserted in comes out clean. Allow the cake to fully cool on a wire rack.
Step Five: Microwave the Candy Bars
Microwave the unwrapped candy bars in the microwave at 50 percent power in 30-second intervals. Microwave until the candy is fully melted.
Step Six: Spread Melted Candy Bars
Pour the melted candy bars over the cake and use a rubber spatula to smooth it out. Let the bars set in the fridge for 10 minutes.
Step Seven: Drizzle and Slice
Microwave the chocolate in the microwave at 50 percent power in 30-second intervals. Using a fork, drizzle the melted chocolate over the bars. Let the bars set in the fridge for five minutes, then slice and serve them.
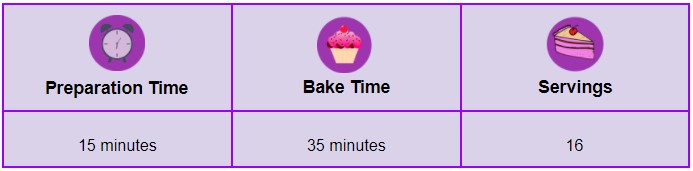
Servings and Preparation Time for Red Velvet Oreo Cake Squares
Tips and Tricks to Make Red Velvet Oreo Cake Squares
These red velvet Oreo cake bars can be kept at room temperature in an airtight container for 3-5 days. Be sure to keep them in a dry and cool area. Avoid storing them in sunlight, as this will cause the chocolate to melt.
The good this is that you can also keep them in the fridge for up to one week. Let them reach room temperature before serving.
In addition, you can also freeze these bars to save you stress by making them ahead of time. Once cooled, wrap the bars in plastic wrap and then place them in an airtight container or gallon bag. The bars can be frozen for 3-6 months and thawed at room temperature before slicing and serving.

Any brand of red velvet cake mix will work just fine. In addition, you can also use any type of Oreo to change it up a bit. Try it with chocolate, golden, or even birthday cake Oreos. You can even use double-stuff Oreos, mini Oreos, or Oreo thins as well.
These bars are great for birthday parties, bake sales, BBQs, and parties. They are easy to serve, as they are already sliced, making them convenient and mess-free. You can also easily package them individually if you want to give them out as a party favor.
Delicious Red Velvet Oreo Cake Squares
Equipment
- 9×9 inch pan
- Parchment paper
- Large mixing bowl
- Two microwave-safe bowls
- Wire rack
- Fork
Ingredients
Instructions
- Prepare the Pan and Preheat the Oven - Preheat the oven to 350 degrees Fahrenheit. Line the baking pan with parchment paper.
- Make the Cake - In a large mixing bowl, combine the red velvet cake mix, egg, melted butter, milk, and salt. Mix the ingredients together until fully incorporated.
- Add the Oreos - Pour the cake mix into the prepared pan. Using a rubber spatula, spread the cake batter until smooth. Add the Oreos in an even layer and gently press them down so they are slightly sunk into the batter.
- Bake the Red Velvet Oreo Cake - Bake the cake for 30-35 minutes, or until a toothpick inserted in comes out clean. Allow the cake to fully cool on a wire rack.
- Microwave the Candy Bars - Microwave the unwrapped candy bars in the microwave at 50 percent power in 30-second intervals. Microwave until the candy is fully melted.
- Spread Melted Candy Bars - Pour the melted candy bars over the cake and use a rubber spatula to smooth it out. Let the bars set in the fridge for 10 minutes.
- Drizzle and Slice - Microwave the chocolate in the microwave at 50 percent power in 30-second intervals. Using a fork, drizzle the melted chocolate over the bars. Let the bars set in the fridge for five minutes, then slice and serve them.
Notes
Tasty and Easy Red Velvet Oreo Cake Squares
Not only are these bars super tasty, but they are also simple to make. You don’t need any baking experience, so you can make them no matter your skill level. They will be a big hit among your family and friends, as they are packed full of flavor.
If you are a fan of red velvet and Oreos, these squares are an absolute must. They are the perfect combination of the two flavors, resulting in a truly delicious dessert. They are a great go-to recipe for any occasion, whether a birthday party or graduation celebration.
Do you enjoy this tutorial on how to make red velvet Oreo cake squares? If so, please share your thoughts in the comments down below and share this post with your family and friends.
Read more about Is Red Velvet Chocolate?

Ever since she was a young girl, Anna has been a lover of desserts. As an adult, she enjoys
baking a variety of desserts from cakes, cookies, brownies, bread, and more from scratch. She
enjoys sharing her passion for baking with others who also have a sweet tooth. From properly
measuring ingredients to making sure they are the correct temperature, Anna knows the
importance small details can make in baking. She wants to share her experience with others in
hopes they can make the most delicious baked goods. When she’s not busy blogging, Anna
enjoys trying new recipes in the kitchen.