
Last Updated on February 2, 2023
Are you in a bit of a rush? Yet, do you have cookie cravings? And you ask yourself “can I convert cookie recipe to bars?”. The answer is yes. You can make them. However, you may find it tiring to do all that rotation of pans and scooping.
Additionally, what if you do not want to do much of that work? For that reason, you want to satisfy your cravings immediately. That is why no need to worry since you can convert your favorite cookie recipes to bars. Likewise, you can conveniently do it at home.
For those reasons, it is not a big concern anymore when you have visitors coming over. The main reason is that you can effortlessly prepare these tasty recipes for anyone to enjoy.
1)What You Will Need in Making Chewy Chocolate Chip Cookie Bar Recipe
Ingredients
- 2 cups and 2 tbsp of all-purpose flour
- 1/2 tsp of kosher salt
- 1/2 tsp of baking soda
- 12 tbsp of unsalted butter, make sure to melt and cool to room temperature
- 1 cup of light brown sugar
- 1/2 cup of brown sugar
- 1pc large egg
- 1pc large egg yolk
- 2 tsp of pure vanilla extract
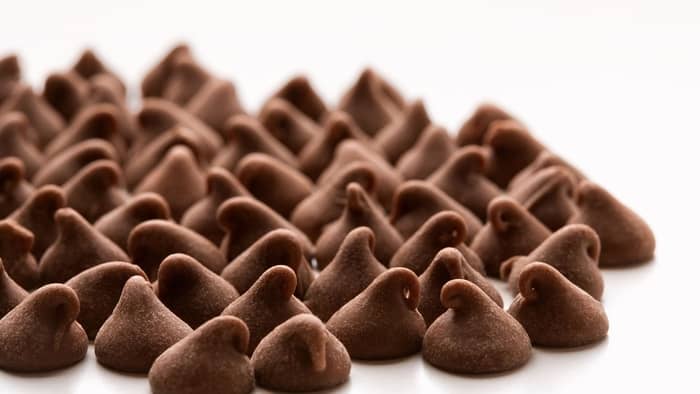
- 2 cups of semi-sweet chocolate chips
- 1 cup of semi-sweet chocolate chips for toppings
- sea salt flakes (optional)
Equipment
- Measuring cups
- Measuring spoons
- Mixing bowls
- 9×13 metal baking pan
- Foil (heavy-duty)
- Non-stick cooking spray
- Rubber spatula
- Whisk
- Cooling wire rack
Step-by-step instructions
Step 1
Position your oven rack at the lower-middle part of your oven. Then, ensure to preheat your oven to 325 degrees Fahrenheit.
Step 2
Afterward, prepare your 9×13-inch baking pan. And make sure to line your baking pan with heavy-duty foil. As a result, leave some excess foil hanging over the edges of your pan at the long sides. Next, lightly grease it using a non-stick cooking spray. Bear in mind that this process will help you pull the foil to lift your cookie bars with ease.
Step 3
After that, whisk together your flour, salt, and baking soda in a medium-sized mixing bowl. Then, set it aside.
Step 4
Using a large mixing bowl, combine your melted butter, light brown sugar, and brown sugar. With that, make sure to use a whisk until well combined. Then, be sure to add in your egg, egg yolk, and vanilla. With that, make sure to whisk again to combine.
Step 5
With a rubber spatula, fold your dry ingredients into your wet mixture. And about halfway, add your chocolate chips. Afterward, continue to fold until just combined. Also, refrain from over-mixing.
Step 6
Next, take your prepared 9×13-inch baking pan. And ensure to transfer your cookie dough. After that, press your cookie dough evenly into your pan using a spatula or your fingertips. Please note that the cookie dough can be sticky. Because of that, you can use the butter in your hands when pressing the cookie dough. When done, you can now add your extra chocolate chips on top. And it would help to press them a bit.
Step 7
Then, place your 9×13-inch baking pan inside the preheated oven. And bake for about twenty-three minutes. Or bake it until the top becomes light golden brown. Likewise, it is slightly firm to the touch.
Step 8
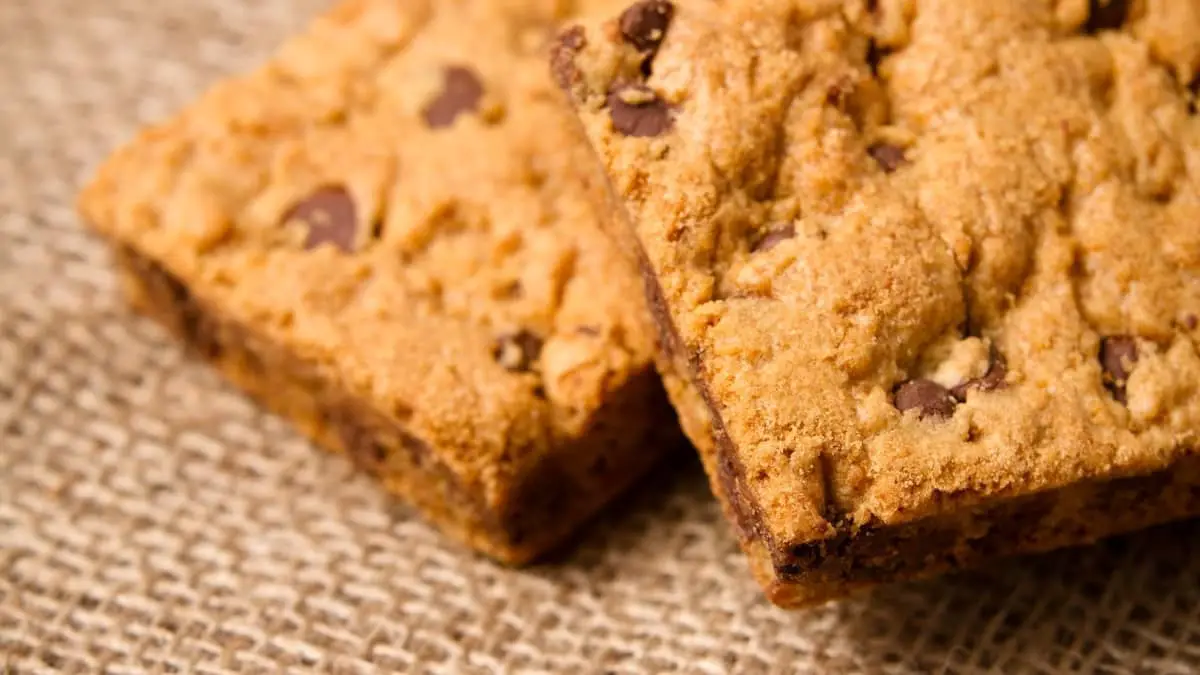
Ensure not to overbake your dough to have chewy chocolate chip cookie bars. Remember, you can underbake it slightly and remove it from the baking pan. Then, allow it to rest on the cooling wire rack. And if you want, you can sprinkle some sea salt flakes over the top.
Step 9
Finally, allow the chewy chocolate chip cookie bar to cool to room temperature. With that, make sure you do this before cutting into bars. Afterward, transfer to a chopping board. Then, cut using a knife or pastry cutter. As always, serve and enjoy!
Tips & Tricks on How to Convert Cookie Recipe To Bars
If you want to double the chewy chocolate chip cookie bar, you can double the amount of the ingredients. Afterward, follow the same steps. Moreover, bake the bars using a 13×18-inch baking pan. Also, bake at 325 degrees Fahrenheit for about twenty-nine to thirty minutes.
2) What You Will Need in Making Easy Oatmeal Cookie Bar Recipe
Ingredients
- 1 cup of melted butter, about 226 grams
- 1 cup of light brown sugar, about 200 grams, tightly packed
- 1/2 cup of sugar, about 100 grams
- 2 pcs large eggs
- 1pc large egg yolk
- 1 1/2 tsp of vanilla extract
- 1 1/4 cups of all-purpose flour, about 157 grams
- 2 tsp of cornstarch or cornflour
- 1/2 tsp of baking powder
- 3/4 tsp of salt
- 1/2 tsp of ground cinnamon (optional)
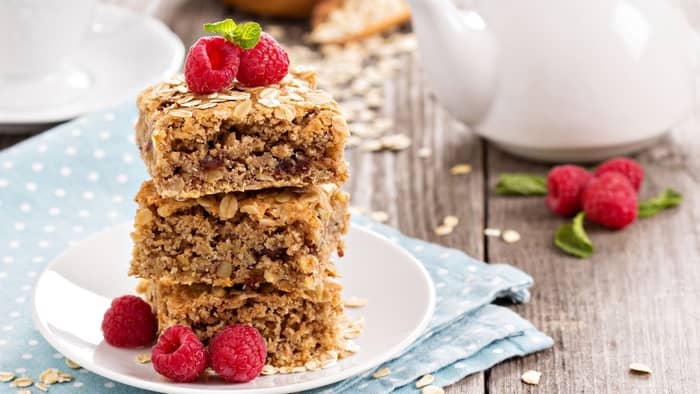
- 3 cups of old-fashioned rolled oats, about 285 grams
- 1 1/2 cups of mixed chocolate chips, milk chocolate, semi-sweet, and butterscotch, about 255 grams
Equipment
- Measuring cups
- Measuring spoons
- Mixing bowls
- 9×9 metal baking pan
- Parchment paper
- Non-stick cooking spray
- Electric mixer
- Rubber spatula
- Whisk
- Cooling wire rack

Step-by-step instructions
Step 1
First off, preheat the oven to 175 degrees Celsius or about 350 degrees Fahrenheit. Then, take your 9×9-inch baking pan, and line it with parchment paper. After that, grease the sides and bottom with non-stick cooking spray. Make sure to set aside for later.
Step 2
In a large-size mixing bowl, combine your butter and sugars. Then, beat them using an electric mixer. After that, mix until well combined.
Step 3
Afterward, add your eggs and your vanilla extract to the mixture. And be sure to beat until well combined.
Step 4
Whisk together your flour, cornstarch, baking powder, salt, and ground cinnamon in a different mixing bowl.
Step 5
Then, gradually combine your dry ingredients with your wet ingredients until well combined.
Step 6
After that, fold in your rolled oats and mixed chocolate chips using a rubber spatula. As usual, mix until well combined.
Step 7
Next, take your lined and greased 9×9-inch metal baking pan. And pour your oatmeal cookie dough. Then, spread your cookie dough evenly in the prepared pan using a rubber spatula or your fingertips.
Step 8
Ultimately, place the baking pan into the preheated oven. And make sure to bake for about thirty to forty minutes. Or bake until cooked thoroughly. Also, you can use the toothpick test to check if your cookie dough is ready.
Tips & Tricks: Can I Make Cookie Bars From a Cookie Mix?
For the most part, you can use a glass baking pan for this recipe. However, the baking time may be longer than the metal baking pan.
Want plain oatmeal cookie bars without add-ins? You can leave the ground cinnamon and mixed chocolate chips in the recipe.
Also, if you dislike using ground cinnamon, you can leave the ground cinnamon. In addition to that, the mixed chocolate chips in the recipe if you want plain oatmeal cookie bars without add-ins.
Convert Cookie Recipes To Bars
Equipment
- Measuring cups
- Measuring Spoons
- Mixing bowls
- 9x13 metal baking pan
- Foil (heavy-duty)
- Non-stick cooking spray
- Cooling wire rack
Ingredients
- 2 cups and 2 tbsp of all-purpose flour
- 1/2 tsp of kosher salt
- 1/2 tsp of baking soda
- 12 tbsp of unsalted butter, make sure to melt and cool to room temperature
- 1 cup of light brown sugar
- 1/2 cup of brown sugar
- 1 pc large egg
- 1 pc large egg yolk
- 2 tsp of pure vanilla extract
- 2 cups of semi-sweet chocolate chips
- 1 cup of semi-sweet chocolate chips for toppings
- sea salt flakes (optional)
Instructions
- Position your oven rack at the lower-middle part of your oven. Then, ensure to preheat your oven to 325 degrees Fahrenheit.
- Afterward, prepare your 9x13-inch baking pan. And make sure to line your baking pan with heavy-duty foil. As a result, leaving some excess foil hanging over the edges of your pan at the long sides. Next, lightly grease it using a non-stick cooking spray. Bear in mind that this process will help you pull the foil to lift your cookie bars with ease.
- After that, whisk together your flour, salt, and baking soda in a medium-sized mixing bowl. Then, set it aside.2 cups and 2 tbsp of all-purpose flour, 1/2 tsp of kosher salt, 1/2 tsp of baking soda
- Using a large mixing bowl, combine your melted butter, light brown sugar, and brown sugar. With that, make sure to use a whisk until well combined. Then, be sure to add in your egg, egg yolk, and vanilla. With that, make sure to whisk again to combine.12 tbsp of unsalted butter, make sure to melt and cool to room temperature, 1 cup of light brown sugar, 1/2 cup of brown sugar, 1 pc large egg, 1 pc large egg yolk, 2 tsp of pure vanilla extract
- With a rubber spatula, fold your dry ingredients into your wet mixture. And about halfway, add your chocolate chips. Afterward, continue to fold until just combined. Also, refrain from over-mixing.2 cups of semi-sweet chocolate chips
- Next, take your prepared 9x13-inch baking pan. And ensure to transfer your cookie dough. After that, press your cookie dough evenly into your pan using a spatula or your fingertips. Please note that the cookie dough can be sticky. Because of that, you can use the butter in your hands when pressing the cookie dough. When done, you can now add your extra chocolate chips on top. And it would help to press them a bit.1 cup of semi-sweet chocolate chips for toppings
- Then, place your 9x13-inch baking pan inside the preheated oven. And bake for about twenty-three minutes. Or bake it until the top becomes light golden brown. Likewise, it is slightly firm to the touch.
- Ensure not to overbake your dough to have chewy chocolate chip cookie bars. Remember, you can underbake it slightly and remove it from the baking pan. Then, allow it to rest on the cooling wire rack. And if you want, you can sprinkle some sea salt flakes over the top.
- Finally, allow the chewy chocolate chip cookie bar to cool to room temperature. With that, make sure you do this before cutting into bars. Afterward, transfer into a chopping board. Then, cut using a knife or pastry cutter. As always, serve and enjoy!
Notes
Can You Bake Cookies in a Glass Pan?
It’s no wonder that lately people are turning more and more often to baking different goods in a glass pan, however, is making cookies in it even a good idea? So, based on our previous experience, we believe you should give it a shot. P.S. If you try it, we guarantee you will never go back. No one is.
Baking cookies in a glass pan can be a smart idea for several reasons; however, there are some important factors to keep in mind when using it. Allow us to present you with the entire situation.
The math is very simple, since glass pans take longer to heat up compared to metal ones, your cookies may take longer to bake. This might cause your cookies to spread too much, resulting in thin, crunchy cookies rather than chewy ones. To avoid this, warm your glass baking pan for at least 10-15 minutes before adding the cookie batter.
One of the key benefits is the even heating that a glass pan provides. Glass is known as a good conductor of heat and distributes it evenly, sometimes even better than other materials, which ultimately results in consistently baked cookies that are not over- or under-cooked in certain areas. This is especially crucial for those who want their baked goods to have a uniform texture and appearance.
Another advantage of glass pans is their durability. Glass pans, unlike metal pans, are less prone to distort or bend over time due to changes in temperature and pressure. As a result, they are a more durable alternative for baking cookies and other delicacies.
We mustn’t fail to mention possibly the most crucial part of all: you won’t be bothered by those pesky scratches, because this material is almost completely resistant to them, which actually makes it a more long-lasting solution compared to any other option on the market available.
What’s more, glass pans are an excellent solution for people seeking a non-toxic, natural alternative to metal pans. Since glass is free of chemicals and coatings, it is a much safer choice for food preparation than you would expect at first.
Can we ask you one question that demands an honest response? How many times have you spent time and effort making the most delicious cookies only to find them stuck to the pan when they came out of the oven? Here’s some good news: unlike metal pans, which may require greasing or the use of parchment paper, cookies baked in glass pans are less prone to stick and may be effectively removed from the pan once chilled.
Toll House Cookie Bars Recipe: How to Turn Your Go-To Cookie Recipe into Perfect Bars
Toll House Cookie Bars are a classic American treat that is simple to make and always a crowd-pleaser. The classic recipe consists of a mixture of butter, brown sugar, eggs, vanilla extract, all-purpose flour, baking soda, salt, and chocolate chips, but there are other variations, depending on individual tastes.
Here’s a detailed recipe for making the best Toll House Cookie Bars you have ever had:
Ingredients:
- 2 1/4 cups of all-purpose flour
- 1 tsp of baking soda
- A pinch of salt
- 1 cup of unsalted butter
- 3/4 cup of granulated sugar
- 3/4 cup of packed brown sugar
- 2 large eggs
- 2 tsp of vanilla extract
- 2 cups of semisweet chocolate chips
Instructions:
- First, preheat the oven to 375°F (190°C). You don’t have to completely stick to this temperature since your oven may bake more vigorously, for example, and you may need to adjust it slightly so that the dough does not burn. Line a 9×13 baking sheet with parchment paper or aluminum foil and measure out all of the ingredients you will use.
- In a medium mixing bowl, combine all the dry ingredients, namely the flour, baking soda, and salt. Set aside.
- Cream together the butter, granulated sugar, and brown sugar in a large mixing bowl until light and fluffy. Mix in the eggs one at a time until fully mixed. Incorporate the vanilla extract.
- Add the dry ingredients to the butter mixture gradually, mixing until just combined. We recommend not overdoing it. Namely, it is not recommended to beat the batter excessively when making Toll House Cookie Bars or any baked goods because over-beating can affect the texture and structure of the finished product.
- When making cookie bars or cakes, the goal is to mix the ingredients just enough to get a homogeneous batter. Excessive beating can break down the gluten in the flour, resulting in a thick, tough texture. In addition, overbeating can sometimes cause the batter to rise too much and then collapse during baking, resulting in a heavy and sunken cake or cookie. Following these instructions precisely will ensure that your Toll House Cookie Bars have the right texture and flavor. Finally, all you have to do is add the chocolate chips and mix lightly until everything is nicely combined.
- Pour the batter into the prepared baking pan in an equal layers. Bake for 25-30 minutes. Additionally, you can also check for doneness by looking at the color and appearance of the bars. The edges should be golden brown, and the middle should be firm and not jiggly.
- After taking the Toll House Cookie Bars out of the oven, it is important to let them cool completely in the pan on a wire rack. This allows them to set and firm up, making them simpler to cut into squares later.
- Also, it is important to note that the bars will continue to bake somewhat throughout this cooling period as leftover heat from the pan is absorbed. Once the bars have completely cooled, all you have to do is cut them into squares in the size according to your preferences. Don’t forget to use a sharp knife, it will make things a lot easier.
- After cutting, refrigerate the bars in an airtight container for up to a week, to maintain their freshness and flavor. This keeps the bars moist and chewy, preventing them from drying out or going stale.
- If you plan to freeze them, wrap each bar individually in plastic wrap or aluminum foil, place them in a freezer-safe container with a tight-fitting lid, and store them for up to three months.
How about these quick and easy bar cookies, will you give them a chance next time?

Zarah is an experienced pastry chef whose creations have delighted countless customers. With a passion for baking, Zarah has developed a unique style that combines classic techniques with modern flavors. Her desserts are consistently crafted with the finest ingredients, and her attention to detail is evident in the stunning and delectable results. Zarah has a wealth of experience in the pastry kitchen, and loves to share her knowledge with others. Whether it is teaching a class or creating a custom cake for a special occasion, Zarah is committed to making sure every customer is satisfied.