Last Updated on February 13, 2023
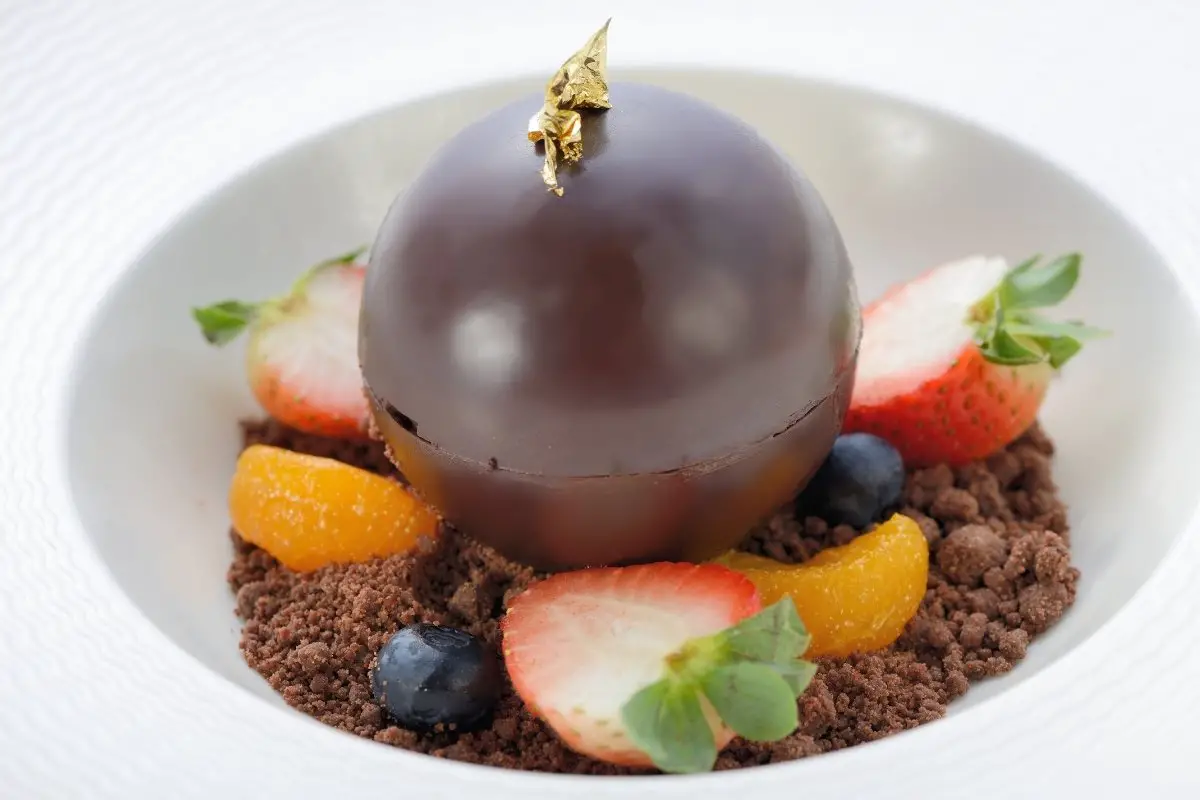
Are you thinking of a great dessert for guests? If that is the case, a chocolate sphere dessert that melts is the best option. You won’t regret it. Just imagine a dessert with a brownie tower, ice cream, and berries topped with a chocolate ball. In addition to that, poured with hot fudge to create a show-stopping dessert.
In that regard, you may think it is a hard dessert to create, but do not fret. It is easy and fun to make. Also, you may get creative with this recipe, and you can add your twist.
What You Will Need: Chocolate Sphere Dessert
Ingredients
- Eight ounces of chopped milk chocolate, about 225 grams. (you can also use chips if you want)
- 2pcs of brownies
- 1/2 cup of assorted berries, about 90 grams per serving.
- Ice cream, for serving
- 8 ounces of chopped dark chocolate, about 225 grams
- 1 cup of heavy cream, about 240 ml
Equipment
- 6-inch fillable ornament, you can find these at craft and baking stores
- Mixing bowls
- Microwave
- Rubber spatula
- Paper towel
- Large plate for plating
M KITCHEN WORLD Heat Resistant Silicone Spatula Set – Non-Stick Rubber Spatula
Step-by-Step Instructions
Step 1
Place your chopped milk chocolate inside a glass bowl. Then, ensure to melt the milk chocolate inside your microwave in 20-second intervals. And stir it using a rubber spatula until it becomes smooth.
Step 2
Afterward, open your fillable ornament. And coat the inside using a lightly oiled paper towel. Then, make sure to pour the melted chocolate into one of the halves. And close the ornament. After that, rotate the ornament ball to coat it with chocolate evenly. Also, ensure to rotate until you coated the entire surface with chocolate.
Step 3
Next, continue to rotate slowly for about five minutes. With that, you can shake it a bit to fill any holes with chocolate. Remember, you can place the ball inside the freezer if you fill the ornament ball with chocolate. Besides, you can flip the ornament with chocolate after two minutes. Afterward, continue to flip every two minutes about two to three times until the chocolate will set. Once set, freeze it for thirty minutes.
Step 4
After thirty minutes, ensure to remove the ornament ball from the freezer. Then, carefully open the ornament. And remove the chocolate ball. Bear in mind that you have to work quickly. Doing this prevents you from touching the ball too long with your warm hands. You may also place the chocolate ball inside the freezer after unmolding it for a few minutes.
Step 5
Then, dip a flat-bottomed bowl in boiling water. After that, dry the entire bowl. Afterward, invert your flat-bottomed bowl on a flat surface. And carefully place one side of your frozen chocolate ball in the hot bowl.
Step 6
Twist gently with a back-and-forth motion. Doing this ensures that you are not applying too much pressure to your chocolate ball. Be gentle as possible as the chocolate ball tends to be very fragile. Utilize a paper towel to help insulate the ball from the warmth of your fingers. Reheat and wipe off the bowl a few times as needed, as the bowl may cool down a bit. Once done, place your chocolate ball back inside the freezer.
Step 7
Next, prepare your large plate. And stack your prepared brownies on top of each other. With that, surround your brownies with the berries of your choice.
Step 8
Afterward, place a scoop of ice cream on top of the brownies. And gently place the chocolate ball, covering your brownies, berries, and ice cream.
Step 9
Then, if there are imperfections along the chocolate ball’s seam, you may cover the chocolate’s base with more berries.

Step 10
After that, place your chopped dark chocolate in a microwavable bowl. And add your heavy cream. Then, microwave your dark chocolate mixture in 20-second intervals until it becomes smooth and glossy.
Step 11
Next, pour your chocolate sauce over the ball in a circular motion to melt your chocolate ball. As a result, reveal your brownie, ice cream, and berries.
Step 12
Finally, taste and enjoy!
What You Will Need: Quick And Easy Brownie Recipe
Ingredients
- 1 cup of melted butter
- 2 cups of white sugar
- 1/2 cup of cocoa powder
- 1/2 tsp of salt
- 1 tsp of vanilla extract
- 4 eggs
- 1 1/2 cups of all-purpose flour
- 1/2 tsp of baking powder
- 1/2 cup of halved walnuts
USA Pan Bakeware Rectangular Cake Pan, 9 x 13 inch, Nonstick & Quick Release
Equipment
- 9×13-inch baking pan
- Mixing bowls
- Measuring cups
- Measuring spoons
- Rubber spatula
- Whisk
- Non-stick cooking spray
- Oven
- Cooling wire rack
Step by Step: Quick And Easy Brownie Recipe
Step 1
Before anything else, preheat your oven to 350 degrees Fahrenheit or 175 degrees Celsius. After that, grease your 9×13-inch baking pan using non-stick cooking spray.
Step 2
Afterward, combine your melted butter, sugar, cocoa powder, vanilla, eggs, flour, baking powder, and salt in a large mixing bowl. Next, mix using a whisk until combined evenly.
Step 3
After that, pour your brownie batter into your prepared 9×13-inch baking pan. And spread evenly using a rubber spatula. Likewise, you can utilize an offset spatula. Do not forget to decorate with your halved walnuts.
Step 4
Next, place your baking pan inside your preheated oven for 20 to 30 minutes. Or till you cook it thoroughly. With that, you can check using a toothpick. You can do it by inserting a toothpick in the center of your brownie. And when the toothpick comes out without any crumble sticking to it, it is ready.
Step 5
Once you finish cooking your brownie, take it out of your oven. Then, let it cool off in the cooling wire rack. So with that, let it cool completely to cut it. After that, cut your brownies evenly. And set them aside for your melting chocolate ball recipe.
Step 6
Lastly, serve and enjoy!
How to Make a Melting Chocolate Ball
When it comes to a chocolate sphere dessert, there are many options that you can try. One of my favorites is a melting chocolate ball drizzled in caramel sauce. Let’s take a closer look. For this recipe, you’ll need the following ingredients:
- 1 cup of melted chocolate chips (any flavor)
- 1 cup of caramel sauce
- 1 Caramilk bar
- 3 brownie bites
- 1 cup of raspberries
Now all you need to do is:
- Add your chocolate chips to a microwave-safe bowl and gently heat in the microwave, in 15-20 second intervals. Stir each time you remove it from the microwave until completely melted.
- Use a 6-cavity silicone mold and add around a tablespoon of chocolate to each cavity. Spread the chocolate out into the molds evenly and then chill for at least 10 minutes.
- After this time, add the same amount of chocolate to the molds to make a thick ball, and cover any gaps you may have missed. Chill for another 10 minutes or so.
- Once set, carefully remove your balls from the molds. Heat a pan over low heat and place the edges of each half circle onto the pan for a few seconds. This will remove any imperfections and help your balls to stick together.
- Place a brownie bite inside your dome, as well as a few berries and gently cover your dome, pressing the edges carefully together. Hold for at least 10 seconds.
- Break off a piece of chocolate from your Caramilk bar and heat over the frying pan to stick to your ball with ease.
- Warm your caramel sauce in the microwave and pour it over your domes to reveal the delicious desserts. Serve and enjoy!
How to Make Hollow Chocolate Balls
If you’re looking to make hollow chocolate balls to fill with candy, then look no further. We have the perfect recipe! For this recipe, you’ll need the following ingredients:
- 1 bag of chocolate chips (any flavor)
- 2 tablespoons of coconut oil
- candy of your choice, for inside
- 3 pieces of candy, to decorate
Now all you need to do is:
- Place your chocolate chips into a microwave-safe bowl and heat on low power for 15-20 second intervals. Once completely melted, add your coconut oil and mix until well combined.
- Using your six-cavity silicone mold, fill the molds with your melted chocolate; just enough to cover the molds. Chill for around 10 minutes and then repeat this process. Chill for a further 10 minutes to firm.
- Remove your domes from the molds carefully. Heat a pan on low heat and gently place each dome on for a few seconds to make it easier to stick.
- Fill the balls with the candy of your choice and top with a second dome; press gently to ensure they stick together. Repeat with the remaining domes.
- With melted chocolate, add one piece of candy to the top of each ball. Serve and enjoy!
Tips and Tricks: Chocolate Ball That Melts
First and foremost, when handling or working with chocolate, ensure that your ornament, utensils, and bowl is completely dry.
Moreover, avoid covering your microwaveable bowl when melting chocolate. For that reason, covering or putting a lid on your bowl may cause condensation. As a result, it will ruin your chocolate or cause seizing.
Furthermore, avoid using a wooden spoon to mix because wood can retain moisture that may ruin your chocolate mixture.
Read more about How to Make Dark Chocolate Into Milk Chocolate – A step-by-step Guide.
Conclusion
I hope this post has helped you to become more familiar with how to make a chocolate sphere dessert. While it can seem a little intimidating at first, it’s super easy to do, and so much fun; especially for the little ones! Do you have any tips or tricks when it comes to making a chocolate sphere dessert? If so, please feel free to let me know in the comments below. And remember, sharing is caring!
Chocolate Sphere Dessert: Magic Melting Ball
Equipment
- 6-inch fillable ornament, you can find these at craft and baking stores
- Mixing bowls
- Microwave
- Paper towel
- Large plate for plating
Ingredients
- 8 ounces of chopped milk chocolate about 225 grams. (you can also use chips if you want)
- 2 pcs of brownies
- 1/2 cup of assorted berries about 90 grams per serving.
- Ice cream for serving
- 8 ounces of chopped dark chocolate about 225 grams
- 1 cup of heavy cream about 240 ml
Instructions
- Place your chopped milk chocolate inside a glass bowl. Then, ensure to melt the milk chocolate inside your microwave in 20-second intervals. And stir it using a rubber spatula until it becomes smooth.
- Afterward, open your fillable ornament. And coat the inside using a lightly oiled paper towel. Then, make sure to pour the melted chocolate into one of the halves. And close the ornament. After that, rotate the ornament ball to coat it with chocolate evenly. Also, ensure to rotate until you coated the entire surface with chocolate.
- Next, continue to rotate slowly for about five minutes. With that, you can shake it a bit to fill any holes with chocolate. Remember, you can place the ball inside the freezer if you fill the ornament ball with chocolate. Besides, you can flip the ornament with chocolate after two minutes. Afterward, continue to flip every two minutes about two to three times until the chocolate will set. Once set, freeze it for thirty minutes.
- After thirty minutes, ensure to remove the ornament ball from the freezer. Then, carefully open the ornament. And remove the chocolate ball. Bear in mind that you have to work quickly. Doing this prevents you from touching the ball too long with your warm hands. You may also place the chocolate ball inside the freezer after unmolding for a few minutes.
- Then, dip a flat-bottomed bowl in boiling water. After that, dry the entire bowl. Afterward, invert your flat-bottomed bowl on a flat surface. And carefully place one side of your frozen chocolate ball in the hot bowl.
- Twist gently with a back and forth motion. Doing this ensures that you are not applying too much pressure to your chocolate ball. Be gentle as possible as the chocolate ball tends to be very fragile. Utilize a paper towel to help insulate the ball from the warmth of your fingers. Reheat and wipe off the bowl a few times as needed, as the bowl may cool down a bit. Once done, place your chocolate ball back inside the freezer.
- Next, prepare your large plate. And stack your prepared brownies on top of each other. With that, surround your brownies with the berries of your choice.
- Afterward, place a scoop of ice cream on top of the brownies. And gently place the chocolate ball, covering your brownies, berries, and ice cream.
- Then, if there are imperfections along the chocolate ball's seam, you may cover the chocolate's base with more berries.
- After that, place your chopped dark chocolate in a microwavable bowl. And add your heavy cream. Then, microwave your dark chocolate mixture in 20-second intervals until it becomes smooth and glossy.
- Next, pour your chocolate sauce over the ball in a circular motion to melt your chocolate ball. As a result, revealing your brownie, ice cream, and berries.
- Finally, taste and enjoy!
Notes

Zarah is an experienced pastry chef whose creations have delighted countless customers. With a passion for baking, Zarah has developed a unique style that combines classic techniques with modern flavors. Her desserts are consistently crafted with the finest ingredients, and her attention to detail is evident in the stunning and delectable results. Zarah has a wealth of experience in the pastry kitchen, and loves to share her knowledge with others. Whether it is teaching a class or creating a custom cake for a special occasion, Zarah is committed to making sure every customer is satisfied.


