
Last Updated on January 21, 2023
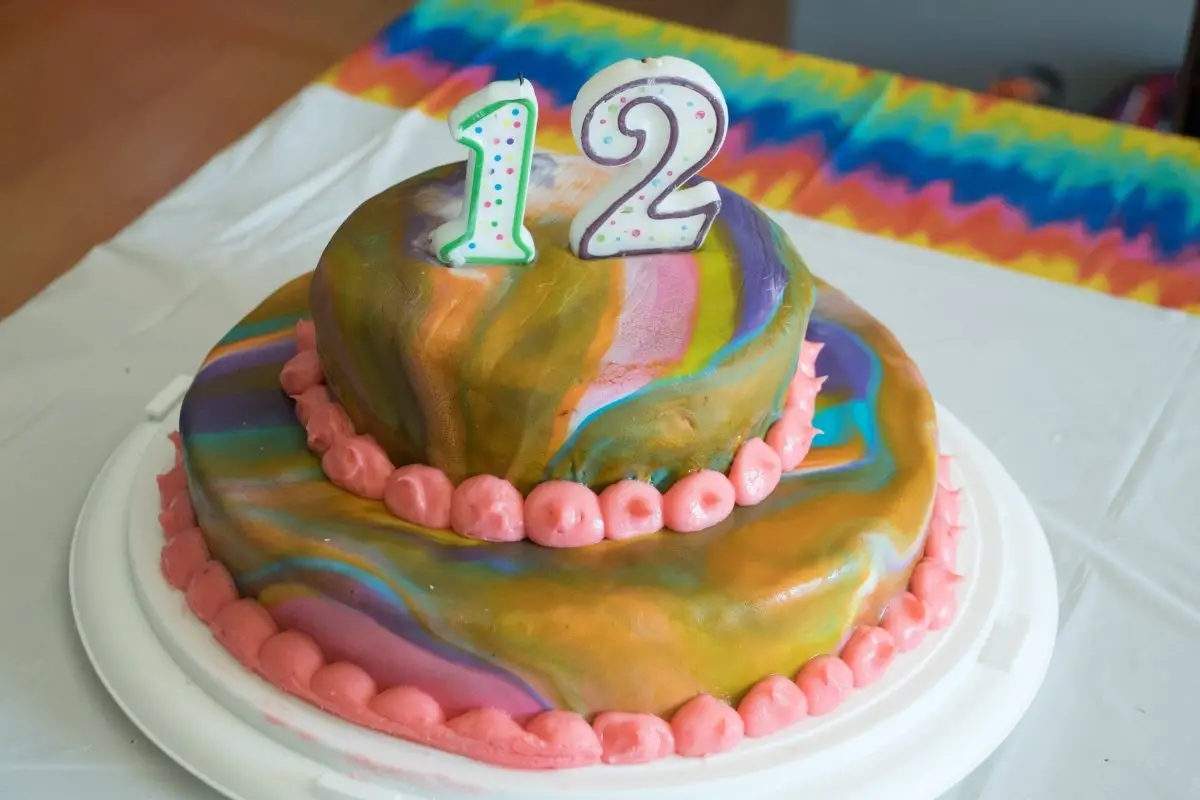
If you want an exciting cake that looks super creative, then try this amazing tie-dye cake icing recipe. Imagine a super moist chocolate cake – and all you need are simple ingredients. Not only that, but also you can decorate it with a tie-dye cake icing design. Because of that, this super fun design will surely impress anyone who is a fan of tie-dyes. That is why I guarantee that this recipe is best for the summer and spring months. Let’s take a closer look at how to make tie dye cake icing.
What You Will Need: Tie Dye Cake Icing
Ingredients for the Chocolate Cake
- 2 large eggs
- 1/2 cup of vegetable oil
- 2 tsp of whole milk
- 1 1/2 teaspoons of baking powder
- 2 cups of all-purpose flour
- 1 cup of strong-brewed coffee
- 3/4 cup of cocoa powder
- 1 1/2 teaspoons of baking soda
- 2 cups of granulated sugar
- 1/4 teaspoon of cinnamon powder
- 1 tsp of salt
- 1 tbsp of sprinkles (optional)
For Tie Dye Cake Icing
- 2 cups of unsalted butter
- 2 tbsp of vanilla extract
- 8 cups of powdered sugar
- 6-8 tablespoons of milk
Equipment for Tie Dye Cake Icing
- Mixing bowls
- Measuring spoons
- Measuring cups
- Electric mixer
- 2 cake pans (9-inch round)
- Rubber spatula
- Offset spatula
- Gel food coloring, white, neon pink, yellow, blue, and green
12 Color Cake Food Coloring Set, Nomeca Food Grade Vibrant Food Color

Step by Step Instructions: Tie Dye Frosting Cake
For the Chocolate Cake
Step 1
First, ensure to preheat your oven to 350 degrees Fahrenheit. Next, grease your two 9-inch round cake pans. And line them with parchment paper. After that, make sure to set aside.
Step 2
Using a large mixing bowl, combine eggs, oil, milk, and vanilla. Then, mix using an electric mixer. Ensure to do this until the mixture becomes smooth.
Step 3
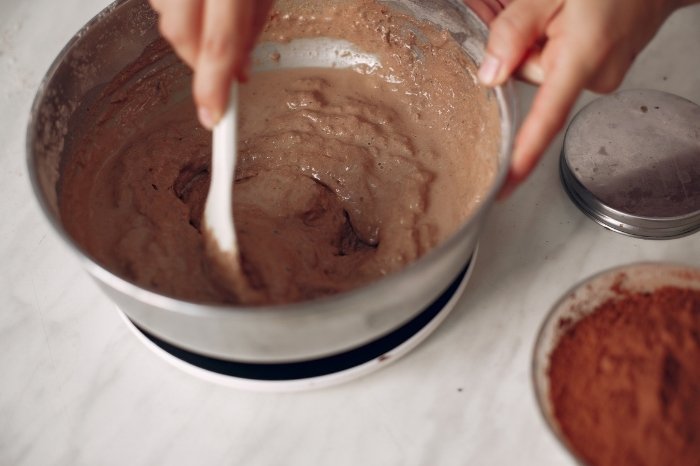
Afterward, add the flour to the mixture. You follow it with cocoa powder, sugar, cinnamon powder, salt, baking powder, and baking soda. Then, beat until it combines partially. After that, stir in the coffee until the cake batter becomes smooth and creamy. Because of this, expect the batter to be thin.
Step 4
Next, pour the chocolate cake batter into the prepared cake pans. After that, bake the chocolate cakes in the oven for 35 minutes. Or until the cakes cook thoroughly.
Step 5
Lastly, when the cakes cook completely, allow the cakes to cool. And set them aside for later.
For the Tie Dye Icing
Step 1
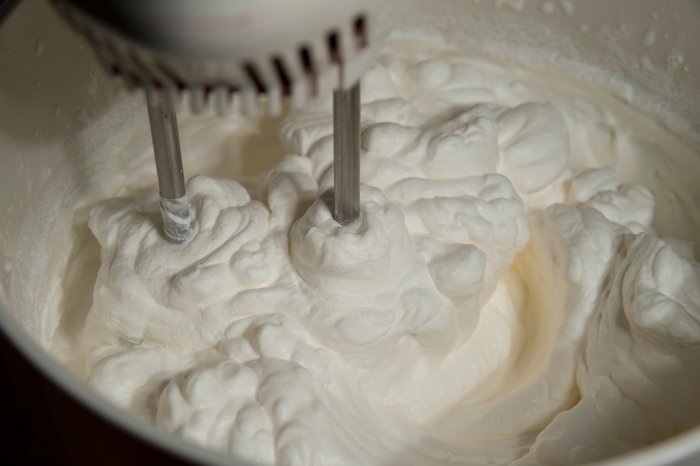
First of all, using a mixing bowl, combine the butter and vanilla extract. Make sure to use an electric mixer.
Step 2
Then, gradually add the powdered sugar about half a cup at a time while mixing. Afterward, add one tablespoon of milk at a time (still mixing). Make sure to do this until you can achieve your desired consistency.
Step 3
Afterward, place a small amount of the icing. And put it in a bowl for the crumb coat and filling. Then, divide the remaining icing equally into four bowls. And color them neon pink, yellow, blue, and green.
Step 4
After that, place the colored icing into separate piping bags and set aside.
Cake Assembly and Design: Tie Dye Cake Decorating
Step 1
Before anything else, take your cooled and baked cakes. Next, stack and fill your cake.
Step 2
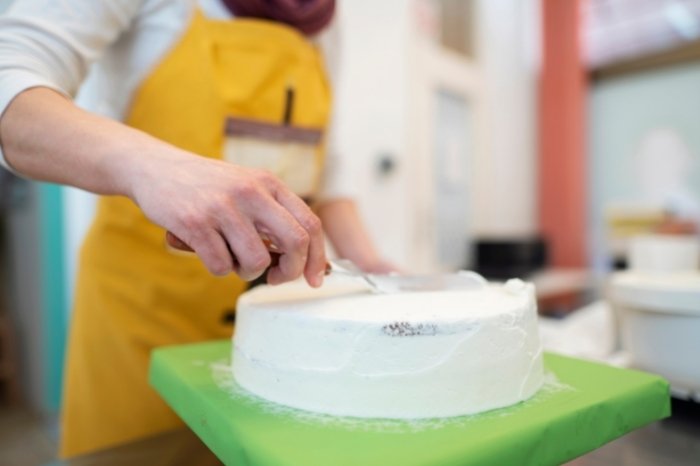
After that, ensure to crumb coat your cake using white or uncolored icing. Then, chill your cake for 20 minutes.
Step 3
Afterward, take your cake. And make sure to frost the cake using an offset spatula. Or you can use a bench scraper for the white icing. Then, smooth your cake. After that, chill your cake for another 30 minutes.
Step 4
Next, take your frosted and chilled cake out of the chiller. And then begin piping an inverted number 6 all over the cake. Ensure to fill all the empty spots with lines and scribbles. Also, use colored icing and arrange the colors.
Step 5
Then, for the cake’s side, pipe the icing at an angle. And allow the icing to flow. If it looks messy, it is okay; clean it up later.
Step 6
Afterward, take a toothpick. And place it gently in the center of each number 6 you have piped and drag it out. After that, repeat the process on each number 6, imitating the way a tie dye would look.
Step 7
For the sides of the cake, drag the toothpick to the right and left. Do this until you reach your desired design. Then, clean the messy icing around your cake using a moist paper towel.
Step 8
After that, add colorful sprinkles to your tie-dye cake if you want. Likewise, you can add the sprinkles to the base of your cake, if desired. Serve and enjoy!
Tips and Tricks for Tie Die Cake Icing
Before frosting and filling, allow the cakes to cool down completely. Remember, frosting and icing a warm cake will melt the icing. In addition to that, the cake will be unstable.
Keep in mind that the icing should not be very thin, just thin enough to pipe. Moreover, the icing should spread enough when you are piping; this will allow the toothpick to run better when dragged.
Furthermore, you can use gel colors and liquid colors. Additionally, lining the cake with parchment paper will make it easier for you to remove the cake from the pan.
Also, you can store leftover icing in the refrigerator in a sealed container. Because of this, it will last up to 3 days. In addition to that, you can make the cake a day beforehand and refrigerate it. So with that, it is ready for serving on the day of the party.
Also, adding strong brewed coffee can enhance and deepen the flavor of the cocoa powder and chocolate. Remember, do not overbake your cake. Overbaking your cake can evaporate moisture in your cake resulting in a dry and crumbly cake. To avoid having a dense cake, refrain from over-mixing your cake batter. Also, avoid adding too much sugar and other liquids.
If your cake sinks and deflates in the middle, the main reason is too much baking powder and baking soda. Too much of these can cause the cake to rise too quickly than the rest of the cake when baking. For that reason, it causes the center of the cake to deflate and sink later.
Tie Dye Cake Icing: Amazing Recipe
Equipment
- Mixing bowls
- Measuring Spoons
- Measuring cups
- 2 cake pans (9 inch round)
- Gel food coloring, white, neon pink, yellow, blue, and green
Ingredients
For The Chocolate Cake
- 2 large eggs
- 1/2 cup of vegetable oil
- 2 tsp of whole milk
- 1 1/2 teaspoon of baking powder
- 2 cups of all-purpose flour
- 1 cup of strong brewed coffee
- 3/4 cups of cocoa powder
- 1 1/2 teaspoon of baking soda
- 2 cups of granulated sugar
- 1/4 teaspoon of cinnamon powder
- 1 tsp of salt
- 1 tbsp of sprinkles optional
For Tie Dye Cake Icing
- 2 cups of unsalted butter
- 2 tbsp of vanilla extract
- 8 cups of powdered sugar
- 6-8 tablespoons of milk
Instructions
For the Chocolate Cake
- First, ensure to preheat your oven to 350 degrees Fahrenheit. Next, grease your two 9-inch round cake pans. And line them with parchment paper. After that, make sure to set aside.
- Using a large mixing bowl, combine eggs, oil, milk, vanilla. Then, mix using an electric mixer. Ensure to do this until the mixture becomes smooth.
- Afterward, add the flour to the mixture. You follow it with the cocoa powder, sugar, cinnamon powder, salt, baking powder, and baking soda. Then, beat until it combines partially.
- After that, stir in the coffee until the cake batter becomes smooth and creamy. Because of this, expect the batter to be thin.
- Next, pour the chocolate cake batter into the prepared cake pans. After that, bake the chocolate cakes in the oven for 35 minutes. Or until the cakes cook thoroughly.
- Lastly, when the cakes cook completely, allow the cakes to cool. And set them aside for later.
For the Tie Dye Icing
- First of all, using a mixing bowl, combine the butter and vanilla extract. Make sure to use an electric mixer.
- Then, gradually add the powdered sugar; about half a cup at a time while mixing. Afterward, add one tablespoon of milk at a time (still mixing). Make sure to do this until you can achieve your desired consistency.
- Afterward, place a small amount of the icing and put it in a bowl for the crumb coat and filling. Then, divide the remaining icing equally into four bowls. And color them with neon pink, yellow, blue, and green.
- After that, place the colored icing into separate piping bags and set aside.
Notes

Zarah is an experienced pastry chef whose creations have delighted countless customers. With a passion for baking, Zarah has developed a unique style that combines classic techniques with modern flavors. Her desserts are consistently crafted with the finest ingredients, and her attention to detail is evident in the stunning and delectable results. Zarah has a wealth of experience in the pastry kitchen, and loves to share her knowledge with others. Whether it is teaching a class or creating a custom cake for a special occasion, Zarah is committed to making sure every customer is satisfied.