Last Updated on March 25, 2022
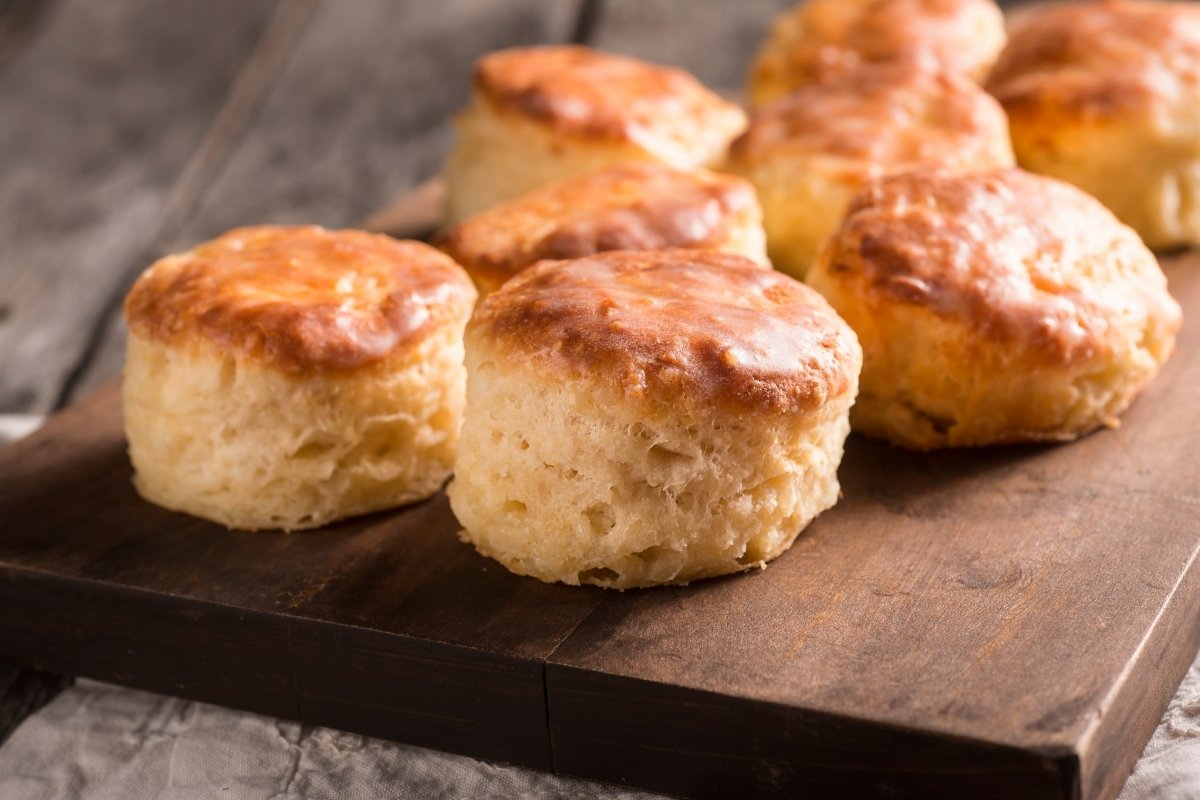
If you love flaky biscuits, then you will surely love ultimate flaky buttermilk biscuits. Biscuits have different meanings. It relies on where you live in the part of the world. Like the USA, biscuits are the same as dinner rolls in some parts of the world. But, they are more dense and flaky since you do not make it with yeast.
However, in some other places, biscuits are like cookies and even scones. So if you like the former part, you should check out this recipe. These ultimate flaky buttermilk biscuits are flaky on the exterior and light and fluffy inside. You can taste the butter in every flaky layer.
Likewise, they are the perfect sides to any meal. Everyone can indeed enjoy these ultimate flaky buttermilk biscuits on any occasion and weather. With that, bake your flaky buttermilk biscuits and impress everyone with this recipe.
What You Will Need
Ingredients
- 3 cups of all-purpose flour
- 2 tbsp of sugar
- 4 tbsp of baking powder
- 1/2 tsp of baking soda
- 1 1/2 tsp of salt
- 16 tbsp (2 sticks) of unsalted butter (frozen for 30 minutes)
- 1 1/4 cups of chilled or cold buttermilk
Equipment
- Mixing bowls
- Measuring cups
- Measuring spoons
- Rimmed baking sheet
- Parchment paper
- Whisk
- Rubber spatula
- Bench scraper
- Rolling pin
- Plastic wrap
- Knife
- Pastry brush
- Box grater
- Cutting board
- Cooling wire rack
M KITCHEN WORLD Heat Resistant Silicone Spatula Set – Non-Stick Rubber Spatula
Step By Step Instructions
Step 1
Before anything else, take your rimmed baking sheet. And line it with parchment paper. Then, set it aside.
Step 2
After that, take your large mixing bowl and whisk. Afterward, mix the flour, sugar, baking powder, baking soda, and salt.
Step 3
Next, coat the sticks of the butter with the flour mixture. Then, grate seven tablespoons of butter from each stick of butter on the large holes of the grater. Make sure to grate it directly into the flour mixture. Afterward, toss the mixture gently to combine. After that, reserve two tablespoons of butter and set it aside.
Step 4
Then, take your cold buttermilk and pour it into the flour mixture. Afterward, fold in using a rubber spatula until combined. If the dough looks dry, it is fine. After that, take some flour, dust the counter liberally, and transfer the dough into the counter.
Step 5
Next, dust your dough with flour using your floured hands. Then, make sure to press the dough into a rough 7-inch square.
Step 6
Afterward, roll your dough using a rolling pin. Ensure to roll it into a 12 by 9-inch rectangle with a short side parallel to the counter’s edge. With that, please start at the bottom of your dough. Then, fold it into thirds like folding a business letter. After that, use a bench scraper to release your dough from the counter.
Step 7
Then, press the top of your dough firmly to seal the folds. Afterward, turn your dough 90 degrees clockwise. Repeat the rolling process into a 12 by 9-inch rectangle, folding into thirds. And turning clockwise about four more times, totaling five sets of folds.
Step 8
When you find yourself at the last set of folds, roll your dough into an eight 1/2-inch square. In addition to that, make sure that it is about an inch thick. Next, transfer your dough to your prepared rimmed baking sheet. And cover it with plastic wrap. Afterward, refrigerate your dough for about 30 minutes.
Step 9
Then, reposition your oven rack to the upper-middle position. And make sure to preheat the oven to about 400 degrees Fahrenheit.
Step 10
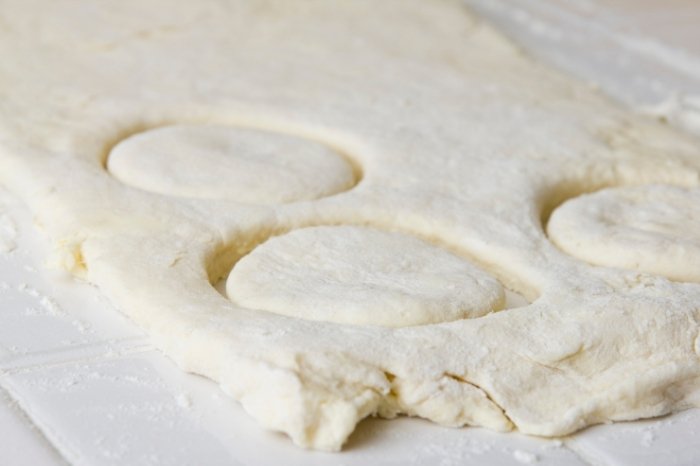
After refrigerating your dough, transfer it to a lightly floured cutting board. Then, use a sharp and floured knife. After that, make sure to trim 1/4 inch of your dough from each side of the square. Do not forget to throw the excess away.
Step 11
Afterward, cut your remaining dough into squares; make sure to flour the knife after every cut to avoid sticking. Then, arrange your biscuits at least one inch apart on the baking sheet.
Step 12
Next, melt the reserved butter from earlier. Afterward, brush the top of your biscuits using a pastry brush and melted butter.
Step 13
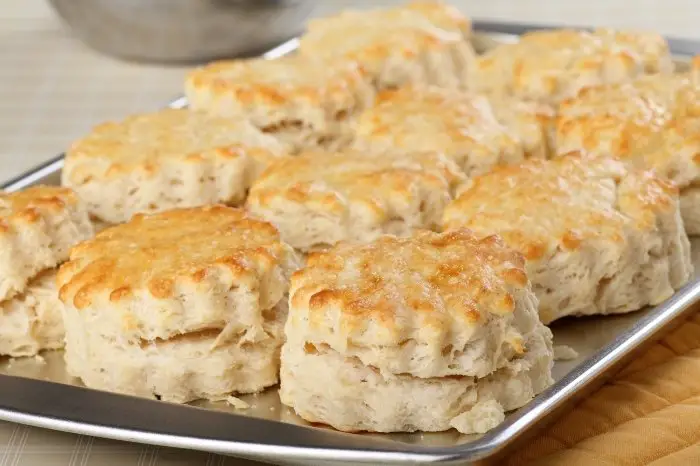
Then, bake the biscuits for about 22 to 25 minutes. Or until the top becomes golden brown. After that, rotate the baking sheet halfway throughout baking.
Step 14
Once the biscuits cook, take them out of the oven. After that, place them on a cooling rack. And allow the ultimate flaky buttermilk biscuits to cool for about 15 minutes.
Step 15
Finally, serve and enjoy!
Tips And Tricks For Flaky Buttermilk Biscuits Recipes
To achieve the ultimate flaky biscuits, grating the cold butter is essential. Make sure to do this to distribute it evenly into the flour mixture. And to make it super flaky. Moreover, freezing the butter before grating allows the butter to hold its shape. Remember, individual pieces throughout the mixing and shaping process.
Furthermore, use a high-protein all-purpose flour for this recipe to provide the right amount of structure. Do this to achieve flakiness without having a tough texture. Also, the buttermilk gives the biscuits the tang, while the sugar gives complexity.
Additionally, cutting the biscuits into squares makes it easier. And avoids having waste scraps. However, if you want to have circular biscuits, you can use a cookie cutter to cut your biscuits.
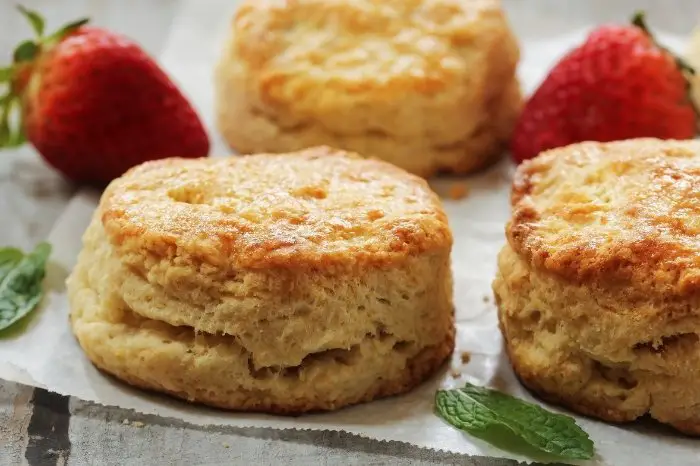
Moreover, make sure to allow your dough to rest for 30 minutes. Likewise, trim the edges. Doing this ensures that you will have a biscuit that will rise tall inside the oven. If you reside in a humid place, chill your flour mixture, mixing bowls, box grater, and other equipment before using.
If the dough is crumbly in the beginning, restrain yourself from adding extra buttermilk. Remember, the dough will be very crumbly and dry at first. But, it will become smooth at the end of the folding process.
When dusting flour, be careful not to incorporate large pockets of flour into your dough when folding. If buttermilk is unavailable in your area, you can make your own. With that, put a tablespoon of distilled white vinegar into a cup of milk.
Ultimate Flaky Buttermilk Biscuits
Equipment
- Mixing bowls
- Measuring cups
- Measuring Spoons
- Rimmed baking sheet
- Parchment paper
- Bench scraper
- Rolling Pin
- Plastic wrap
- Knife
- Pastry brush
- Box grater
- Cutting board
- Cooling wire rack
Ingredients
- 3 cups of all-purpose flour
- 2 tbsp of sugar
- 4 tbsp of baking powder
- 1/2 tsp of baking soda
- 1 1/2 tsp of salt
- 16 tbsp 2 sticks of unsalted butter (frozen for 30 minutes)
- 1 1/4 cups of chilled or cold buttermilk
Instructions
- Before anything else, take your rimmed baking sheet. And line it with parchment paper. Then, set it aside.
- After that, take your large mixing bowl and whisk. Afterward, mix the flour, sugar, baking powder, baking soda, and salt.
- Next, coat the sticks of the butter with the flour mixture. Then, grate seven tablespoons of butter from each stick of butter on the large holes of the grater. Make sure to grate it directly into the flour mixture. Afterward, toss the mixture gently to combine. After that, reserve two tablespoons of butter and set it aside.
- Then, take your cold buttermilk and pour it into the flour mixture. Afterward, fold in using a rubber spatula until combined. If the dough looks dry, it is fine. After that, take some flour, dust the counter liberally, and transfer the dough into the counter.
- Next, dust your dough with flour using your floured hands. Then, make sure to press the dough into a rough 7-inch square.
- Afterward, roll your dough using a rolling pin. Ensure to roll it into a 12 by 9-inch rectangle with a short side parallel to the counter's edge. With that, please start at the bottom of your dough. Then, fold it into thirds like folding a business letter. After that, use a bench scraper to release your dough from the counter.
- Then, press the top of your dough firmly to seal the folds. Afterward, turn your dough 90 degrees clockwise. Repeat the rolling process into a 12 by 9-inch rectangle, folding into thirds. And turning clockwise about four more times, totaling five sets of folds.
- When you find yourself at the last set of folds, roll your dough into an eight 1/2-inch square. In addition to that, make sure that it is about an inch thick. Next, transfer your dough to your prepared rimmed baking sheet. And cover it with plastic wrap. Afterward, refrigerate your dough for about 30 minutes.
- Then, reposition your oven rack to the upper-middle position. And make sure to preheat the oven to about 400 degrees Fahrenheit.
- After refrigerating your dough, transfer it to a lightly floured cutting board. Then, use a sharp and floured knife. After that, make sure to trim 1/4 inch of your dough from each side of the square. Do not forget to throw the excess away.
- Afterward, cut your remaining dough into squares; make sure to flour the knife after every cut to avoid sticking. Then, arrange your biscuits at least one inch apart on the baking sheet.
- Next, melt the reserved butter from earlier. Afterward, brush the top of your biscuits using a pastry brush and melted butter.
- Then, bake the biscuits for about 22 to 25 minutes. Or until the top becomes golden brown. After that, rotate the baking sheet halfway throughout baking.
- Once the biscuits cook, take them out of the oven. After that, place them on a cooling rack. And allow the ultimate flaky buttermilk biscuits to cool for about 15 minutes.
- Finally, serve and enjoy!
Notes

Zarah is an experienced pastry chef whose creations have delighted countless customers. With a passion for baking, Zarah has developed a unique style that combines classic techniques with modern flavors. Her desserts are consistently crafted with the finest ingredients, and her attention to detail is evident in the stunning and delectable results. Zarah has a wealth of experience in the pastry kitchen, and loves to share her knowledge with others. Whether it is teaching a class or creating a custom cake for a special occasion, Zarah is committed to making sure every customer is satisfied.

