
Last Updated on June 11, 2022
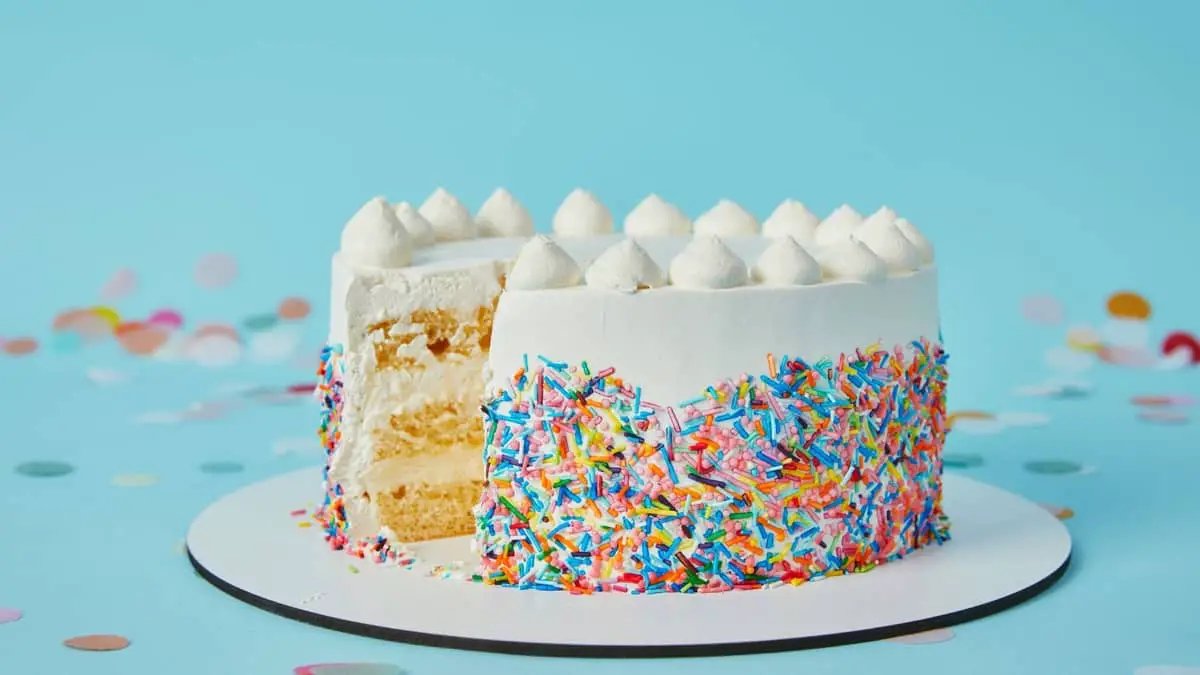
Creatively decorating cakes can be challenging, especially when sprinkles are involved. Today we look at how to put sprinkles on the side of a cake!
By adding these fun confetti garnishes, you can elevate the uniqueness of the cake and even help accentuate a specific theme! So, what are you waiting for? Let’s jump right into it!
How to Put Sprinkles On The Side Of A Cake
There are many methods which you can try for how to put sprinkles on the side of a cake. Which one you choose depends entirely on what you have available and what you are willing to try. Let’s have a look at the best techniques you can use.
1. Hand-press sprinkles onto the frosting
This technique basically requires a medium-soft buttercream to coat the entire cake. Then, you grab hold of a bunch of sprinkles and press them against the side of the cake.
While this method is easy in principle, it takes up a lot of time. And, it isn’t extremely effective on the first try. You will need to add multiple layers of sprinkles to ensure that the entire surface area is uniformly covered.
2. Roll the cake in sprinkles
This is one of our go-to methods if you need the entire cake to be covered in sprinkles. However, there are a few conditions for using this technique.
First, you cannot do this with a soft cake. Soft cakes won’t hold their shape when you are handling them and turning them sideways. Secondly, you will have to rest the cake for a while in the fridge. This will help set the frosting and keep the shape together.
And finally, while extremely effective, you have to do it quickly. As the frosting heats back up, the potential for the layers sliding off each other increases.
This method sounds scary, but it is the best to use in almost all scenarios. So, we will be discussing it in more depth today.
3. Place sprinkles with a tweezer
If the sprinkles that you add are much larger in size or you only need to add specific detailing on the cake, you can apply the sprinkles using a tweezer. Now, we admit that this technique is extremely time-consuming.
However, it allows you to accurately place each sprinkle to create an extremely detailed-orientated cake. And, don’t use it if you are placing hundreds and thousands over the entire surface. Then, rather opt for another technique.
What You Will Need – How to Put Sprinkles On The Side Of A Cake Using The Rolling Method
Ingredients
- Baked cake of your choice
- Sprinkles of your choice
Ingredients for the buttercream frosting
- 1/2 cup salted butter, softened at room temperature
- 2 cups powdered sugar, sifted
- 1 teaspoon vanilla extract
- 1-2 tablespoons milk, room temperature
- Food coloring, optional
Equipment
- Measuring cups and spoons
- Mixing bowls
- Electric mixer
- Sieve
- Rubber or silicone spatula
- Offset pallet knife
- Tray with lip
- Parchment or baking paper
Step By Step Instructions
Step 1: Make the buttercream frosting
To start the frosting, add the softened butter into a large mixing bowl. Cream it until the butter becomes light and fluffy. This should take between 3-5 minutes. Your creamed butter should not have any lumps.
Then, add your sifted powdered sugar to the creamed butter. Mix until you have a smooth and thick buttercream. don’t worry if the mixture initially looks like breadcrumbs. It will eventually smooth out if you continue mixing.
Finally, add the vanilla extract, 1 tablespoon of milk, and food coloring. Mix again until your buttercream frosting is fluffy and smooth. If you want to make the frosting softer, add the other tablespoon of milk.
Step 2: Crumb coat the cake
Once your frosting has been made and the cake layers are level, you can begin crumbing the cake.
Start by stacking the layers of cake. Add frosting, filling, or jam between each layer. Add the final layer and don’t add anything to the top. Make sure that the filling doesn’t drip down the side of the cake.
Then, add a thin coating of frosting around the side and top of the cake. You will see that some of the cake will peek through the frosting. That is perfect! The crumb layer is only meant to grab together all of the crumbs and keep them from mixing with the beautiful outer frosting layer.
Once you have a uniform crumb layer, set the cake inside the fridge and allow it to rest for 30 minutes to 1 hour.
Step 3: Add the decorative buttercream layer
Once the crumb coat has been set, you can add a beautiful layer of buttercream on the outside. Take a generous amount of frosting and apply it evenly to the outside and top of the cake.
You can have a look at this tutorial for a more in-depth guide to a beautifully smooth buttercream layer.
Once your cake is covered in buttercream, rest it in the fridge for another hour or two.
Step 4: Add the sprinkles
While the cake is resting, you can start preparing the sprinkle tray. First, add all of your sprinkles to a tray with a small lip. This lip will keep them inside. But, make sure the tray is large enough to fit the cake inside.
Then, using pieces of parchment paper between your hands and the frosting, gently lift the cake off the stand and add it to the sprinkles. Roll the cake in the sprinkles while rotating it constantly. finally, add sprinkles to the top and place the cake back onto the board or stand.
Tips And Tricks
- We haven’t included a cake recipe in this article, however, you can find many on our site. And, this technique isn’t limited to any one type of cake! The only ones that won’t necessarily work are soft ones like angel food cakes and genoise cakes.
- This technique works best with jimmies, nonpareils (hundreds and thousands), quins (dots), small dragees, and sanding sugar. It won’t work well with larger pearls and balls.

- Your frosting doesn’t have to be extremely soft, but it shouldn’t be too hard. if you see that the sprinkles don’t want to easily stick to the frosting, gently mist the buttercream with water. And when we say gently, we mean the finest layer that you can. Otherwise, the colors will bleed. Another alternative is to simply wait for the frosting to soften slightly.
Wrapping Things Up
How to put sprinkles on the side of a cake doesn’t have to take you all day, and it doesn’t have to be extremely complicated. With our tutorial, you can make a stunning colorful cake in no time at all!
Make sure to send along this article to anyone who has an upcoming birthday or if you know they could use it. And as always, let us know if you have any questions in the comments below!
How To Put Sprinkles On The Side Of A Cake - 3 Easy Ways
Equipment
- Measuring cups and spoons
- Mixing bowls
- Sieve
- Rubber or silicone spatula
- Offset pallet knife
- Tray with lip
- Parchment or baking paper
Ingredients
- Baked cake of your choice
- Sprinkles of your choice
Ingredients for the buttercream frosting
- 1/2 cup salted butter, softened at room temperature
- 2 cups powdered sugar, sifted
- 1 teaspoon vanilla extract
- 1-2 tablespoons milk, room temperature
- Food coloring, optional
Instructions
- Make the buttercream frostingTo start the frosting, add the softened butter into a large mixing bowl. Cream it until the butter becomes light and fluffy. This should take between 3-5 minutes. Your creamed butter should not have any lumps.Then, add your sifted powdered sugar to the creamed butter. Mix until you have a smooth and thick buttercream. don't worry if the mixture initially looks like breadcrumbs. It will eventually smooth out if you continue mixing.Finally, add the vanilla extract, 1 tablespoon of milk, and food coloring. Mix again until your buttercream frosting is fluffy and smooth. If you want to make the frosting softer, add the other tablespoon of milk.1/2 cup salted butter, softened at room temperature, 2 cups powdered sugar, sifted, 1 teaspoon vanilla extract, 1-2 tablespoons milk, room temperature, Food coloring, optional
- Crumb coat the cakeOnce your frosting has been made and the cake layers are level, you can begin crumbing the cake.Start by stacking the layers of cake. Add frosting, filling, or jam between each layer. Add the final layer and don't add anything to the top. Make sure that the filling doesn't drip down the side of the cake.Then, add a thin coating of frosting around the side and top of the cake. You will see that some of the cake will peek through the frosting. That is perfect! The crumb layer is only meant to grab together all of the crumbs and keep them from mixing with the beautiful outer frosting layer.Once you have a uniform crumb layer, set the cake inside the fridge and allow it to rest for 30 minutes to 1 hour.
- Add the decorative buttercream layerOnce the crumb coat has been set, you can add a beautiful layer of buttercream on the outside. Take a generous amount of frosting and apply it evenly to the outside and top of the cake.You can have a look at this tutorial for a more in-depth guide to a beautifully smooth buttercream layer.Once your cake is covered in buttercream, rest it in the fridge for another hour or two.
- Add the sprinklesWhile the cake is resting, you can start preparing the sprinkle tray. First, add all of your sprinkles to a tray with a small lip. This lip will keep them inside. But, make sure the tray is large enough to fit the cake inside.Then, using pieces of parchment paper between your hands and the frosting, gently lift the cake off the stand and add it to the sprinkles. Roll the cake in the sprinkles while rotating it constantly. finally, add sprinkles to the top and place the cake back onto the board or stand.Sprinkles of your choice, Baked cake of your choice
Notes
FAQs
How do you get sprinkles to stick to frosting?
The best way is to make sure that the frosting is soft, but not moist. You can rest the cake inside the fridge for a while before sticking the sprinkles onto the side. Otherwise, you can lightly mist the buttercream to create a sticky surface for the sprinkles to hold on to. Another way is to simply allow the buttercream to soften again at room temperature.
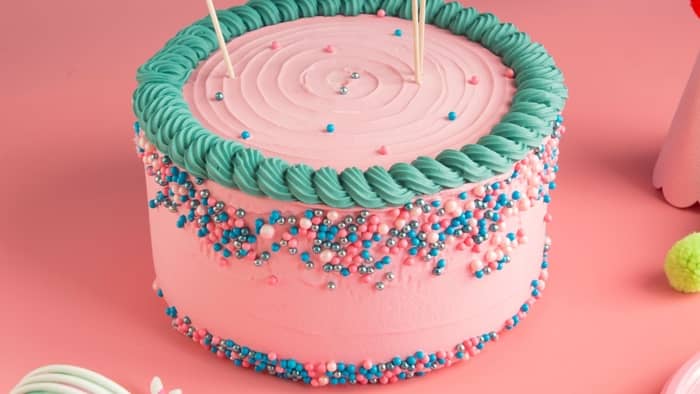
How do you get sprinkles on the bottom of a cake?
If you want to create a decorative band around the bottom or top edge of the cake, you can use your hands to apply the sprinkles. Alternatively, you can use a tweezer to individually place large and small sprinkles exactly where and how you want them to be.
How do you put sprinkles on after baking?
You will first have to crumb coat the cake, then coat it with some buttercream frosting. Once the frosting has firmed up a bit, you can either press sprinkles onto the side using your hand, place them with a tweezer, or rolling the cake in a sheet of sprinkles.
Do sprinkles melt in cake batter?
When placing sprinkles in the raw cake batter to be baked, they will melt from the residual heat. However, they will still leave a "stain" of color in the batter which will look like color flecks. This is how you can create a confetti cake.

Lindy Van Schalkwyk is a culinary specialist with a background in Advanced Cooking, Advanced Pâtisserie, Media Communications and Nutrition. She has gained invaluable experience in the culinary industry having worked in some of the top restaurants in Africa in 2016 and 2017. Her expertise in nutrition has enabled her to develop recipes for special dietary needs. In 2018, Lindy began working in the Food Media industry, focusing on recipe development, recipe writing, food writing and food styling.