
Last Updated on December 29, 2022
There are many techniques for how to make a tie-dye cake. Today, we will be playing with some cake batter to create a fun and uber-unique cake!
We have made a lot of unique cakes on this site, but this one is pure fun. You can use it on any occasion and it will be the life of the party! And, you’ll be shocked to find how easy it is to make!
What Is A Tie-Dye Cake?
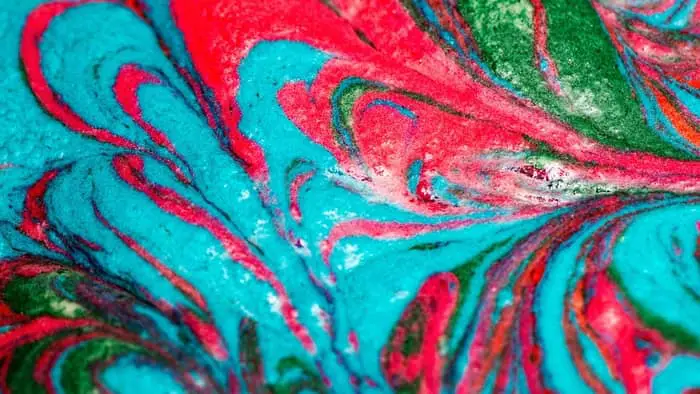
This is a broad term used to describe a very psychedelic pattern popular in the 60s and 70s. “Tie-dye is any bright and colorful pattern that doesn’t follow a specific shape. The colors blend together seamlessly that creating a mesmerizing effect.
For the more advanced bakers, you can use an airbrush to spray the colors onto the cake. Naturally, this technique requires a lot of practice and special equipment – time and money! So, we won’t be discussing this in-depth at this stage.
Why make a tie-dye cake?
Tie-dye cakes are fun! What other reason do you need? This cake can be used at any kids’ or adults’ birthday party and can easily be matched to many themes!
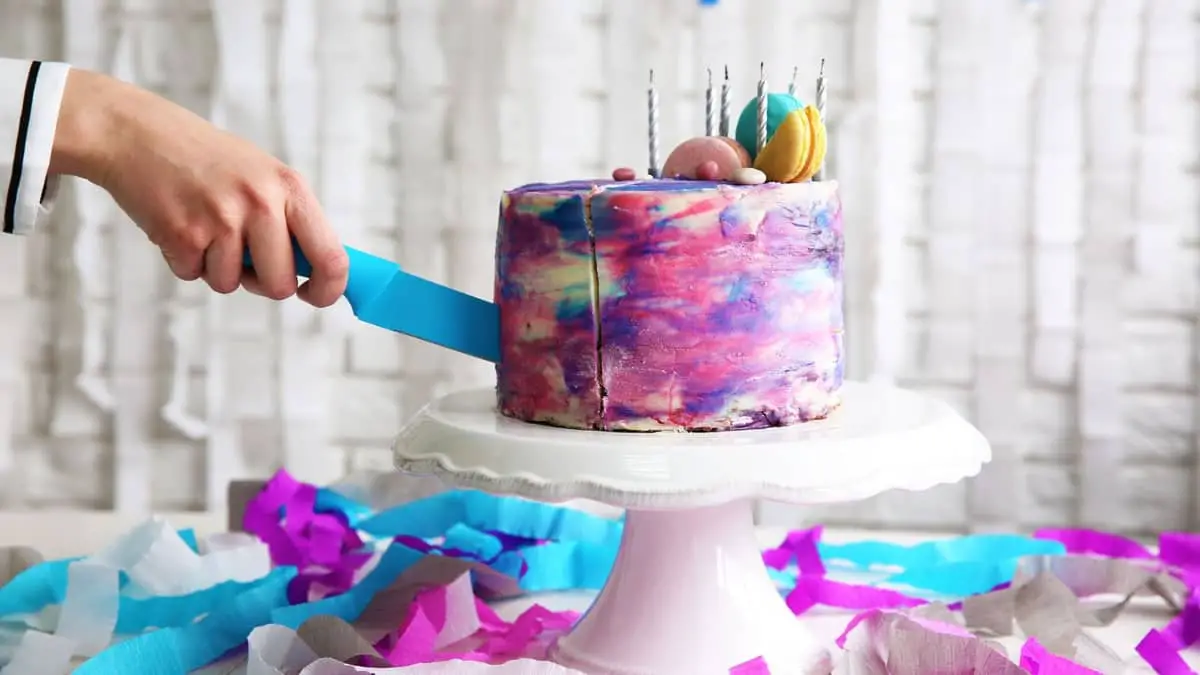
It is easy to make and doesn’t even take that much longer. And, if you cover the entire cake with white or black buttercream frosting (or fondant), once cut it will reveal a beautiful colorful cake crumb! It is guaranteed to “wow” your guests!
And, the idea of a tie-dye cake can also be used for specific color schemes. It doesn’t only have to apply to a rainbow pallet. You can use this effect to create a unicorn theme, superhero theme, mermaid theme, and dinosaur theme. Whatever you can think of, this fun technique will help elevate the creativity and uniqueness of the cake!
So, without further or do, let’s have a look at the best way how to make a tie-dye cake.
What You Will Need How To Make A Tie-Dye Cake
Ingredients for the vanilla cake
- 2 cups cake flour, sifted
- 2 1/2 teaspoons baking powder
- Pinch of salt
- 4 large eggs, room temperature
- 1 1/2 cups granulated white sugar
- 1/2 cup salted butter, softened at room temperature
- 1 cup milk, room temperature
- 2 teaspoons vanilla extract
- Food coloring – red or pink, blue, green, yellow, orange, purple
Equipment
- 2 x 8-inch round cake pans
- Non-stick baking paper
- Cooking or baking spray (or melted butter)
- Measuring cups and spoons
- Mixing bowls
- Electric hand or stand mixer
- 6-8 Small bowls (for mixing the color into the batter)
- 6-8 Forks or spoons
- Silicone or rubber spatula
- Cooling rack
Step-by-step instructions
Step 1: Make the meringue base
To start, preheat the oven to 320ºF (160ºC). Line two 8-inch cake pans with non-stick baking paper on their bases. Then, spray the sides with non-stick baking spray or brush them with melted butter or oil.
To start your journey on how to make a tie-dye cake, first combine the cake flour, baking powder, and salt in a large mixing bowl. Make sure that they are sifted. Then, set this aside.
Next, add the eggs into a bowl and beat them at high speed for roughly 30 seconds. Then, while the mixer is still running, add the sugar in 3 additions. Continue beating this mixture, ultimately creating a type of meringue. It should be white and tripled in volume. This will take about 5-8 minutes.

Step 2: Heat the liquid ingredients
Meanwhile, combine the salted butter and milk in a heatproof bowl (or saucepan) and allow it to heat slightly. The butter should be melted. Do not allow the milk to boil and don’t make this mixture too far in advance. It shouldn’t be allowed to cool.
Step 3: Add the flour
While the liquid ingredients are heating and once the meringue is made, pour the flour mixture into the meringue in 3 additions. Beat for 5-10 seconds after each interval until the flour is just combined. Do not overmix.
Step 4: Add the liquid ingredients
While the melted butter and milk mixture is still hot, slowly add it to the egg and flour mixture along with the vanilla. Only add a thin stream so that the eggs don’t overheat and curdle. Use a low mixer speed for this to ensure you don’t lose any air.
Stop mixing once all of the butter-milk mixtures have been added and you are left with a uniform cake batter.
Step 5: Add the food coloring
Equally, divide the cake batter into separate bowls. The number of bowls depends on the number of colors you want.
Then, make each bowl a different color by adding a few drops of coloring to each. Mix well to ensure you have no “pale” cake batter left peeking through.
Step 6: Pour and bake the cake
There are a couple of techniques you can use to create a tie-dye effect. We prefer simply pouring dollops of alternative colors into the cake pan. Then, use a toothpick and drag the colors around to help them bleed into each other. Imagine creating a type of wheel with spokes starting in the middle.
Once both your cake pans have been filled, simply bake the cake in your preheated oven for roughly 35-50 minutes. After 35 minutes, check the doneness of the cake.
Step 7: Cool and decorate the cake
Finally, remove the cake from the oven and allow it to cool at room temperature. once removed from the pan, place it on a cake board or stand and start decorating as you’d like.
You can cover it with fondant, make a naked cake, or simply add a layer of buttercream frosting over the sides and top.
Expert Tips And Tricks On How to Make a Tie-Dye Cake
- You don’t have to buy 8 different colors for this tutorial on how to make a tie-dye cake. You can buy the three primary colors (red, yellow, and blue) and mix them into others that you’d need. Have a look at these tips for mixing primary colors.
- Do not bake this cake at too high of a temperature. This will cause the colors to fade a lot and the top to burn. You want to showcase the colors, not have them muted.
- The best type of food coloring to use is gel or powder. Neither will change the consistency of the batter. Gel food coloring is powerful and you only need to add a drop or two. The powdered food coloring will require more but is equally effective and not as messy.
- Mix the colored batter into glass bowls or bowls you don’t care about staining. Food coloring stains anything and won’t come out under any circumstances.
How Do You Make a Tie Dye Sheet Cake?
To make a tie-dye sheet cake, divide your prepared cake batter into four or six separate bowls depending on how many colors you would like to use. Then, color each bowl with a different color of food coloring, being sure to add enough so that the color will show through. Good colors to use include blue, green, orange, red, yellow, and purple.
After preparing your cake batter in separate colors, pour each color one at a time into your prepared sheet cake pan. After adding all of the colors, use a butter knife to swirl all of the colors together to create a tie-dye design. Be sure not to overmix as you don’t want the colors to blend together.
After you are satisfied with your design, bake your cake according to the instructions for the recipe. Once done, allow your cake to fully cool before decorating it with frosting. If desired, you can also create a tie-dye design with your frosting as well.
How Do You Paint a Sunset on a Cake?
A simple way to paint a sunset on a cake is to create an ombre effect with shades of yellow, red, white, and orange. Allow your cake to fully cool as you prepare the frosting. Use bowls to mix frosting as your cake cools to create red-orange, orange-red, dark yellow, orange, and golden-yellow, and then add the colors to piping bags.
After your cake has cooled, begin to pipelines on your cake starting with the darkest color and working up to the lightest. After you pipe all of the colors, using an icing smoother, smooth the colors together to create a sunset effect.
Instead of using buttercream frosting of different colors, you can also use white buttercream frosting. Then use food paint to add the sunset colors and then use an icing smoother to smooth them together.
Where Can I Buy Edible Spray Paint for Cakes?
You can buy edible spray paint for cakes at most craft and baking stores. In addition, edible paint for cakes is also available online as well. Some superstores and grocery stores may even sell edible paint in their cake decorating aisles.
Can I Use a Regular Paint Brush for Cake Decorating?
It is typically not advisable to use a regular paintbrush for cake decorating. You want to use only paintbrushes designed for cake decorating on your cakes as these are food-safe. Regular paintbrushes may include ingredients that are not food-safe and the hairs may come loose on your cake, which could be a choking hazard.
How Do You Paint a Watercolor Cake?
To paint a watercolor cake, decorate your cake with white buttercream or white fondant to create a blank slate for your watercolors. There are a couple of different ways you can create a watercolor effect on your cake.
One method is to use different colors of buttercream to create a watercolor effect. Use an offset spatula to smudge the cakes with swipes of different colors of frosting.
You can also use food coloring to create a watercolor effect. Simply dilute your food coloring with some water, vanilla extract, or lemon juice, and then use a food-safe paintbrush to paint it on your cake. You can also use edible art paint to decorate your cake.
How Do You Paint on Ganache Cake?
To paint on a ganache cake, allow the ganache to fully dry before painting. It can take up to eight hours to dry, so it is best to plan ahead of time.
Once dry, you can paint on your ganache cake. You can use edible art paint to create different designs, just be sure to choose colors that will show up well.
Conclusion
As complicated as it may look, how to make a tie-dye cake is actually pretty easy! All you need is enough bowls and a little bit of patience. What also makes this type of cake great is that the effect will never be the same for each cake you make!
Let us know how your tie-dye cake came out and if you would like more fun articles like this!
How To Make A Tie-Dye Cake - An Easy Psychedelic Pattern
Equipment
- 2 x 8-inch round cake pans
- Non-stick baking paper
- Cooking or baking spray (or melted butter)
- Measuring cups and spoons
- Mixing bowls
- Electric hand or stand mixer
- 6-8 Small bowls (for mixing the color into the batter)
- 6-8 Forks or spoons
- Silicone or rubber spatula
- Cooling Rack
Ingredients
- 2 cups cake flour, sifted
- 2 1/2 teaspoons baking powder
- Pinch of salt
- 4 large eggs, room temperature
- 1 1/2 cups granulated white sugar
- 1/2 cup salted butter, softened at room temperature
- 1 cup milk, room temperature
- 2 teaspoons vanilla extract
- Food coloring - red or pink,blue, green, yellow, orange, purple
Instructions
- Make the meringue baseTo start, preheat the oven to 320ºF (160ºC). Line two 8-inch cake pans with non-stick baking paper on their bases. Then, spray the sides with non-stick baking spray or brush them with melted butter or oil.To start your journey on how to make a tie-dye cake, first combine the cake flour, baking powder, and salt in a large mixing bowl. Make sure that they are sifted. Then, set this aside.Next, add the eggs into a bowl and beat them at high speed for roughly 30 seconds. Then, while the mixer is still running, add the sugar in 3 additions. Continue beating this mixture, ultimately creating a type of meringue. It should be white and have tripled in volume. This will take about 5-8 minutes.2 cups cake flour, sifted, 2 1/2 teaspoons baking powder, Pinch of salt, 4 large eggs, room temperature, 1 1/2 cups granulated white sugar
- Heat the liquid ingredientsMeanwhile, combine the salted butter and milk in a heatproof bowl (or saucepan) and allow it to heat slightly. The butter should be melted. Do not allow the milk to boil and don't make this mixture too far in advance. It shouldn't be allowed to cool.1/2 cup salted butter, softened at room temperature, 1 cup milk, room temperature
- Add the flourWhile the liquid ingredients are heating and once the meringue is made, pour the flour mixture into the meringue in 3 additions. Beat for 5-10 seconds after each interval until the flour is just combined. Do not overmix.
- Add the liquid ingredientsWhile the melted butter and milk mixture is still hot, slowly add it to the egg and flour mixture along with the vanilla. Only add a thin stream so that the eggs don't overheat and curdle. Use a low mixer speed for this to ensure you don't lose any air.Stop mixing once all of the butter-milk mixture has been added and you are left with a uniform cake batter.2 teaspoons vanilla extract
- Add the food coloringEqually, divide the cake batter into separate bowls. The number of bowls depends on the number of colors you want.Then, make each bowl a different color by adding a few drops of coloring to each. Mix well to ensure you have no "pale" cake batter left peeking through.Food coloring - red or pink,blue, green, yellow, orange, purple
- Pour and bake the cakeThere are a couple of techniques you can use to create a tie-dye effect. We prefer simply pouring dollops of alternative colors into the cake pan. Then, use a toothpick and drag the colors around to help them bleed into each other. Imagine creating a type of wheel with spokes starting in the middle.Once both your cake pans have been filled, simply bake the cake in your preheated oven for roughly 35-50 minutes. After 35 minutes, check the doneness of the cake.
- Cool and decorate the cakeFinally, remove the cake from the oven and allow it to cool at room temperature. once removed from the pan, place it on a cake board or stand and start decorating as you'd like.You can cover it with fondant, make a naked cake, or simply add a layer of buttercream frosting over the sides and top.
FAQs
How do you tie-dye icing?
You can use the same method for frostings and icing that we have explained for the cake batter. Divide the icing into different bowls (according to the number of colors that you want). Then, color each bowl with a different color, making sure they are well mixed. then, if it is a thick frosting, you can pipe and blend it out with a pallet knife. Otherwise, simply pour the varying colors over.
How do you make tie-dye patterns for cakes?
It depends mostly on the method you use, and even then the pattern will be different every time. That's what makes tie-dye so great! We like to simply pour varying batter colors into the cake pan. Then, using a. toothpick, from the center, pull out towards the sides, like spokes of a bicycle. This blends and mixes the color to create a random pattern.
How do you make tie-dye fondant icing?
You will first need to create different colors of fondant balls. Then, roll each into a log. Bunch the log together and twist the logs together into a spiral. Then, fold it over itself and press it together again. Shape the fondant into a log again, twist, and fold it over itself. You can repeat this one more time before rolling out the fondant and covering your cake.
How do you airbrush a tie-dye effect?
The process is very difficult and we would recommend reading an in-depth tutorial or video. The best technique to use is to create star-shaped patterns across the cake area, starting with a light color in the center and moving towards darker colors on the outside. You can create multiple starts until they overlap.

Lindy Van Schalkwyk is a culinary specialist with a background in Advanced Cooking, Advanced Pâtisserie, Media Communications and Nutrition. She has gained invaluable experience in the culinary industry having worked in some of the top restaurants in Africa in 2016 and 2017. Her expertise in nutrition has enabled her to develop recipes for special dietary needs. In 2018, Lindy began working in the Food Media industry, focusing on recipe development, recipe writing, food writing and food styling.