
Last Updated on January 19, 2023
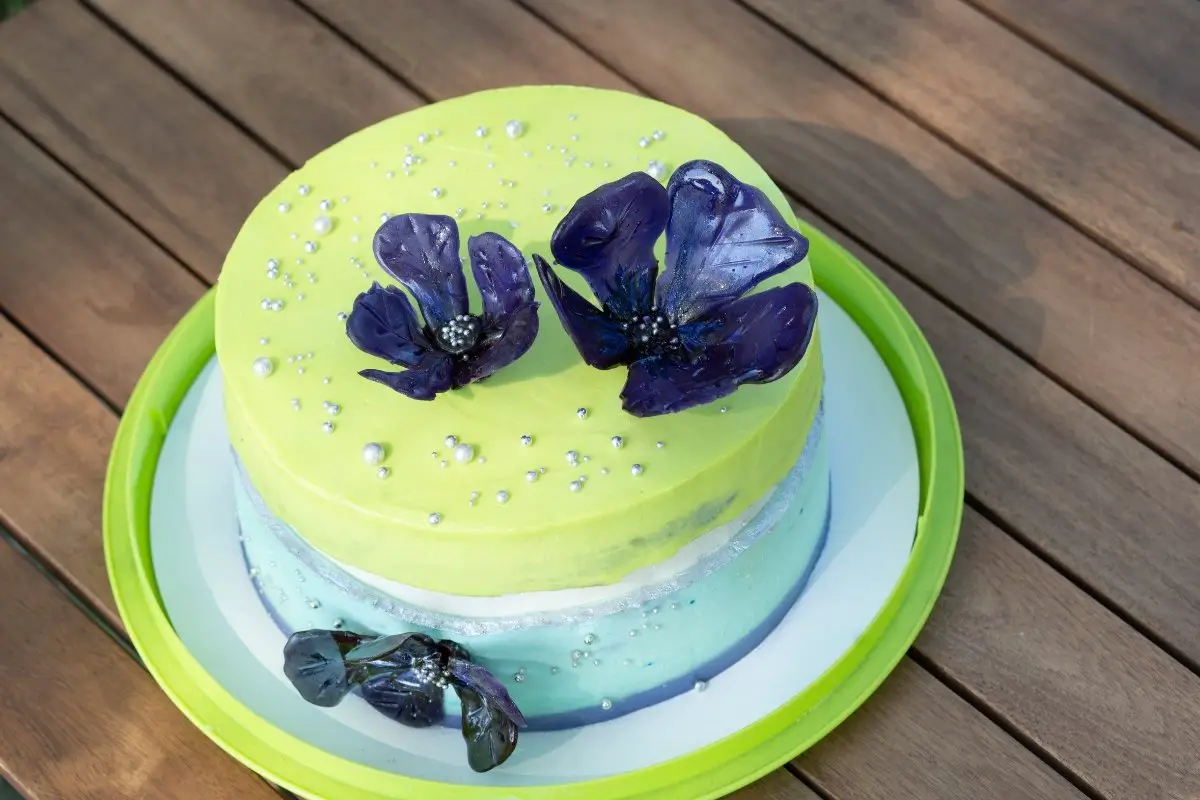
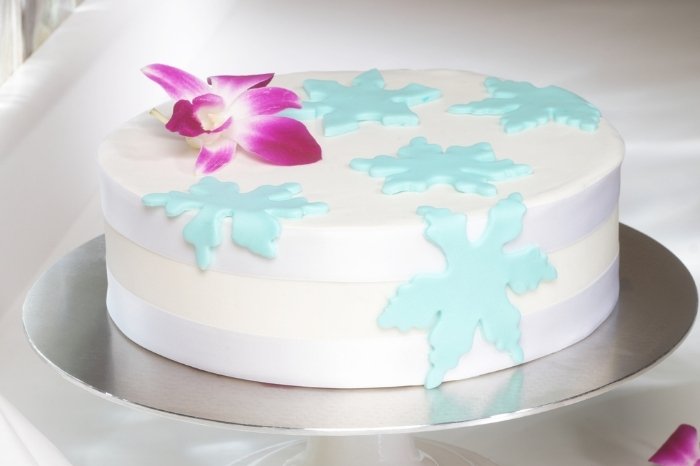
Sugar sheets make a beautiful and unique addition to any cake. Knowing how to make sugar paper will take your cake-decorating skills to the next level. They provide an elegant look, giving your cakes a professional look.
This recipe is more advanced, as it takes several steps to get it just right and the sheets are fragile. However, by carefully following the directions you can create some beautiful edible sugar sheets for cakes. This will make for some real show-stopping cakes, great for any special event. Let’s take a look at how to make sugar paper.
What is Edible Sugar Paper for Cake Decorating?
Edible sugar sheets allow you to cut out different shapes and designs for decorating cakes, cookies, and cupcakes. You can also color them or even transfer images on them as well. It is a simple and effective way to decorate your baked goods.
What You Need: How to Make Sugar Paper
Ingredients
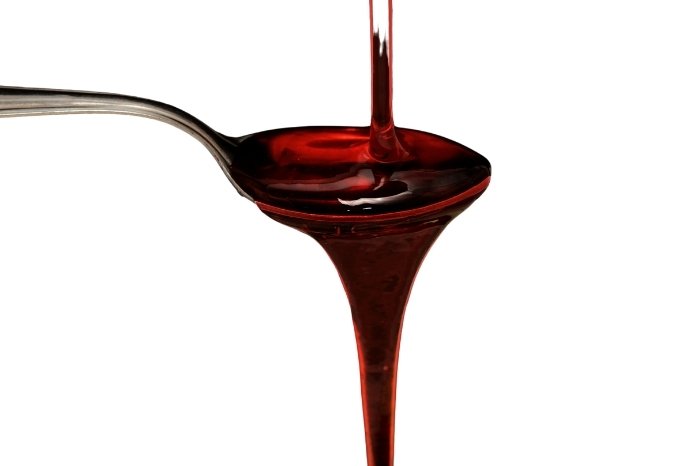
- 60 grams of corn syrup
- 1 teaspoon Tylose Powder
- 200 grams of superfine sugar (or granulated sugar if you are unable to find superfine)
- 1-3 drops of gel food coloring
- Cooking spray or oil
Equipment
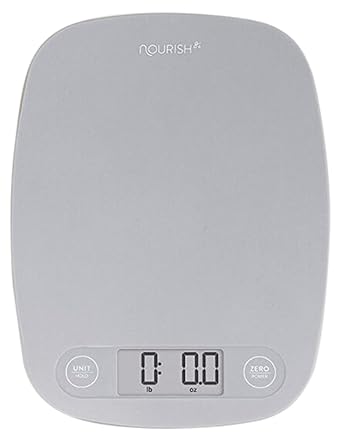
- Kitchen scale
- Large mixing bowl
- Sifter
- Rubber spatula
- Silicone mat
- Rolling pin
- Pizza cutter or sharp knife
- 1/4 or 1/3 inch separators
- Frosted Cake
- Spray the bottle with water
GreaterGoods Digital Food Kitchen Scale, Multifunction Scale Measures in Grams and Ounces
Step by Step: Edible Sugar Sheets for Cakes
Step One: Weigh the Ingredients
Carefully weigh out the corn syrup and sugar using a kitchen scale. Measure out the tylose powder.
Step Two: Combine Sugar and Tylose Powder
In a large bowl, use a sifter to combine the sugar and tylose powder. This will ensure that the ingredients thoroughly combine.
Step Three: Add the Food Coloring to Your Corn Syrup
Add your choice of gel food coloring to the corn syrup. Use a spoon or whisk to thoroughly blend the two.
Step Four: Combine the Sugar Mixture With the Corn Syrup Mixture
Mix all the ingredients in a large bowl using a rubber spatula. Make sure all the color is evenly dispersed.
Step Five: Add Sugar Paper to Silicone Mat
Lightly grease your silicone mat with cooking spray or a neutral-tasting oil. Add your separators, if desired, and begin rolling out the sugar paper.
Step Six: Cut the Sugar Paper
Using a sharp knife or pizza cutter, cut the sugar paper into the shape you would like for your cake decorations. If desired, add any additional coloring or designs you want to the sheet.
Step Seven: Allow the Sheets to Dry
Allow the sheets to dry at room temperature overnight, or for 6-12 hours. Drying time will vary based on the humidity. The more humid your house, the longer it will take to dry.
Step Eight: Add the Sheets to Your Cake
Carefully add the sheets to your frosted cake. If you are having problems with the designs sticking, lightly mist the frosting. Slightly wet frosting will help the sheets stick better.
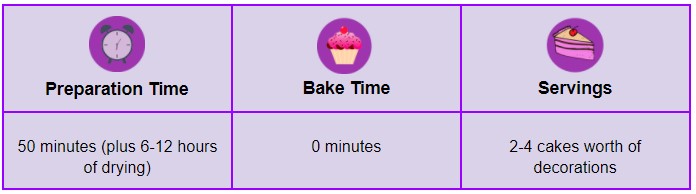
Servings and Preparation Time
Tips and Tricks
The sheets can be kept at room temperature for 1-3 months. Store the sheets in an airtight container. When ready to use, simply add them to your baked goods.
Sugar sheets should not be kept in the fridge or freezer. Cold air will cause them to wilt and fall apart, making them unusable.
In addition, heat will cause the sheets to melt or wilt. It is best to keep them in temperatures between 60-75 degrees Fahrenheit.
The sugar sheets are fragile, so be careful when working with them. You can make them any color you like or even make them multi-colored if you like. Alternatively, you can also leave it white and draw on it with edible markers.
If you don’t have any silicone baking mats, you can use parchment paper instead. The parchment paper will work just as well as the silicone mats.
How To Make Sugar Paper: Easy Recipe
Equipment
- Kitchen scale
- Large mixing bowl
- Sifter
- Silicone mat
- Rolling Pin
- Pizza cutter or sharp knife
- 1/4 or 1/3 inch separators
- Frosted Cake
- Spray bottle with water
Ingredients
- 60 grams corn syrup
- 1 teaspoon Tylose Powder
- 200 grams superfine sugar or granulated sugar if you are unable to find superfine
- 1-3 drops gel food coloring
- Cooking spray or oil
Instructions
- Weigh the Ingredients - Carefully weigh out the corn syrup and sugar using a kitchen scale. Measure out the tylose powder.
- Combine Sugar and Tylose Powder - In a large bowl, use a sifter to combine the sugar and tylose powder. This will ensure that the ingredients thoroughly combine.
- Add the Food Coloring to Your Corn Syrup - Add your choice of gel food coloring to the corn syrup. Use a spoon or whisk to thoroughly blend the two.
- Combine the Sugar Mixture With the Corn Syrup Mixture - Mix all the ingredients together in a large bowl using a rubber spatula. Make sure all the color is evenly dispersed.
- Add Sugar Paper to Silicone Mat - Lightly grease your silicone mat with cooking spray or a neutral-tasting oil. Add your separators, if desired, and begin rolling out the sugar paper.
- Cut the Sugar Paper - Using a sharp knife or pizza cutter, cut the sugar paper into the shape you would like for your cake decorations. If desired, add any additional coloring or designs you want to the sheet.
- Allow the Sheets to Dry - Allow the sheets to dry at room temperature overnight, or for 6-12 hours. Drying time will vary based on the humidity. The more humid your house, the longer it will take to dry.
- Add the Sheets to Your Cake - Carefully add the sheets to your frosted cake. If you are having problems with the designs sticking, lightly mist the frosting. Frosting that is slightly wet will help the sheets stick better.
Notes
Sugar Sheets vs Fondant
If you’re wondering how to apply sugar sheets to fondant, it’s much easier than you may think. You simply add the sugar sheet onto the surface of your cake, starting to press in the center first and working your way outwards, to secure the edges and smooth the sheet out. If you’re not successful on the first attempt, it’s super easy to remove and try again.
Wafer Paper or Sugar Sheets?
You may be wondering what the better option to work with is either wafer paper (sometimes known as rice paper) or sugar sheets (sometimes known as frosting sheets). But what are the differences between the two? What do they taste like? Do they vary in cost? Let’s take a closer look.
- Ingredients. The two vary in ingredients quite a lot. Wafer paper is usually made from water, oil, and potato starches. However, sugar sheets are typically made from sugar, corn syrup, and tylose powder.
- Thickness. Sugar sheets are often much thicker than wafer paper, and look more like fondant icing than paper. However, wafer paper can be extremely thin, and delicate. It’s very similar in thickness to standard paper.
- Printing. Both can be printed effectively on standard prints. However, sugar sheets are often better with printers that are made explicitly for edible ink, due to their thickness. Wafer paper isn’t quite as flexible as sugar sheets.
- Taste. Wafer sheets do not tend to taste anything; however, you can buy flavored wafer paper if you’d prefer. The texture of wafer paper is very thin and fragile. Sugar sheets tend to taste sweet, and often have a vanilla flavor running through them. Once added to your cake, it’s almost impossible to taste sugar sheets.
- Price. Sugar sheets are considerably more expensive to purchase than wafer paper. For example, Wilton charges $6.99 for just one sheet of their gold sugar sheets! You’re likely to find 25-30 wafer sheets for that price!
Can You Cut Sugar Sheets With a Cricut Maker?
Of course! Cricut machines are great for just about anything, including cutting sugar sheets. As well as sugar sheets, Cricut machines are also suitable for cutting wafer paper too. The only thing you’ll need to bear in mind is that you’ll need to adjust the mat size. Sugar sheets usually are available in the following sizes: 8×11 inches or 11×17 inches.
Wilton Gold Sugar Sheets: Everything You Need to Know
Wilton is an incredibly popular cake-baking and decorating the brand home of all things cake-making. Their gold sugar sheets are fantastic, and you can use them to decorate a range of baked goods, including cakes, cookies, and cupcakes. Each gold sugar sheet costs $6.99 and is 8×11 inches in size.
All you need to do to use them is cut your shapes out using scissors; it can be anything from, hearts, flowers, stars, etc. Then all you need to do is peel the back off and place it on your cake, as desired – it really is that easy!
It’s worth mentioning that although there are no allergens listed in the ingredients, this product is made in a facility that processes the following allergens: wheat, soy, and tree nuts; so may not be suitable for all.
Conclusion on How to Make Sugar Paper
I hope this post has helped you to learn how to make sugar paper. If you are looking for a fun and unique project, these sugar sheets are a great recipe to make. Though they require some technique and patience, they are worth the work, as you can make different designs and colors. They make beautiful decorations for your baked goods and allow you to be creative with your decorating.
Did you enjoy this tutorial on how to make sugar sheets edible decorating paper? If so, please share your thoughts on this tutorial in the comments down below and share this post with your friends and family. Sharing is caring!

Ever since she was a young girl, Anna has been a lover of desserts. As an adult, she enjoys
baking a variety of desserts from cakes, cookies, brownies, bread, and more from scratch. She
enjoys sharing her passion for baking with others who also have a sweet tooth. From properly
measuring ingredients to making sure they are the correct temperature, Anna knows the
importance small details can make in baking. She wants to share her experience with others in
hopes they can make the most delicious baked goods. When she’s not busy blogging, Anna
enjoys trying new recipes in the kitchen.