
Today we will show you how to make frosting look like water. There are a couple of techniques we’ll show you, but the secret is practice.
Experiment as much as you possibly can to see what works best for you, and what you like the most.
How To Make Water Effect On A Cake
There are two ways you can make frosting look like water.
The first option is to create a textured frosting on the surface of the cake. You have to make use of various shades of blue and white to create a realistic water effect. Then, you also need some special tools that can help you beautifully create wave-like textures.
The second technique is a lot more simple but usually less common. This is a frosting you create that literally looks like translucent blue water. It is a special recipe that uses thickening agents, granulated sugar, and water.
Today, we will discuss a couple of textured cake frosting techniques, as they are much easier to create and more versatile.

How To Make Frosting Look Like Water
Now, as we’ve just said, we will be looking at how to make frosting look like water. But, even then there are still a couple of different techniques you can use.
For all of them, you will need a white frosting recipe, an offset spatula, and some gel food coloring. Some techniques require additional tools and ingredients, but we’ll go into more detail when discussing those methods.
Method 1: Frosting only
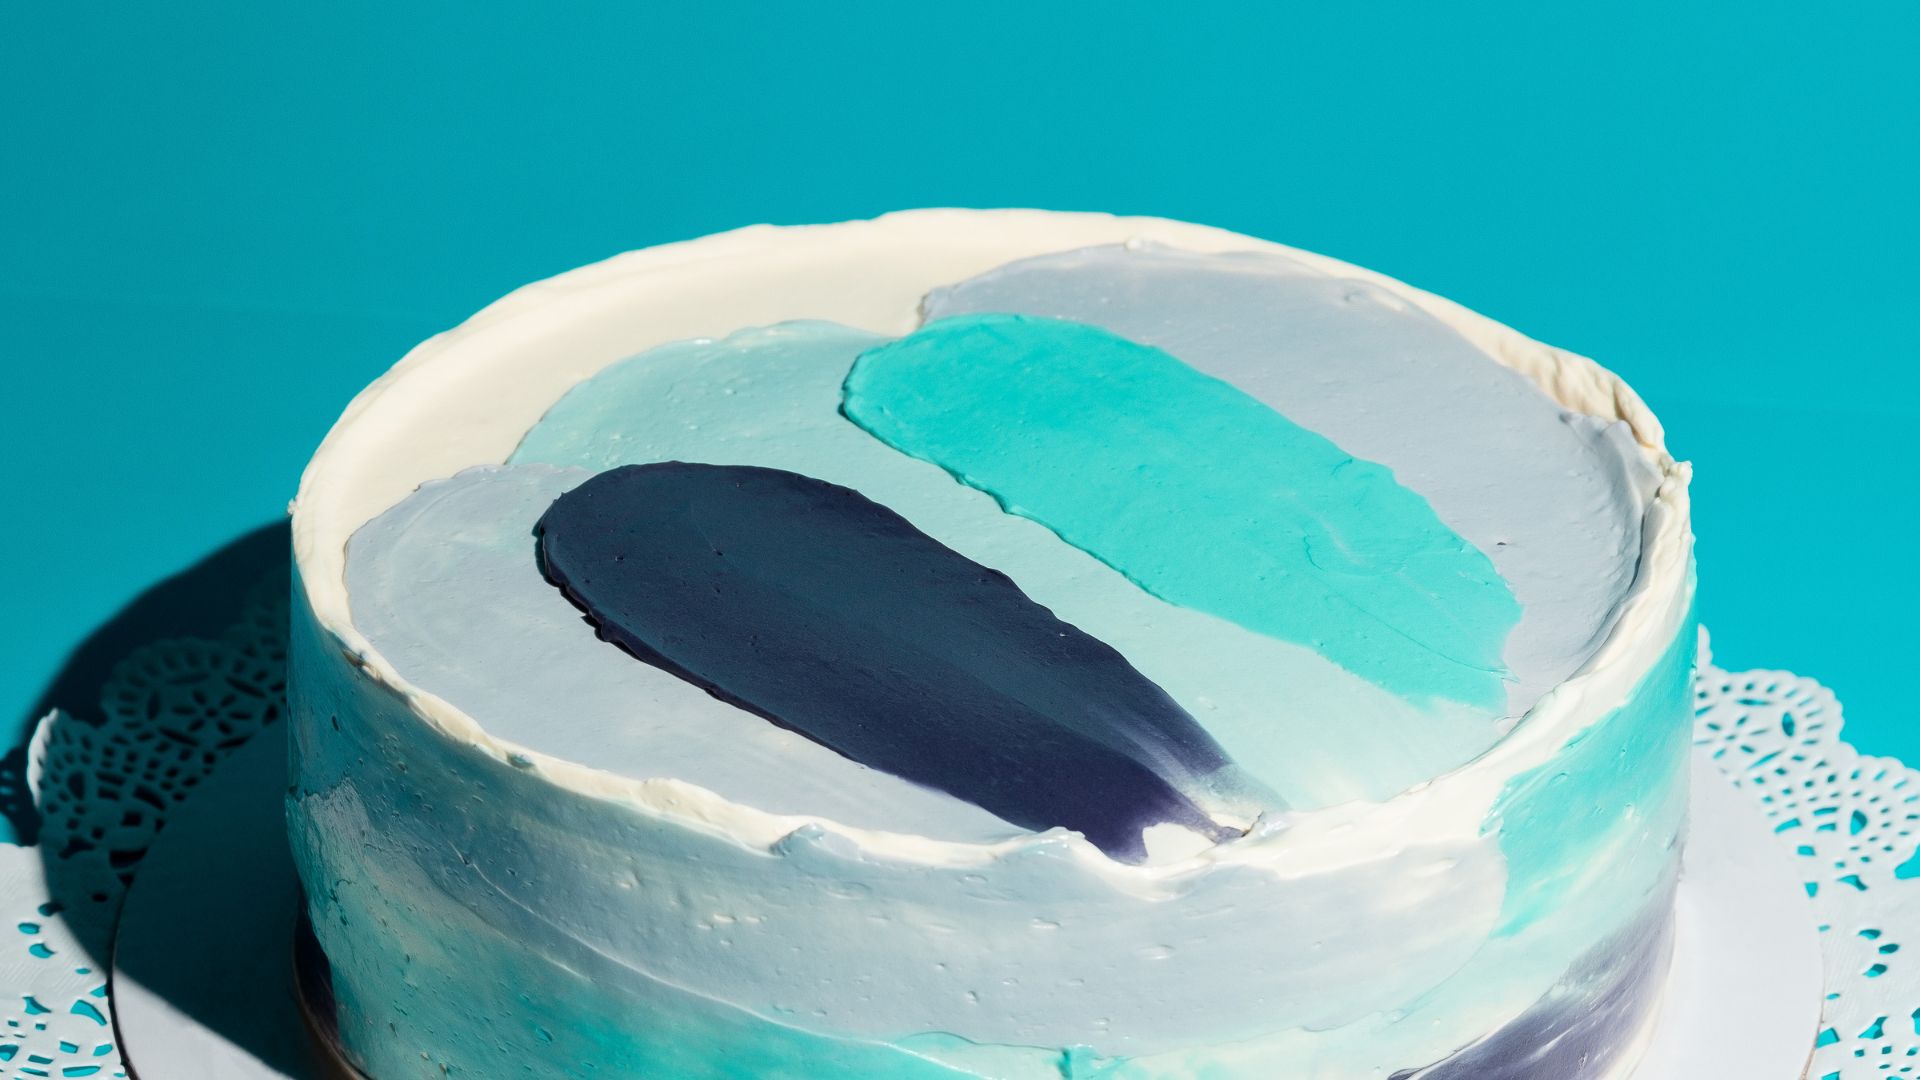
To start with this method, you can divide your white buttercream frosting into at least three bowls. One of these will remain white. The other two can be colored with two different shades of blue gel food coloring.
To start creating a water effect on your cake or cupcake, you’ll first need to cover the entire surface with a layer of white frosting. This layer shouldn’t be very thick. It’s almost like a crumb layer.
Then, leave this layer to harden slightly. It should only take about 10 minutes to start stiffening.
While this crumb layer is hardening, you can place the three frostings into one large bowl. Then, very roughly mix together the colors. You DO NOT want a solid color. It should look marbled. A lot of the white will disappear, so do not overmix this frosting.
Next, you can take your offset spatula (with a rounded tip) and scoop out a dollop of the marbled frosting.
Press it gently against the surface of the cake. Then sweep gently to the side and downwards. As you create this sweeping motion, you’ll see that a big “crashing wave dollop” forms where you started, and ends in a flat “water”.
Keep layering frosting onto the cake like this. Make sure to overlap the waves with each other.
You will notice two things. The first is that you do use a generous amount of frosting for big prominent waves. And the second is that your cake looks more and more like a raging ocean the longer you keep going. At first, it won’t look like much, so keep layering.
Method 2: Piping gel
This method combines two different kinds of frosting. The first is regular white buttercream frosting. And the second is called piping gel. Now, technically it isn’t a frosting, but it is used as one.
The piping gel has a very translucent appearance and looks like actual water. But, it is very thick and pliable, which is why it’s commonly used to create water-like effects.
For this method on how to make frosting look like water, you need two different shades of piping gel, white buttercream frosting, and an offset spatula.
You can color the piping gel yourself at home, or buy pre-colored gel.
To start, crumb coat the cupcake or cake using your white buttercream frosting. Allow it to dry a little. Then, add a thicker layer of white frosting. This time, create a bit of texture by sweeping upwards with your palette knife.
Once the white frosting has hardened a bit again, you can move on to adding the piping gels.
Start with the lighter blue color. Sweep it across the cupcake or cake surface. Again, swoop upwards, lifting some piping gel off the cupcake to create small wave-like textures.
Next, add your darker blue gel and create swirls in the lighter gel. This will create a more realistic water-like effect with a shiny finish.
Creating Different Textures
This in and of itself is a different technique for how to make waves with frosting.
The first way to create different kinds of textures is to use different types and sizes of offset spatulas. There are many different tips available that will change the way the water and waves look.
You can also apply different sweeping motions to change the way the water looks. And, even just using different amounts of frosting can alter the texture of the water.
At the end of the day, the best way to learn how to make frosting look like water is to give it a try and experiment.

Tips And Tricks
- When using food coloring for this technique, always use the gel option. It mixes much better with the frosting, gives a more saturated color, and doesn’t alter the texture of the frosting a lot. Its gel-like consistency also helps create a more flowy water-like frosting.
- Between every couple of layers you add, clean your palette knife to ensure you don’t blend the colors together too much. Remember, you only want a marbled frosting. The waves should show colors of white, blue, and darker blue.
In Conclusion
As you can see, creating a realistic water effect using frosting is surprisingly easy. And, there isn’t a wrong way to do use this tutorial on how to make frosting look like water. The trick is combining different shades of frosting and using the correct tools.
Let us know how your cake came out. And if you have any questions, don’t hesitate to ask us in the comments below.

Lindy Van Schalkwyk is a culinary specialist with a background in Advanced Cooking, Advanced Pâtisserie, Media Communications and Nutrition. She has gained invaluable experience in the culinary industry having worked in some of the top restaurants in Africa in 2016 and 2017. Her expertise in nutrition has enabled her to develop recipes for special dietary needs. In 2018, Lindy began working in the Food Media industry, focusing on recipe development, recipe writing, food writing and food styling.