
Last Updated on February 12, 2023
Can you over-knead bread? Yes, there will be times when you have over-kneaded your dough. That is why you must know how to correct it. Also, you should see the difference between a perfect batch of bread and a flopped one.
Besides, it is vital to learn how to knead bread correctly. Plus, it is best to understand that you may over-knead and under-knead the dough. Always keep in mind that dough tends to flop when over-kneaded or under-kneaded.
In most cases, kneading is the most challenging part of baking bread for beginners. At the same time, it is essential since it makes healthy gluten strands. Bear in mind that gluten helps in developing texture. For this reason, if you knead the dough well, gluten develops appropriately. Not only that but also, the dough will have an elastic-like feel. And it will bounce back when touched.
Can You Over Knead Bread?
Yes, and it is typically easy to over-knead your dough. Therefore, it is best to prevent over-kneading. First off, you have over-kneaded your dough if it has become tough to stretch. Often it occurs when you utilize a food processor or a stand mixer. Keep in mind that over-kneading the dough will undoubtedly be challenging. And most of the time, you will tire yourself out in the process. That is why it would be best to knead by hand. The main reason is to tell when it starts to get hard to knead. And because of that, you can avoid an overworked dough.
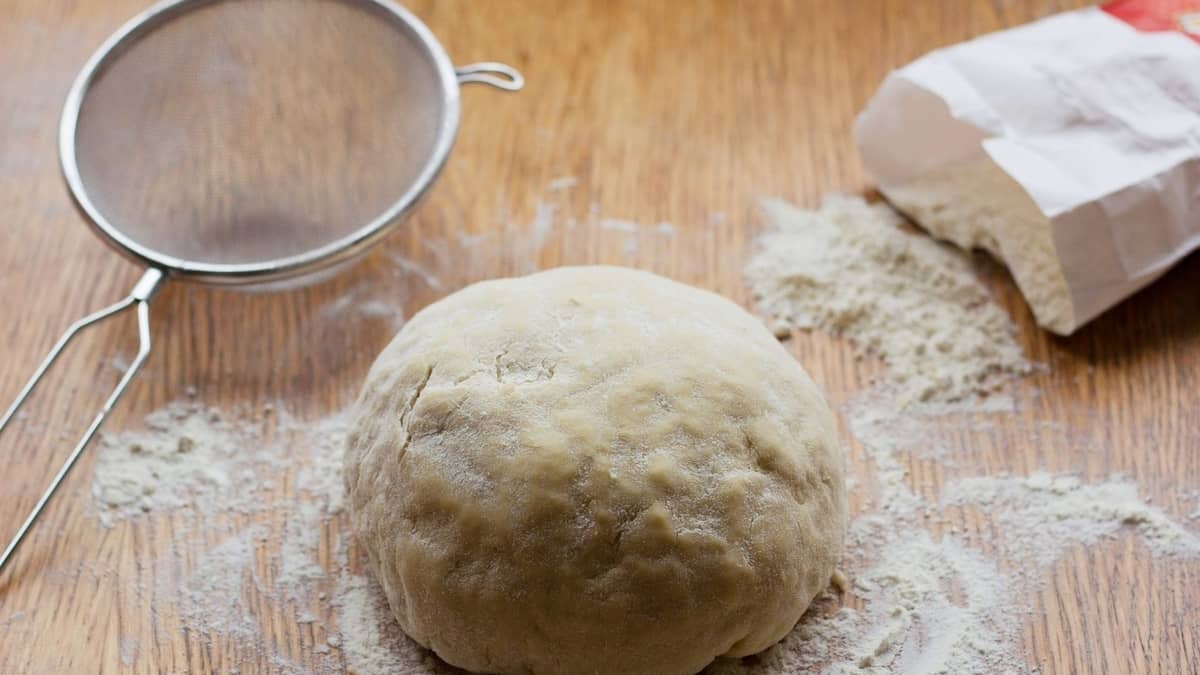
When kneading dough, you must first turn it out. Keep in mind that this is a common phrase in baking. And it means moving the dough from the bowl onto a floured surface. Afterward, make sure to dust some flour on your hands. Then, begin shaping the dough into a ball.
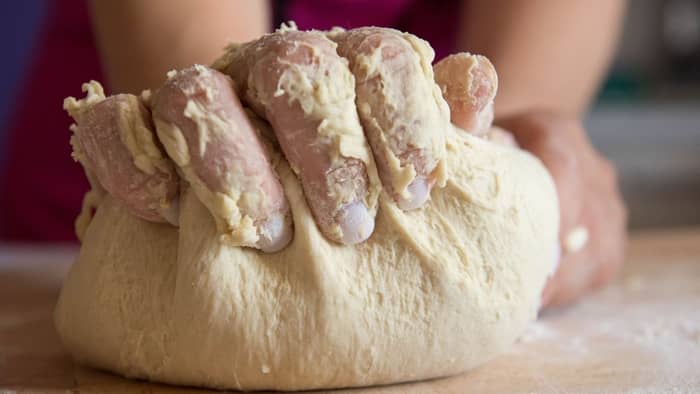
Next, push the bread away from you using your palms. Remember, you need to make a rolling motion. Then, fold your dough over on itself. Do so after every push. In addition to that, you should give it a quarter turn. Also, make sure to repeat. Not only that, but also you should add more flour whenever the dough sticks.
Use the Windowpane Test
You can always do the windowpane test to check if you kneaded the dough well. Remember, your dough should be sufficiently thin so light can pass through it. In addition to that, if you have attained it without any tears, then you have successfully kneaded the dough right. On the other hand, you should continue kneading if the dough breaks easily. With that, make sure to repeat the test in several minutes. In so doing, you can create smooth dough for all kinds of homemade loaves of bread.
What Happens if You Over-Knead the Dough?
For starters, you will see that the inside of an over-kneaded dough is crumbly and dry. In addition to that, the slices will usually fall apart instead of holding their shape.
Also, never bake over-kneaded dough. Consequently, the bread’s outside will be dense and solid if you do so. Likewise, it will feel like a rock instead of soft bread.
Moreover, the bread will not rise much as it bakes. For that reason, you will have a tiny and hard loaf. The reason is that the dough had plenty of gluten that made a solid barrier inside your bread. Because of that, it will trap the gasses released from the yeast. Therefore, it will stop them from pushing your dough upward.
In general, the over-kneaded dough-turned bread will taste the same. However, it will have an unsatisfying mouthfeel because it will be dense, crumbly, and dry.
How to Fix an Over-Kneaded Dough?
If you have over-kneaded the dough, do not lose hope. There are ways you can fix it. For starters, make sure to let your dough sit and rest. With that, be sure you did not touch it for about double the time suggested in a recipe. For instance, the recipe you used states that you let it sit for approximately an hour. Then, you should ensure to let your dough rise for about two hours.
Also, by any chance, you should place your dough in a bowl. Afterward, be sure to cover it. Then, make sure to let it rise overnight in your refrigerator. By doing this, your over-kneaded dough will cool. Thereby, it will delay the yeast to take a whole night to inflate your dough.
Moreover, it will provide the gluten time to relax. Therefore, it will soften it a bit. In addition to that, it will allow the yeast to work its magic. And it will push your dough upward.
Afterward, make sure to shape the dough immediately. With that, do not knead it too much. Keep in mind that you should shape your dough as little as possible. Doing so will prevent the development of more tough gluten strands. In this regard, you must let your dough do its second rise. Remember, you should allow it to rise moderately longer than usual. After that, be sure to bake.
Furthermore, never toss out the bread when removing it from the oven. If you notice that it is still exceedingly tough due to over-kneading, you can always use it to create breadcrumbs or croutons as an alternative.
Learn more about Forgot To Add Salt To Bread Dough
How to Avoid an Over-Kneaded Dough?
Again, the most effective technique to avoid an over-kneaded dough is to knead by hand. Remember, the advantage when kneading by hand is that you get to feel the dough each step of the way. Therefore, you will know if it is beginning to get firm or requires more flour.
Additionally, you will know when it is appropriate to stop kneading the dough. Also, you will prevent the dough from ever becoming too hard. Plus, it is best to know the right time to stop since you do not want to tire your hands.
Furthermore, it would help to read the recipe concerning kneading. And by doing so, you can try to follow the guide correctly. As a result, your kneading time will correspond with the proof and suggested times.
Ultimately, there can be no doubt that practice makes excellent dough. In that regard, the more you practice kneading, the better you will become. Besides that, the less chance you will over-knead the dough.
What Does Under-Kneaded Dough Look Like?
If you’re wondering what under-kneaded dough looks like, there are a few key signs to look out for. If it tears easily and feels quite floppy to the touch, chances are it’s under-kneaded. However, the under-kneaded dough is super easy to fix, as all you need to do is continue kneading until it’s ready. The reason behind kneaded dough tears easily is that the gluten hasn’t become stretchy enough yet.
On the flip side, the over-kneaded dough will also tear quite easily. This is because the gluten has now been overworked and has become tight. The over-kneaded dough will not feel light and soft, it will instead be difficult to work with and dense.
Does Kneading Dough Make it Softer?
Yes. The whole reason we knead dough is to make it stretchy, which in turn, makes it softer. However, if you work the dough too much, it’ll become tough. When you touch your dough, it should spring back when touched.
How to Avoid Over-Mixing Bread Dough
When you knead by hand, it’s very unlikely you’ll over knead the dough, as it can be hard work. However, when you choose to use a mixer, it’s relatively easy to over-mix your dough, where it’ll become tough and dense. If you choose to mix your dough with a mixer, you should check the dough regularly. Feel the texture and decide whether it needs to be mixed for longer.
What Does Kneading Do to Bread?
You may be wondering why we knead bread in the first place. The reason is to make the gluten in the bread stretchy. Once it becomes stretchy, the bread will become soft and have a silky texture.
How to Make Perfectly Kneaded Bread
If you’re looking for a way to make perfectly kneaded bread by hand, then look no further. For this recipe, you’ll need the following ingredients:
- 1 packet of active dry yeast
- 6 1/2 cups of bread flour
- 2 1/4 cups of warm water
- 2 tablespoons of oil
- 3 tablespoons of sugar + 1/2 teaspoon for the yeast
- 1 tablespoon of salt
Now all you need to do is:
- Pour warm water into a bowl, and add the yeast, along with 1/2 teaspoon of sugar. Leave to stand.
- In a separate bowl, add the sugar, half of the flour, and the salt. Add the oil to your rested yeast mixture and then add the bowl to your flour mixture. Keep adding the remainder of the flour; mixing as you go, until you have a dough.
- Lightly flour a surface and then knead your dough. This should take around 10 minutes. It should be soft and silky when kneaded correctly.
- Grease a bowl and leave to prove, covered, for around 2 hours.
- Lightly work the dough and cut it into equal halves. You can then add the dough to two greased pans. Leave for another 2 hours to prove, covered.
- After this time, bake your loaves in a preheated oven, at 375F, for around 30-35 minutes. Remove from oven and leave to cool before slicing and serving. Enjoy!
Conclusion
I hope this post has helped to answer the question: can you over knead bread and give you an idea of how to avoid over kneading your bread? It takes some practice, but you’ll know the signs to look out for in no time! Do you have any tips or tricks when it comes to kneading bread? If so, please feel free to let me know in the comments below. And remember, sharing is caring!
Perfectly Kneaded Bread
Ingredients
- 1 packet active dry yeast
- 6 1/2 cups bread flour
- 2 1/4 cups warm water
- 2 tbsp oil
- 3 tbsp sugar plus 1/2 teaspoon for the yeast
- 1 tbsp salt
Instructions
- Pour warm water into a bowl, and add the yeast, along with 1/2 teaspoon of sugar. Leave to stand.
- In a separate bowl, add the sugar, half of the flour and the salt. Add the oil to your rested yeast mixture and then add the bowl to your flour mixture. Keep adding the remainder of the flour; mixing as you go, until you have a dough.
- Lightly flour a surface and then knead your dough. This should take around 10 minutes. It should be soft and silky when kneaded correctly.
- Grease a bowl and leave to prove, covered, for around 2 hours.
- Lightly work the dough and cut into equal halves. You can then add the dough to two greased pans. Leave for another 2 hours to prove, covered.
- After this time, bake your loaves in a preheated oven, at 375F, for around 30-35 minutes. Remove from oven and leave to cool before slicing and serving. Enjoy!

Zarah is an experienced pastry chef whose creations have delighted countless customers. With a passion for baking, Zarah has developed a unique style that combines classic techniques with modern flavors. Her desserts are consistently crafted with the finest ingredients, and her attention to detail is evident in the stunning and delectable results. Zarah has a wealth of experience in the pastry kitchen, and loves to share her knowledge with others. Whether it is teaching a class or creating a custom cake for a special occasion, Zarah is committed to making sure every customer is satisfied.