Last Updated on January 19, 2023
Sugar cookies and icing are just two things that go perfectly together. This better than store-bought icing for sugar cookies is an absolute must to try. It is flavorful and smooth, making it the perfect addition to your homemade cookies.
Whether for the holidays, birthdays, or any special celebration, this icing is perfect for decorating cookies. It takes no prior baking experience to make, which is great if you are a newbie in the kitchen. You will love not only how it tastes, but also how gorgeous it makes your cookies look.
What You Will Need To Make Better Than Store-Bought Sugar Cookie Icing
To make this sugar cookie icing, you will need:
Ingredients
- 4 cups powdered sugar (about one pound)
- 5 tablespoons warm water
- 3 tablespoons meringue powder
- Food coloring (optional)
Equipment
- Electric mixer
- Large Mixing bowl
- Rubber spatula
- Small spoon
- Piping bag
Step by step instructions
Step one: Beat together all the ingredients
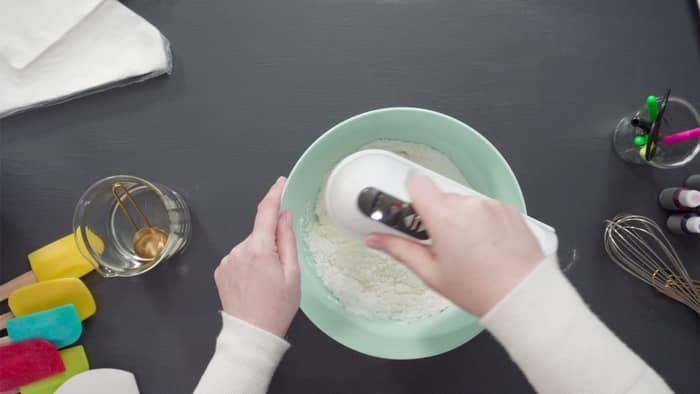
In a large mixing bowl, add the powdered sugar, meringue powder, and water. Beat all these ingredients until stiff peaks form. If you are using a heavy-duty electric mixer, this will take about 7-10 minutes at low speed. If you are using a hand-held mixer, it will take about 10-12 minutes at high speed.
Step two: Check the consistency
After beating the icing mixture, check the consistency of it. If it is too thick, add more water, one teaspoon at a time, until it reaches your desired consistency. If your icing is too thin, add more powdered sugar, one teaspoon at a time, until you reach your desired consistency.

Step three: Achieving stiff consistency icing
If you want your royal icing to be stiff, use one less tablespoon of water. Stiff icing is ideal for piping 3D decorations on your cookies. When using stiff icing, opt for larger piping tips.
Step four: Achieving medium consistency icing
For a medium consistency royal icing, add 1/8 teaspoon of water for every cup of icing. Use a flat object such as an offset spatula or a rubber spatula to create a figure-eight pattern while mixing. Do not overmix or beat too much as this will potentially ruin the consistency.
Medium consistency is ideal for general decorating. You can use a variety of different piping tips for a medium consistency.
Step five: Achieving thin consistency icing
For thin consistency royal icing, add one teaspoon of water per every cup of icing. Use a small spoon or rubber spatula to slowly stir in the water.
To make sure your icing is the right consistency for flooding, you will want to do the 10-second test. Lift some icing out of the bowl with a spatula and let it fall back down. If it completely sinks back into the icing after 10 seconds, it is thin enough for flooding, if not, add some more water.
Thin royal icing is great for flooding, which is where you cover the whole cookie in icing. When it dries, it creates a smooth finish that is great for decorating with thick or medium consistency icing.
Step six: Add food coloring and let it sit
Add in your food coloring to your icing if desired. Mix the icing until just combined, being sure not to over mix.
Let your icing sit in a bowl for 15 minutes to one hour. This will allow the bubbles to naturally rise, allowing your icing to become more smooth.
Step seven: Frost your sugar cookies
Add your icing to a piping bag with a tip of your choice. Then, decorate your cookies with the icing. Allow the icing to set before serving the cookies in order for the designs to last.
The icing can take up to two hours to dry on your cookies. To speed up the process, you can place them in front of the fan.

Tips And Tricks
In order to keep your icing at the proper consistency, make sure all your kitchen utensils are clean. Even a small bit of grease on your utensils can mess up your icing.
Be certain to use just meringue powder in this recipe and not raw egg whites or dried egg whites, as they won’t have the same results. Meringue powder is a substitute for egg whites that consists of cornstarch, dried egg whites, sugar, and citric acid, as well as some stabilizers. It helps stabilize icing as well as other baked goods.
Be sure not to overbeat or vigorously stir your icing, as this will create too many air bubbles. The air bubbles will prevent it from having a smooth finish.
To prevent your royal icing from drying out when baking, place a warm, damp towel over the bowl. The homemade version will likely dry out faster than premade cookie icing from the store.
Store any leftover icing in an airtight container at room temperature for up to two weeks. Avoid storing it in a warm, humid environment that could cause it to become runny. When ready to use it again, give it a quick re-whip at low speed with the electric mixer to get it to the right consistency.
Avoid freezing your royal icing. Placing it in the freezer will mess up the consistency and make it difficult to work with.
Servings And Preparation Time
|
Bake Time |
Preparation Time |
Servings |
| 0 minutes | 20 minutes |
3 cups |
Wilton Sugar Cookie Decorating Kit, 15-Piece –
Easy And Delicious Homemade Version Of Store-Bought Sugar Cookie Icing
This better than store-bought icing for sugar cookies is easy to make and will taste great with your favorite homemade sugar cookies. It is great for decorating cookies for Christmas, Halloween, Easter, or any special event. This beginner-friendly recipe is one you want to keep on hand for decorating.
You can easily make it any color that you like and also adjust the consistency to meet your decorating needs. You can use a piping bag or offset spatula to decorate with it and make many different designs and patterns.
Did you enjoy this recipe on how to make better than store-bought icing for sugar cookies? If so, please share this recipe with your friends and family who enjoy cookie decorating as well.
Read more about How Long Do Sugar Cookies Last?
Better Than Store-Bought Icing For Sugar Cookies
Equipment
- Large mixing bowl
- Small spoon
- Piping Bag
Ingredients
- 4 cups powdered sugar, about one pound
- 5 tablespoons warm water
- 3 tablespoons meringue powder
- Food coloring (optional)
Instructions
- Beat together all the ingredients. In a large mixing bowl, add the powdered sugar, meringue powder, and water. Beat all these ingredients until stiff peaks form. If you are using a heavy-duty electric mixer, this will take about 7-10 minutes at low speed. If you are using a hand-held mixer, it will take about 10-12 minutes at high speed.4 cups powdered sugar, about one pound, 3 tablespoons meringue powder, 5 tablespoons warm water
- Check the consistency. After beating the icing mixture, check the consistency of it. If it is too thick, add more water, one teaspoon at a time, until it reaches your desired consistency. If your icing is too thin, add more powdered sugar, one teaspoon at a time, until you reach your desired consistency.
- Achieving stiff consistency icing. If you want your royal icing to be stiff, use one less tablespoon of water. Stiff icing is ideal for piping 3D decorations on your cookies. When using stiff icing, opt for larger piping tips.
- Achieving medium consistency icing.For a medium consistency royal icing, add 1/8 teaspoon of water for every cup of icing. Use a flat object such as an offset spatula or a rubber spatula to create a figure-eight pattern while mixing. Do not overmix or beat too much as this will potentially ruin the consistency.Medium consistency is ideal for general decorating. You can use a variety of different piping tips for a medium consistency.
- Achieving thin consistency icing. For thin consistency royal icing, add one teaspoon of water per every cup of icing. Use a small spoon or rubber spatula to slowly stir in the water.To make sure your icing is the right consistency for flooding, you will want to do the 10-second test. Lift some icing out of the bowl with a spatula and let it fall back down. If it completely sinks back into the icing after 10 seconds, it is thin enough for flooding, if not, add some more water.Thin royal icing is great for flooding, which is where you cover the whole cookie in icing. When it dries, it creates a smooth finish that is great for decorating with thick or medium consistency icing.5 tablespoons warm water
- Add food coloring and let it sit.Add in your food coloring to your icing if desired. Mix the icing until just combined, being sure not to over mix.Let your icing sit in a bowl for 15 minutes to one hour. This will allow the bubbles to naturally rise, allowing your icing to become more smooth.Food coloring (optional)
- Frost your sugar cookies.Add your icing to a piping bag with a tip of your choice. Then, decorate your cookies with the icing. Allow the icing to set before serving the cookies in order for the designs to last.The icing can take up to two hours to dry on your cookies. To speed up the process, you can place them in front of the fan.

Ever since she was a young girl, Anna has been a lover of desserts. As an adult, she enjoys
baking a variety of desserts from cakes, cookies, brownies, bread, and more from scratch. She
enjoys sharing her passion for baking with others who also have a sweet tooth. From properly
measuring ingredients to making sure they are the correct temperature, Anna knows the
importance small details can make in baking. She wants to share her experience with others in
hopes they can make the most delicious baked goods. When she’s not busy blogging, Anna
enjoys trying new recipes in the kitchen.


