Last Updated on March 27, 2022
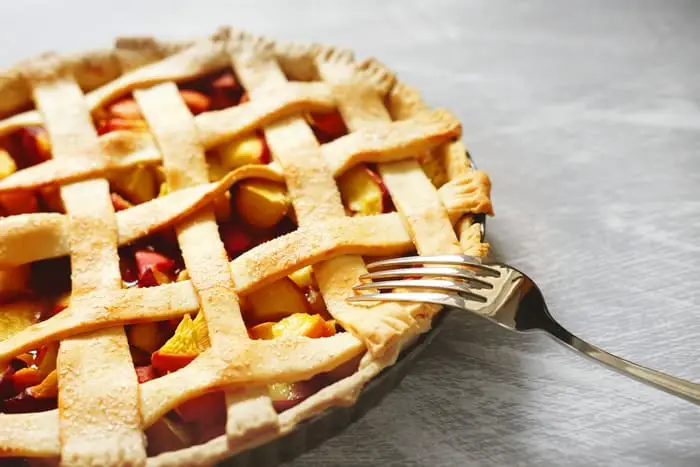
Peaches are one of the most loved fruits thanks to their sweet and juicy flavor. They are used to make many delicious desserts such as peach pie; however, it’s hard to find fresh peaches year-round. This amazing peach pie with canned peaches is sure to be a crowd-pleaser.
Peach pie is an American classic. This peach pie recipe is not only delicious, but it is also easy to make. It’s a great dessert to share with your family at any time.
Using Peach Pie with Canned Peaches
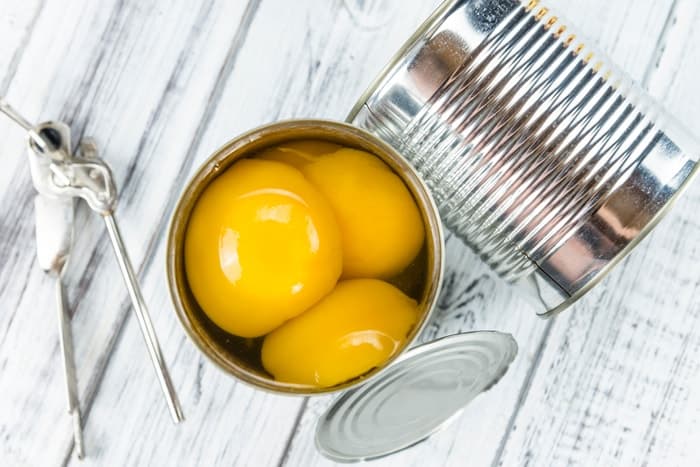
Though many people prefer to use fresh peaches, canned peaches can be a great option for making desserts. Most canned peaches can last for up to two years unopened, whereas fresh peaches normally last around four days. Using canned peaches gives you the ability to make peach pie several months after you bought the canned peaches.
When using canned peaches, many recipes will call for you to drain the peaches first. This is because leaving the juices in will lead to too much liquid which can cause soggy desserts. The peaches will maintain moisture from sitting in the juice, so you will still get a juicy peach dessert.
What You Will Need to Make This Peach Pie with Canned Peaches
Ingredients
To make this peach pie with canned peaches recipe, you will need:
- 1 cup sugar, divided
- 2 tablespoons flour, divided
- 1 can sliced peaches, drained (29 ounces)
- 2 unbaked pie crusts, 9 inches
- A sprinkling of cinnamon, if desired
Equipment
To prepare this peach pie, you will need a:
- 9-inch pie pan (metal or glass)
- Knife
- Mesh Strainer or colander
Step By Step Instructions
Step One: Preheat the Oven and Drain the Canned Peaches
Preheat the oven to 425 degrees Fahrenheit. Using a mesh strainer or colander, drain the excess juice from the canned peaches.
Step Two: Line the Pie Pan with the Pie Crust
Take one of the unbaked pie crusts and gently lay it in the pie pan.
Step Three: Add Sugar and Flour
Place ½ cup of sugar and one tablespoon of flour on the pie crust. Gently mix the sugar and flour together.
Step Four: Add the Peaches and Remaining Flour and Sugar
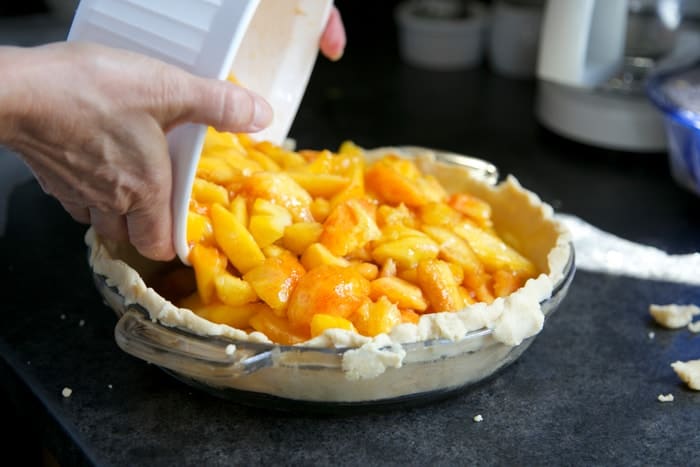
Add the peaches to the pie. Top with the remaining sugar and flour, gently mixing it together. Add a sprinkling of cinnamon if desired.
Step Five: Add the Second Crust
Add the second crust to the top of the pie and seal. Use your fingers to pinch the crusts together until it has fully sealed. Use a knife to cut slits in the top.
Step Six: Bake the Pie
Bake the pie for 10 minutes at 425 degrees Fahrenheit. Reduce the heat to 350 degrees Fahrenheit and bake for another 30 minutes. Allow the pie to cool for at least an hour before serving.
This peach pie is a simple yet delicious treat. Top with ice cream or whipped cream if desired to take this pie to the next level. Everyone is sure to love this classic dish.
Peach Pie with Canned Peaches: Tips and Tricks
When making a pie, it is important to handle your crust as little as possible. This will prevent the crust from developing a tough texture. It is also advised to use your pie crust while it is still cold to achieve a tasty, flaky crust after baking.
Either a metal or glass pie pan will work for making this pie. Some people prefer metal because it conducts heat better and some people prefer glass because it allows for a slow, consistent bake, that allows you to see the crust. Both will work fine, so you can use whatever one your preference is.
Draining the peaches is a vital step in this pie recipe. Though the juice keeps the peaches fresh when canned, if you pour the can of peaches right into the pie with all the juice, you will have a soggy bottom in your pie.
If any of the peaches are bruised or squishy, it is best to throw them out. Using defective peaches will affect the texture and taste of the pie.
Slitting your pie crust is another essential step. Slitting the pie crust provides the pie ventilation and allows any steam to escape, which will prevent collapsing in a pie. Add a few slits, approximately one to two inches long, to provide the pie with proper ventilation.
If you want your crust to have a nice finish on top you can cover it with a layer of egg wash and sprinkle it with sugar and cinnamon. Not only will this give the crust a lovely looking finish, but it will also taste great.
It is recommended to bake your pie on the lowest rack in the oven. This will allow your pie to thoroughly bake through, avoiding a soggy bottom. Baking pies on the lowest rack also helps prevent the edges from getting too dark.
You want to allow your pie to cool for at least an hour, ideally two, before serving. This will allow your filling to firm up, preventing it from going everywhere when you cut it open.
Peach pie can be stored covered at room temperature for up to two days. It can be stored in the refrigerator for up to five days covered in plastic wrap or aluminum foil. Peach pie can be frozen for up to four months tightly wrapped in aluminum foil.
Amazing Peach Pie with Canned Peaches
Equipment
- 9-inch pie pan (metal or glass)
- Knife
- Mesh Strainer or colander
Ingredients
Instructions
- Preheat the Oven and Drain the Canned Peaches - Preheat the oven to 425 degrees Fahrenheit. Using a mesh strainer or colander, drain the excess juice from the canned peaches.
- Line the Pie Pan with the Pie Crust - Take one of the unbaked pie crusts and gently lay it in the pie pan.
- Add Sugar and Flour - Place ½ cup of sugar and one tablespoon of flour on the pie crust. Gently mix the sugar and flour together.
- Add the Peaches and Remaining Flour and Sugar - Add the peaches to the pie. Top with the remaining sugar and flour, gently mixing it together. Add a sprinkling of cinnamon if desired.
- Add the Second Crust - Add the second crust to the top of the pie and seal. Use your fingers to pinch the crusts together until it has fully sealed. Use a knife to cut slits in the top.
- Bake the Pie - Bake the pie for 10 minutes at 425 degrees Fahrenheit. Reduce the heat to 350 degrees Fahrenheit and bake for another 30 minutes. Allow the pie to cool for at least an hour before serving.
- This peach pie is a simple yet delicious treat. Top with ice cream or whipped cream if desired to take this pie to the next level. Everyone is sure to love this classic dish.
Notes
- When making a pie, it is important to handle your crust as little as possible. This will prevent the crust from developing a tough texture. It is also advised to use your pie crust while it is still cold to achieve a tasty, flaky crust after baking.
- Either a metal or glass pie pan will work for making this pie. Some people prefer metal because it conducts heat better and some people prefer glass because it allows for a slow, consistent bake, that allows you to see the crust. Both will work fine, so you can use whatever one your preference is.
- Draining the peaches is a vital step in this pie recipe. Though the juice keeps the peaches fresh when canned, if you pour the can of peaches right into the pie with all the juice, you will have a soggy bottom in your pie.
- If any of the peaches are bruised or squishy, it is best to throw them out. Using defective peaches will affect the texture and taste of the pie.
- Slitting your pie crust is another essential step. Slitting the pie crust provides the pie ventilation and allows any steam to escape, which will prevent collapsing in a pie. Add a few slits, approximately one to two inches long, to provide the pie with proper ventilation.
- If you want your crust to have a nice finish on top you can cover it with a layer of egg wash and sprinkle it with sugar and cinnamon. Not only will this give the crust a lovely looking finish, but it will also taste great.
- It is recommended to bake your pie on the lowest rack in the oven. This will allow your pie to thoroughly bake through, avoiding a soggy bottom. Baking pies on the lowest rack also helps prevent the edges from getting too dark.
- You want to allow your pie to cool for at least an hour, ideally two, before serving. This will allow your filling to firm up, preventing it from going everywhere when you cut it open.
- Peach pie can be stored covered at room temperature for up to two days. It can be stored in the refrigerator for up to five days covered in plastic wrap or aluminum foil. Peach pie can be frozen for up to four months tightly wrapped in aluminum foil.
The Perfect Peach Pie
Peaches are one of the most loved fruits thanks to their sweet and juicy flavor. It’s hard to beat the taste of a freshly picked peach in the summertime; however, canned peaches are a great alternative that is available all year. Canned peaches are a tasty and easy choice for making peach pie.
Not only this peach pie is super easy to make, but it also tastes delicious. Enjoy it by itself or top it with some vanilla ice cream or whipped cream. If you tried this peach pie recipe, please share your experience making it.
Please comment if you enjoyed this article or have any remarks regarding this recipe!

Karen is a passionate pastry chef who loves to create delicious baked goods. She has been in the culinary arts for over 10 years, honing her skills and perfecting her craft. Karen is known for her creativity and attention to detail, creating unique desserts that bring a smile to everyone’s face. She is always looking for ways to challenge herself and come up with new recipes that are both tasty and visually appealing. Karen loves to experiment with different flavors and textures, and she is committed to providing the highest quality of products to her customers.

