
Last Updated on February 4, 2023
How to make a chocolate geode? Rock candy geodes, geode candy, and candy geodes are becoming more popular in baking. It is mainly for cakes. In addition to that, it can be for cupcakes and even cookies. Easter Chocolate geode is also becoming a trend.
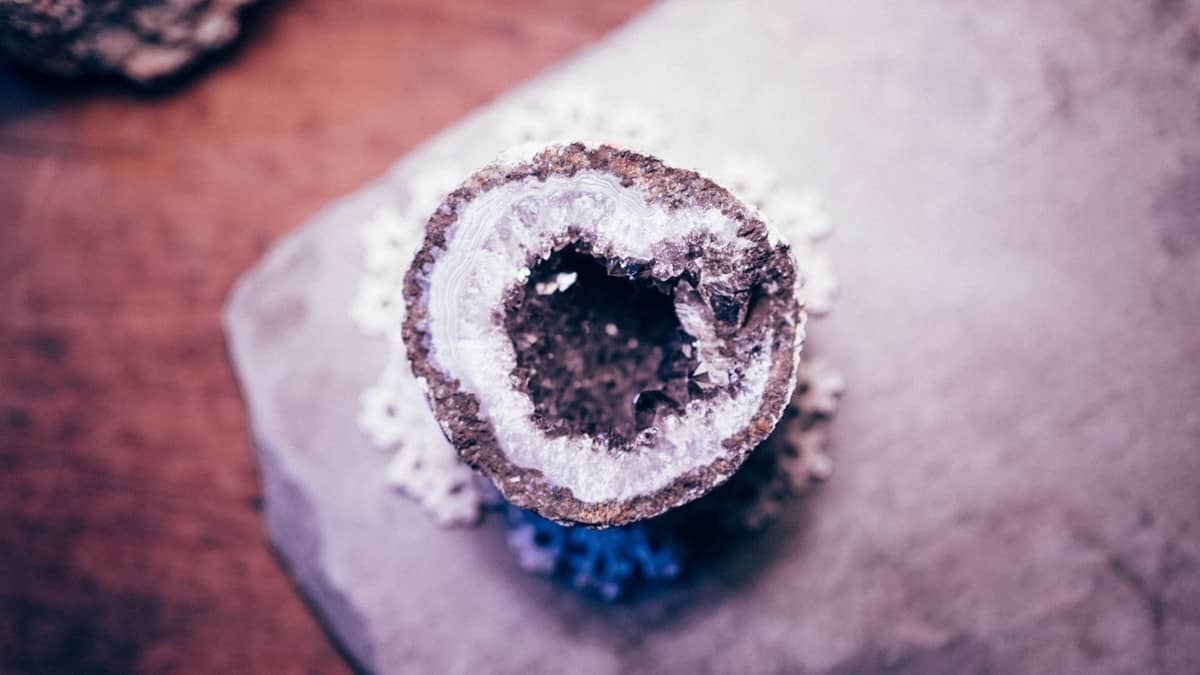
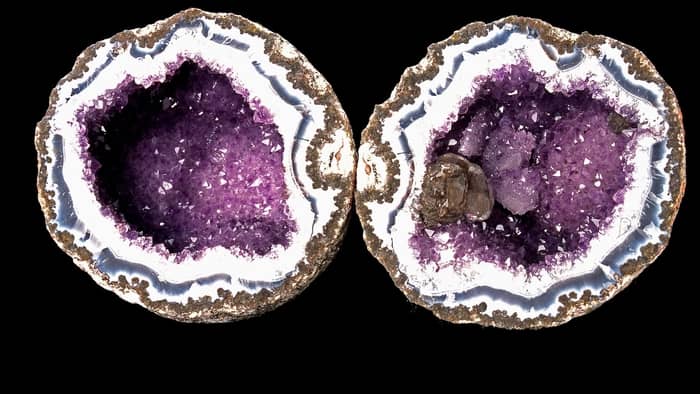
But what are geodes? Geodes are small cavities in rocks with crystals or mineral matter. They form inside the holes where there are hollow spaces of soil. When liquid minerals enter the cavities, they evaporate. In addition to that, they form a hardened exterior shell called geodes. They are beautiful to look at; that is why it is no wonder they are perfect for cakes and pastries.
What You Will Need: Making A Chocolate Geode
Ingredients
- Five bags of chocolate morsels
- 4 cups of sugar
- 2 cups of water
- 5-6 drops of blue food coloring
- 1 tbsp of mint extract
- One container of white fondant
Equipment
- Giant egg mold
- Serrated knife
- Rubber Mallet
- Tin Foil
- Parchment paper
- Cutting board
- Large saucepan or large pot
- Rolling pin
- Parchment paper
Servings and Preparation Time
Preparation Time: 24 hours
Total Time: 24 hours
Yields: 1 serving
Step-by-Step Instructions
Step 1
Before anything else, pour your sugar and water into a large saucepan. Afterward, bring sugar and water to a boil. Be sure to stir constantly. Also, when your syrup is boiling, lower the heat. Then, add the food coloring and mint extract.
Step 2
After that, roll your fondant 0.3 cm thick. Then, make sure to roll it out on parchment paper to minimize sticking. Afterward, cut it into a circular shape of the same size as your egg mold’s interior. Also, be sure to grease your egg molds using a non-stick cooking spray. Next, set them aside.
Step 3
Then, melt one bag of your chocolate morsels. And be sure to fill your egg molds. Also, place your cut fondant inside the molds, pressing it inwards and then outwards. Afterward, pour your syrup about 3/4 inch high inside your egg molds. After that, cover your egg mold with tin foil. And do not forget to allow it to rest overnight. Likewise, you can let it rest even longer if desired. In addition to that, you can keep the remaining sugar syrup. And set it aside for later.
Step 4
Next, you will begin to notice that crystals will form after a few days. Also, pour the excess syrup from your egg mold. Then, remove your edible geode from the egg mold.
Step 5
Afterward, you may trim and cut off extra chocolate and fondant from your edible geode to attach both sides. Also, you can melt another bag of chocolate. Then, spread the chocolate on one side of your geode to connect both. In addition, pour more syrup on one side before attaching both sides. Also, coat your attached geode with more chocolate.
Step 6
Then, when your chocolate geode seals, rotate it every other day for about 3 to 6 months. Also, add more chocolate layers if you see leakage.
Step 7
Finally, when opening your geode, be cautious as it is hard as the real geode crystals.
What You Will Need: Hard Shells
Ingredients
- 1 lb of marshmallows
- 1 lb of powdered sugar
- Shortening
- Gum-tex powder
- Black food coloring
- Peppermint extract (flavoring)
Equipment
- Silicone cake pop molds
- Tinfoil
- Candy thermometer
- Digital scale
Servings and Preparation Time
Preparation Time: 6 minutes
Cooking time: 20 minutes
Total Time: 26 minutes
Yields: 12 servings
Step-by-Step Instructions
Step 1
First and foremost, melt your marshmallows in the microwave. Then, microwave your marshmallows on high heat for about a minute and twenty seconds. After that, make sure to take it out. And be sure to stir the mixture every 15 seconds.
Step 2
Then, add your powdered sugar to the marshmallow mixture. And ensure to stir until well combined and cool to the touch.
Polycarbonate Easter Eggs Chocolate Mold Ostrich Egg Shape Candy Mould 14cm (5.5inch) Long

Step 3
Afterward, dust your work surface with sugar. And be sure to coat your hands with a shortening. Then, start kneading your sugar dough.
Step 4
When your dough is flexible, sprinkle a bit of Gum-tex on top. After that, knead again till it incorporates well.
Step 5
Next, divide your gum paste into two portions and add your flavoring. Also, set the other half aside and add food coloring to the other half. You can mix water with black food coloring. Doing so achieves a grayish hue resembling a real rock. Then, allow the halves to set for about two hours.
Step 6
Then, roll out the white and colored gum paste after two hours. Also, slightly wet your colored gum paste. Then, stick it to your white gum paste. As a result, the white gum paste will become the inner lining of your geode.
Step 7
Afterward, roll and cut your gum paste according to the size of your molds. Then, line your molds with foil to remove them easier later.
Step 8
Finally, press your gum paste into your mold. Then, allow it to harden in a warm and dry area for about 24 hours. Also, ensure that the white part is the inner layer of your mold. In addition to that, the colored part is the exterior of your mold.
What You Will Need: Crystals
Ingredients
- 1/2 cup of water
- 2 cups of granulated sugar
- Food coloring of your choice
- Raspberry flavoring extract
Equipment
- Silicone cake pop molds
- Saucepan
- Tinfoil
- Candy thermometer
Step-by-Step Instructions
Step 1
First, boil together water and sugar in a saucepan over medium-high heat. Then, bring your sugar mixture to a boil until it reaches 237 degrees Fahrenheit. Also, measure the temperature using a candy thermometer.
Step 2
Afterward, take your saucepan from the heat. After that, add your flavoring and food coloring. Also, make sure to allow the mixture to cool for a while.
Step 3
Next, place your molds with the gum paste in foil. Also, ensure the foil size can cover each mold later.
Step 4
After that, pour your cooled syrup into your gum paste shells. Then, carefully wrap your foil around the mold. Also, fold it to secure the gum paste shells and syrup.
Step 5
Then, place your wrapped gum paste and syrup unbothered in a warm place for a week or more. Remember, this period is enough for your crystal to grow; however, you may leave it longer if you like more formation of crystals.
Step 6
Next, remove or unwrap your molds. Afterward, turn them upside down to remove and drain the excess liquid. Also, gently release each of the shells. Not only that but do not disturb them for a couple of days to dry.
Step 7
After drying, you and your loved ones are ready to enjoy the geodes.
Giant Chocolate Geode Cake Recipe
You may be wondering how to make a giant chocolate geode cake. If this is the case, then look no further! For this recipe, you’ll need the following ingredients:
For the cake:
- 3 cups of all-purpose flour
- 3 cups of white granulated sugar
- 2 1/2 teaspoons of baking powder
- 1 teaspoon of salt
- 1 cup of softened butter
- 1 cup of egg whites
- 1 1/2 cups of buttermilk
- 2 tablespoons of vegetable oil
- 2 teaspoons of vanilla extract
- 1/2 cup of cocoa powder
- few drops of purple gel food coloring, if desired
For the frosting:
- 2 cups of softened butter
- 1 tablespoon of vanilla extract
- 1/2 teaspoon of fine salt
- 7 cups of confectioners’ sugar
- 3 tablespoons of heavy cream
- few drops of black food coloring
Additional equipment:
- clear extract (any flavor)
- paintbrush
- rock candy
- purple gel food coloring
Now all you need to do is:
- Gather all of the ingredients you need for this recipe and preheat your oven to 350F. You’ll also need to grease and line 4 6″ cake pans.
- Grab a bowl and add the following ingredients: flour, sugar, baking powder, and salt. Mix well.
- Slowly add the butter to the bowl, mixing as you go. Once the butter has fully incorporated, you can move to the next step.
- Add in 1/2 of the egg whites, and 1/2 of the buttermilk. Then add the other 1/2 of the egg whites and the remainder of the buttermilk.
- Once fully mixed, add the vanilla extract, as well as the oil. If you want to color your cake, add the food coloring at this point; and ensure it’s mixed through the batter evenly.
- Pour the batter into your prepared pans and place them in the center of your preheated oven. Bake for around 34-36 minutes, or until a toothpick in the center comes out clean.
- Remove from the oven and leave the cakes to completely cool before moving to the next step.
- Use a knife to remove the domed section of each layer, so that they’re all level with one another.
- For the frosting, add your butter to a stand mixer and beat for around a minute, then add the vanilla extract.
- Gradually add your confectioners’ sugar; mixing as you go. Then add your heavy cream. Mix until the frosting reaches the consistency you desire. If your frosting appears too thin, add a small amount of confectioners’ sugar. Likewise, if your frosting appears too thick, add a splash of heavy cream.
- Add a blob of frosting to a cake board, and stick your first layer down. Then stack your layers, ensuring your frost each layer, before adding the next. Then add a thin layer of frosting around the sides of the cake and smooth it out; this is called a crumb coat. Chill for around 20 minutes.
- From one part of the cake, remove a shallow hole. It can be larger and any shape you want, I just prefer a smaller hole removed. With the section, you removed, coat it with buttercream.
- With the rest of your buttercream, add your black gel food coloring and frost the entirety of the cake; bar the section you just covered in white/yellow buttercream.
- With your clear pieces of rock candy, place them into the buttercream, until completely covered.
- In a small bowl, add one tablespoon of clear extract, along with your purple gel food coloring. Mix well. Once mixed, paint your rock candy. You can use any color you want; it doesn’t have to be purple.
- Leave for around 15 minutes. Your cake is now ready. Slice, serve, and enjoy!
Chocolate Geode for Sale
Many small businesses sell chocolate geodes, and places like Etsy are the best in terms of variety. One of my go-to companies for chocolate geode is Candy Rocks – the Edible Crystal Co. They launched their company when people thought their chocolate geodes were actually real geodes!
They come in a range of colors and styles, including quartz, topaz, amethyst, emerald, and ruby. They are made from sugar crystals, chocolate, and fondant; and start at around £10.
Conclusion
I hope this post has helped you to become more familiar with how to make chocolate geodes and where to buy them. Do you have any tips or tricks when it comes to making chocolate geode? If so, please feel free to let me know in the comments below. Sharing is caring!
Chocolate Geode
Equipment
- Giant egg mold
- Serrated knife
- Rubber Mallet
- Tin Foil
- Parchment paper
- Cutting board
- Large saucepan or large pot
- Rolling Pin
- Parchment paper
Ingredients
- Five bags of chocolate morsels
- 4 cups of sugar
- 2 cups of water
- 5-6 drops of blue food coloring
- 1 tbsp of mint extract
- One container of white fondant
Instructions
- Before anything else, pour your sugar and water into a large saucepan. Afterward, bring sugar and water to a boil. Be sure to stir constantly. Also, when your syrup is boiling, lower the heat. Then, add the food coloring and mint extract.4 cups of sugar, 2 cups of water, 5-6 drops of blue food coloring, 1 tbsp of mint extract
- After that, roll your fondant 0.3 cm thick. Then, make sure to roll it out on parchment paper to minimize sticking. Afterward, cut it into a circular shape with the same size as your egg mold's interior. Also, be sure to grease your egg molds using a non-stick cooking spray. Next, set them aside.One container of white fondant
- Then, melt one bag of your chocolate morsels. And be sure to fill your egg molds. Also, place your cut fondant inside the molds, pressing it inwards then outwards. Afterward, pour your syrup about 3/4 inch high inside your egg molds. After that, cover your egg mold with tin foil. And do not forget to allow it to rest overnight. Likewise, you can let it rest even longer if desired. In addition to that, you can keep the remaining sugar syrup. And set it aside for later.Five bags of chocolate morsels
- Next, you will begin to notice that crystals will form after a few days. Also, pour the excess syrup from your egg mold. Then, remove your edible geode from the egg mold.
- Afterward, you may trim and cut off extra chocolate and fondant from your edible geode to attach both sides. Also, you can melt another bag of chocolate. Then, spread the chocolate on one side of your geode to connect both. In addition, pour more syrup on one side before attaching both sides. Also, coat your attached geode with more chocolate.
- Then, when your chocolate geode seals, rotate it every other day for about 3 to 6 months. Also, add more chocolate layers if you see leakage.
- Finally, when opening your geode, be cautious as it is hard as the real geode crystals.

Zarah is an experienced pastry chef whose creations have delighted countless customers. With a passion for baking, Zarah has developed a unique style that combines classic techniques with modern flavors. Her desserts are consistently crafted with the finest ingredients, and her attention to detail is evident in the stunning and delectable results. Zarah has a wealth of experience in the pastry kitchen, and loves to share her knowledge with others. Whether it is teaching a class or creating a custom cake for a special occasion, Zarah is committed to making sure every customer is satisfied.