
Last Updated on January 21, 2023
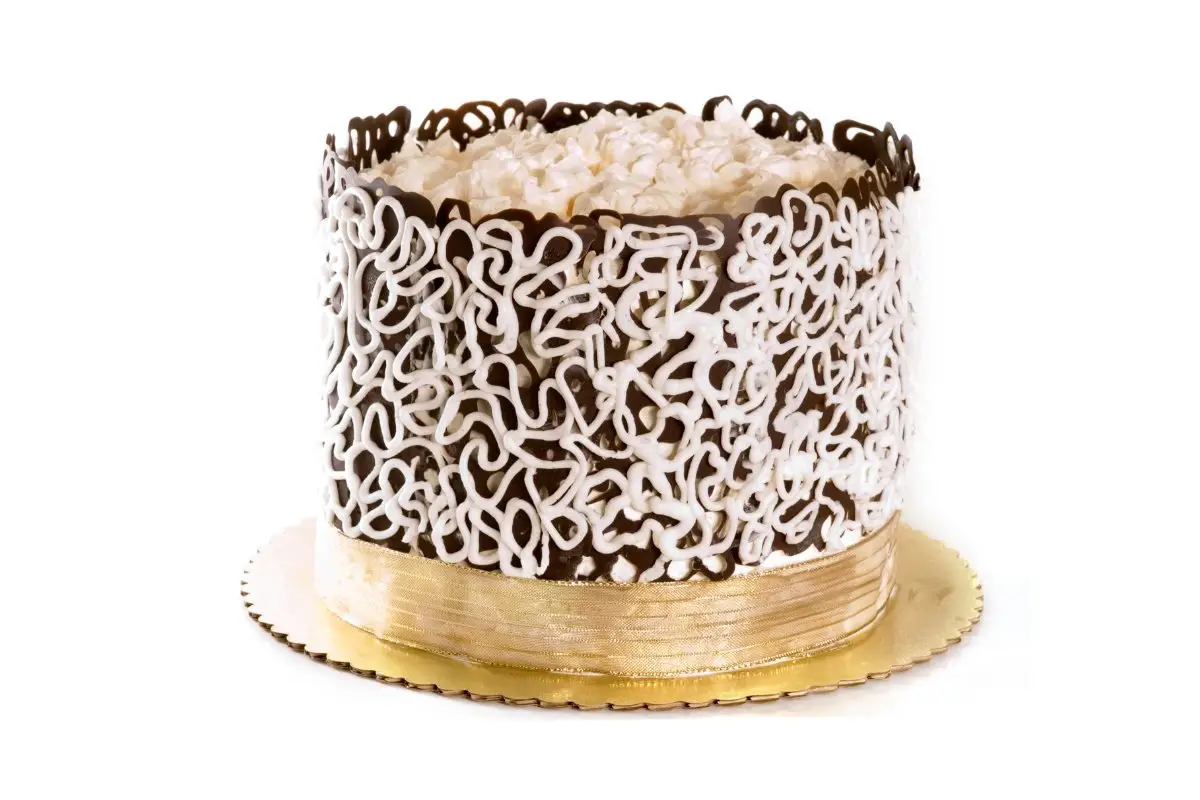
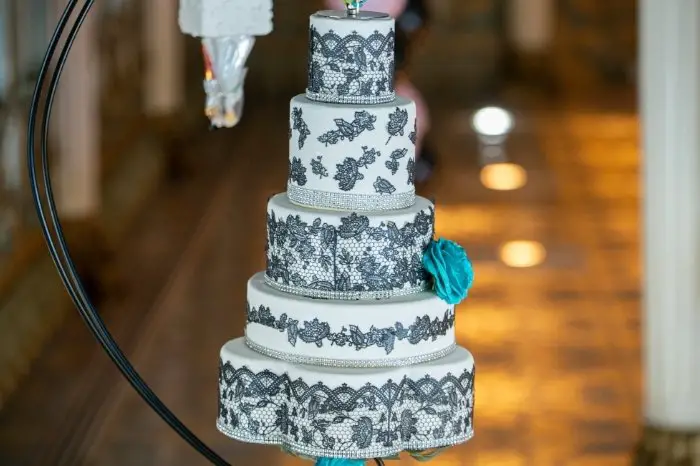
Have you ever seen gorgeous cakes embellished with lace of sugar? And you might be wondering if you can make a homemade sugar veil recipe. Well, sure you can. You can refer to a beautifully intricate lace of sugar as a sugar lace. But, of course, you can also call it sugar lace.
Moreover, you can buy a pack of sugar lace in stores. However, the recipe that I will share with you is vegan. In addition to that, making this is not as hard as you think. But, you will surely need patience and practice to perfect this recipe. And if you have perfected this recipe, you can surely impress any guest. Let’s take a look at a homemade sugar veil recipe.
What You Will Need: Homemade Sugar Veil Recipe
Ingredients
- ½ cup of boiling water
- 1 tbsp of tylose powder
- 1 tbsp of powdered sugar
- 2 tbsp of cornstarch
- ½ tsp of light corn syrup
- ½ tsp of clear vanilla (or any clear flavor of choice)
- White food coloring
- Additional colored food coloring (optional)
Equipment
- Small bowl
- Small offset spatula
- Measuring spoons
- Measuring cups
- Rubber spatula (small)
- Silicone mat
- Lace mat
- Clear piping gel or edible adhesive
- Small paintbrush
- Bench scraper
- Baking sheet
Anyana silicone baking lace Mat fondant impression Texture lace decorating

Step by Step: Homemade Sugar Veil Recipe
Step 1
First and foremost, set your oven to 170 degrees Fahrenheit. Then, prepare a dry and clean lace mat that is ready to fill.
Step 2
After that, pour 1/4 cup of boiling water. Then, add the tylose powder to a small bowl. And stir it using a fork or a small rubber spatula to combine.
Step 3
Afterward, let the mixture sit for about 5 to 7 minutes to become translucent.
Step 4
Then, add the powdered sugar and cornstarch to the mixture and mix well until it combines well.
Step 5
Next, add the corn syrup, vanilla, and white food coloring. With that, make sure to stir every ingredient until all is incorporated completely. In addition to that, you can add white coloring if necessary.
Step 6
After that, add one teaspoon of hot water at a time, mixing well after each addition. Remember, you should achieve a thick but spreadable paste consistency. Then, when you are almost at the consistency you are looking for, add the colored food coloring you desire.
Step 7
Afterward, press and spread a small dollop of the paste in every nook and cranny of the lace mat. With that, ensure to use an offset spatula.
Step 8
Once you fill all the lace mat space, scrape all the excess off using a bench scraper.
Step 9
After that, place the lace mat onto a baking sheet and bake for about seven to ten minutes. Or bake it until the edges are dry.
Step 10
Then, air dry it until not wet. Do this if you have a sticky center.
Step 11
Afterward, flip the lace mat over onto the silicone mat or parchment paper to remove the lace. Then, carefully peel the edge of the lace; pull the lace mat away from the lace. In addition to that, you can use a toothpick on the tricky areas to remove it properly.
Step 12
Lastly, you can use the sugar lace on your chilled cake. Or you can store it in parchment placed in an airtight container.
How to Apply Homemade Sugar Lace on the Cake
Step 1
To apply the sugar lace, you will need to brush a thin layer of edible adhesive onto your chilled cake.
Step 2
Then, gently place the sugar lace onto the edible adhesive. Also, ensure that the bottom lines up with the bottom of the cake. In that regard, work in small sections and support your sugar lace with your free hand.
Tips and Tricks for Cake Lace Recipe
You have to make the cake before making the sugar lace. So with that, ensure to stack, crumb coat, and frost the cake. Then, chill it before applying the sugar lace. If you find areas that need more adhesive in applying the sugar lace, reapply it behind the lace. However, be extra careful. Because when the sugar lace comes in contact with the adhesive, it tends to be more delicate.
Moreover, if you have to press the sugar lace onto the cake, use the end of the paintbrush. But, always be gentle. Furthermore, there is a bad chance that your sugar lace will not wrap around the cake completely. To fix this, you will need to cut a second piece of the sugar lace. After that, measure the gap length, observe the sugar lace pattern, and cut where the pattern matches.
Also, you can have easements when cutting since you can trim the excess off. However, do not overbake the sugar lace because it will become brittle. In addition to that, do not air-dry your sugar lace overnight. As a result, it will cause the sugar lace to become fragile.
Homemade Sugar Veil Recipe: Amazing Guide
Equipment
- Small bowl
- Small offset spatula
- Measuring Spoons
- Measuring cups
- Rubber spatula (small)
- Silicone mat
- Lace mat
- Clear piping gel or edible adhesive
- Small paintbrush
- Bench scraper
- Baking sheet
Ingredients
- ½ cup of boiling water
- 1 tbsp of tylose powder
- 1 tbsp of powdered sugar
- 2 tbsp of cornstarch
- ½ tsp of light corn syrup
- ½ tsp of clear vanilla or any clear flavor of choice
- White food coloring
- Additional colored food coloring optional
Instructions
- First and foremost, set your oven to 170 degrees Fahrenheit. Then, prepare a dry and clean lace mat that is ready to fill.
- After that, pour 1/4 cup of boiling water. Then, add the tylose powder to a small bowl. And stir it using a fork or a small rubber spatula to combine.
- Afterward, let the mixture sit for about 5 to 7 minutes to become translucent.
- Then, add the powdered sugar and cornstarch to the mixture and mix well until it combines well.
- Next, add the corn syrup, vanilla, and white food coloring. With that, make sure to stir every ingredient until all incorporated completely. In addition to that, you can add white coloring if necessary.
- After that, add one teaspoon of hot water at a time, mixing well after each addition. Remember, you should achieve a thick but spreadable paste consistency. Then, when you are almost at the consistency you are looking for, add the colored food coloring you desire.
- Afterward, press and spread a small dollop of the paste in every nook and cranny of the lace mat. With that, ensure to use an offset spatula.
- Once you fill all the lace mat space, scrape all the excess off using a bench scraper.
- After that, place the lace mat onto a baking sheet and bake for about seven to ten minutes. Or bake it until the edges are dry.
- Then, air dry it until not wet. Do this if you have a sticky center.
- Afterward, flip the lace mat over onto the silicone mat or parchment paper to remove the lace. Then, carefully peel the edge of the lace; pull the lace mat away from the lace. In addition to that, you can use a toothpick on the tricky areas to remove it properly.
- Lastly, you can use the sugar lace on your chilled cake. Or you can store it on parchment placed in an airtight container.
How to Apply Homemade Sugar Veil on the Cake
- To apply the sugar veil, you will need to brush a thin layer of edible adhesive onto your chilled cake.
- Then, gently place the sugar veil onto the edible adhesive. Also, ensure that the bottom lines up with the bottom of the cake. In that regard, work in small sections and support your sugar veil with your free hand.
Notes
Sugarveil Lace Molds Recipe Without Meringue Powder
Meringue powder is typically a main ingredient when it comes to sugar veil lace. However, it’s not a necessity! It’s very easy to make without meringue powder. Let’s take a closer look.
The ingredients you’ll need for this recipe are:
- 1 tbsp of tylose powder
- 4 tbsp of boiling water
- 1 tbsp of confectioners’ sugar
- 2 tbsp of cornstarch
- 1/2 tsp of light corn syrup
- 1 drop of white gel food coloring
Now all you need to do is:
- Add the tylose powder and water to a bowl and mix with a fork.
- Once the mixture has become clear, add the sugar and the cornstarch. Keep mixing, and then add the corn syrup. Once smooth, you can move on to the next stop.
- Add one drop of white gel food coloring and stir until evenly distributed. Use immediately or store in the refrigerator, for the best results.
- Once ready to use, allow it to come to room temperature. Pour the mixture into your sugar veil lace molds and place in the oven for around 10 minutes at around 110F. Your sugar veil lace is ready to add to your cake!
Best Lace Mat for Cakes
When it comes to lace mats, there’s a large range of options you can choose from. The easiest place to buy lace mats for sugar veils is online stores, such as Etsy and Amazon. However, you should also be able to buy them from craft stores too. Whether you’re a professional or a beginner, the brand Anyana on Amazon is a great place to start.
Their prices start at $9.99. It’s not just easy to work with, but it’s also easy to clean too – and above all, reusable. Whether you need to use it in the freezer, the microwave, or the oven – these molds can do it all.
How Long is Sugar Veil Okay For?
Once you’ve finished making your sugar veil, it should be safe to use for around a year. However, for it to last this long, it needs to be stored correctly. The correct storage method is to separate between parchment paper and in a cool, dry place; such as in a cardboard box. This will help it to stay as fresh as possible, for longer.
Is Sugar Veil Edible?
Of course. A sugar veil is completely safe for consumption. It does not contain any ingredients that you can’t eat. However, many people claim that they’re predominately used for cake decoration only, as the taste isn’t particularly nice. The texture is quite chewy and the flavor is tasteless.
Conclusion
I hope this post has helped you to become more familiar with a homemade sugar veil recipe. It can be fiddly to add to the cake once you’ve finished, but making it is super easy! Do you have any tips or tricks when it comes to making homemade sugar veils? If so, please feel free to let me know in the comments below. Sharing is caring!

Zarah is an experienced pastry chef whose creations have delighted countless customers. With a passion for baking, Zarah has developed a unique style that combines classic techniques with modern flavors. Her desserts are consistently crafted with the finest ingredients, and her attention to detail is evident in the stunning and delectable results. Zarah has a wealth of experience in the pastry kitchen, and loves to share her knowledge with others. Whether it is teaching a class or creating a custom cake for a special occasion, Zarah is committed to making sure every customer is satisfied.