Last Updated on February 13, 2023
If you are wanting to share your baking with a loved one that lives far away, you will want to know how to ship cupcakes. To ensure your cupcakes arrive safe and fresh, proper precautions must be taken before you ship them. However, with the right steps, your loved ones can receive your cupcakes looking flawless and tasting delicious.
Shipping cupcakes is a great way to celebrate the holidays and birthdays of your friends and family that live far away. Cupcakes are the perfect gift as they are thoughtful and something that everyone loves. They are the perfect size for enjoying and are easier to ship than you think.
How to Ship Cupcakes
Shipping cupcakes is a great way to share homemade baked goods with those who live far away from you. However, it should be done with care so your cupcakes arrive fresh and beautifully decorated.
If you don’t properly pack your cupcakes, they can end up smashed and smudged. They must be properly packed, as they will go through a lot of movement as they travel in the mail and may even get thrown around.
Bake and Decorate Your Cupcakes
First, bake your cupcakes and fully let them cool. Once they are cool, you can decorate them with frosting and any other toppings you would like to add, such as sprinkles.
It is best not to send cupcakes with perishable fillings and toppings, such as cream cheese or fresh fruit jam. If you do decide to send cupcakes with perishable fillings or toppings, be sure to take extra measures when packing them.
Place Them in a Cupcake Box
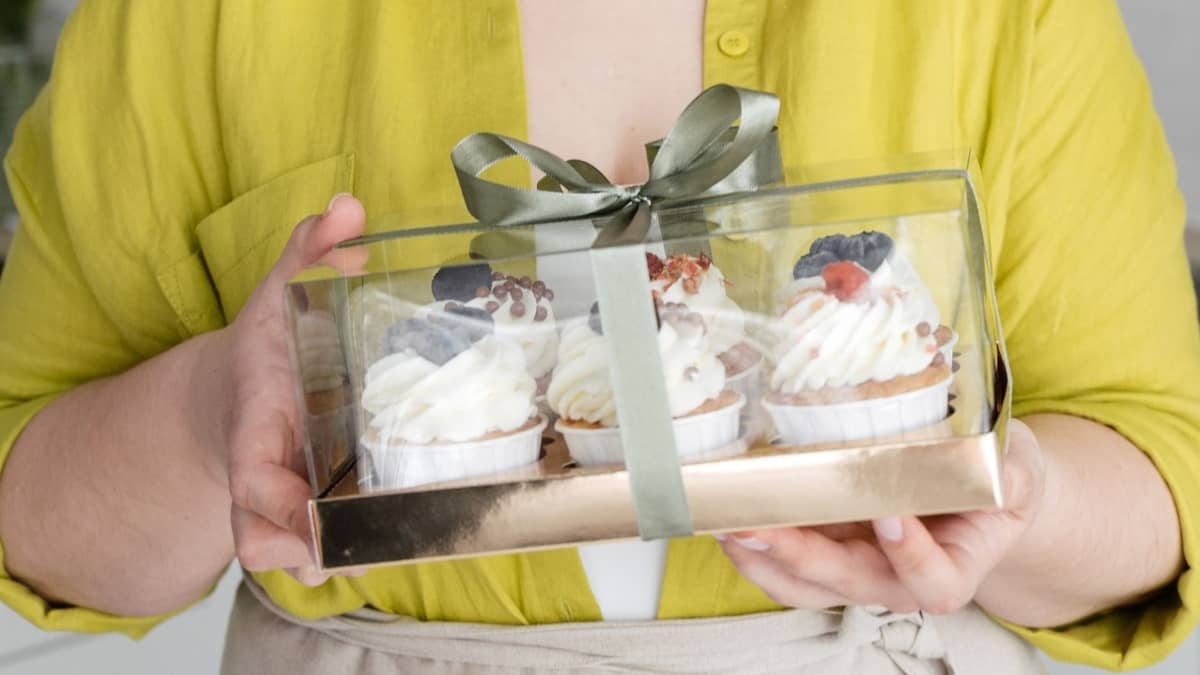
To mail cupcakes, you will want to use a cupcake box with individual spots for each cupcake. This will give them extra security as they travel.
Once your cupcake box is fully assembled, carefully place your cupcakes inside. For an extra safety measure, you can also add a candy stick to keep your cupcake in place and prevent it from bouncing around during travel. Trim the candy stick so it will touch the top and bottom of the box when the box is closed and then place it in the middle of the cupcake.
Insulate and Protect Cupcakes in the Shipping Box
After all of the cupcakes are securely in the cupcake box, tape up the sides of the box to keep it closed during travel. Then, take a cardboard box that is only slightly larger than your cupcake box to use for shipping. You don’t want the box to be too much bigger than your cupcake box, as this can cause them to slide around.
Line the bottom of your shipping box with bubble wrap for extra protection. If you are shipping your cupcakes during summer or if they have perishable toppings, place an ice pack in the bottom package. This will help ensure your cupcakes will stay fresh and that none of the toppings or frosting will melt if it gets too warm while transporting.
After placing the bubble wrap and ice pack, if needed, add your cupcake box carefully to the shipping box. If there is room left at the top of the shipping box, add another layer of bubble wrap for extra protection. Add any special notes or letters to the top of the box if you want.
Once everything is securely placed in the box, you want to tape your box securely closed. For best results, be sure to use packing tape and not wrapping paper tape.
Mail the Cupcakes With Overnight Shipping
To ensure your cupcakes will arrive fresh and delicious, you will want to send them with overnight shipping. Though this will be more expensive, it will ensure your cupcakes will get to their destination promptly where the receivers will be able to enjoy them at their best.
You can choose express shipping if your cupcakes don’t have perishable toppings or fillings. However, you want to avoid standard shipping as your cupcakes may be stale by the time they arrive.

Tips For Shipping Cupcakes
For extra measure, some good tips for shipping your cupcakes can help ensure a smooth trip. They can give you peace of mind that they will arrive safely and make things easier for you as well.
Freeze Them First
If you are not sending the cupcakes the day you make them or are sending them when it is hot, it is a good idea to freeze your cupcakes before sending them. Freezing will help keep them fresh for longer and can help prevent any melting or smudging during transport.
Use Durable Packaging
Be sure to use only durable packaging when shipping your cupcakes. Your cupcakes are delicate and you don’t want to risk damaging them by cutting corners.
Ship Cupcakes in Mason Jars
Mason jars can be a great alternative to shipping cupcakes in a cupcake box. Layer unwrapped cupcakes with layers of frosting and filling for a delicious treat. Be sure to tightly wrap your mason jars before shipping and protect them with plenty of bubble wrap.
Find more useful ideas for shipping cupcakes here:
How to Wrap Cupcakes for Shipping
Wrapping cupcakes for shipping couldn’t be easier. All you need to do is place them in a special cupcake shipping box, where each cupcake has its own space. Then simply stick a candy stick in the middle of each cupcake; ensuring it reaches to the top and bottom of the box, to avoid movement – you may need to cut them down if the measurements are not exact. If you want to be extra cautious, then place bubble wrap in between gaps, as well as around the shipping box too.
Gourmet Cupcakes Shipping
To send gourmet cupcakes by mail can be more difficult, but the process for shipping is still the same. Add your cupcakes to a cupcake box, stick candy sticks into each cupcake, tape the sides, and cover with bubble wrap. Then send via next-day delivery – it is that easy!
How to Make Cupcakes in a Jar
One of the easiest ways to send cupcakes is to send them in jars. They’re a perfect size and make for a unique cupcake-eating experience. Let’s take a look at how to make vanilla cupcakes in a jar, and Snickers cupcakes in a jar.
Vanilla Cupcakes Recipe
For this recipe you’ll need the following ingredients:
For the cake:
- 5oz of butter
- 5oz of white sugar
- 5oz of self-raising flour
- 3 eggs
- 2 teaspoons of vanilla extract
- 1 teaspoon of baking powder
For the frosting:
- 4oz of butter
- 4oz of confectioners’ sugar
- 1 tablespoon of vanilla extract
- 1 tablespoon of milk
- 2 tablespoons of raspberry jam
Now all you need to do is:
- Gather all of the ingredients you need and preheat your oven to 375F. You’ll also need to grease an 8″ baking tin.
- Add the butter, sugar, flour, eggs baking powder, and vanilla extract to a bowl. Mix well until you have a smooth batter.
- Pour batter into your prepared baking pan and place your cake in your preheated oven for around 25 minutes. Remove from oven and leave to cool.
- For the frosting, add the sugar, vanilla, and butter and mix to a bowl and mix well until you have a light and fluffy buttercream.
- Cut out circles of cake that fit the size of your mason jars and then cut them into 4 equal pieces, so you can place them back together again easily in the jar.
- Add one layer of cake, then one layer of jam, then one layer of buttercream. Add your second layer of cake, a layer of jam, and a final layer of buttercream. Seal the jar, and your cupcake in a jar is ready!
Snickers Cupcakes Recipe
For this recipe, you’ll need the following ingredients:
For the cake:
- 40oz of Snickers minis
- 1 box of chocolate cake mix and ingredients for cake mix
For the frosting:
- 1/2 cup of butter
- 4 tablespoons of confectioners’ sugar
- 1/4 teaspoon of vanilla extract
- 24 glass oven-safe jars (4oz)
- caramel syrup, to decorate
Now all you need to do is:
- Gather all of the ingredients you need for this recipe and preheat your oven to 350F. You’ll also need to grease your glass jars with spray. Then add around 24 minis to a blender and pulse. Leave to one side.
- Grab a bowl and add the following ingredients: cake mix and ingredients you need to make the cake; as well as the blended minis.
- Fill each jar with around 3/4 full of batter, and place your cupcake jars in the oven for around 25-30 minutes. Remove from oven and leave to cool.
- Add the butter, sugar, and vanilla to a bowl and mix well, until light and fluffy. Decorate each glass jar with your frosting and place a Snickers on top of each, and then add caramel syrup. Seal and ship!
Shipping Delicious Cupcakes
With the right steps, you can send fresh cupcakes to your loved ones that live far away. For best results, be sure to use overnight or express shipping.
Do you have any questions regarding how to ship cupcakes? If so, please ask any shipping questions in the comment section.
FAQs
How Can I Ship Cupcakes Without Damage?
To ship cupcakes without damage, place the cupcakes in a cupcake box with inserts so each cupcake has a spot. Then, use candy sticks the length of the jar and stick them in the middle of the cupcakes to secure them. Be sure to cushion your cupcake box with bubble wrap in the shipping container.
Should I Freeze Cupcakes Before Shipping?
It is a good idea to freeze your cupcakes before shipping. This will help keep them fresh and help keep them intact.
How Do You Ship Cupcakes with Dry Ice?
After purchasing your dry ice, properly wrap it and place it in a styrofoam box. Then, carefully place your packaged cupcakes in the styrofoam box and place the lid on. Place your styrofoam box in a fiberboard box for proper ventilation and then prepare it for shipping.
Can You Ship Cupcakes in a Jar?
You can ship cupcakes in mason jars. Make layers of an unwrapped cupcake, filling and frosting. Securely close the jar and then wrap with bubble wrap.
How to Make Cupcakes in a Jar
Ingredients
For the Vanilla Cupcakes
- 5 oz butter
- 5 oz white sugar
- 5 oz self raising flour
- 3 eggs
- 2 tsp vanilla extract
- 1 tsp baking powder
- 4 oz butter for the frosting
- 4 oz confectioners' sugar for the frosting
- 1 tbsp vanilla extract for the frosting
- 1 tbsp milk for the frosting
- 2 tbsp raspberry jam for the frosting
For the Snickers Cupcakes
- 40 oz Snickers minis
- 1 box chocolate cake mix
- 1/2 cup butter for the frosting
- 4 tbsp confectioners' sugar for the frosting
- 1/4 tsp vanilla extract for the frosting
- 24 glass jars 4oz
- caramel syrup to decorate
Instructions
For the Vanilla Cupcakes
- Gather all of the ingredients you need and preheat your oven to 375F. You'll also need to grease an 8" baking tin.
- Add the butter, sugar, flour, eggs baking powder and vanilla extract to a bowl. Mix well until you have a smooth batter.
- Pour batter into your prepared baking pan and place your cake in your preheated oven for around 25 minutes. Remove from oven and leave to cool.
- For the frosting, add the sugar, vanilla, butter and mix to a bowl and mix well until you have a light and fluffy buttercream.
- Cut out circles of cake that fit the size of your mason jars and then cut them into 4 equal pieces, so you can place them back together again easily in the jar.
- Add one layer of cake, then one layer of jam, then one layer of buttercream. Add your second layer of cake, a layer of jam and a final layer of buttercream. Seal the jar, and your cupcake in a jar is ready!
For the Snickers Cupcakes
- Gather all of the ingredients you need for this recipe and preheat your oven to 350F. You'll also need to grease your glass jars with spray. Then add around 24 minis to a blender and pulse. Leave to one side.
- Grab a bowl and add the following ingredients: cake mix and ingredients you need to make the cake; as well as the blended minis.
- Fill each jar with around 3/4 full of batter, and place your cupcake jars in the oven for around 25-30 minutes. Remove from oven and leave to cool.
- Add the butter, sugar and vanilla to a bowl and mix well, until light and fluffy. Decorate each glass jar with your frosting and place a Snickers on top of each, and then add caramel syrup. Seal and ship!

Ever since she was a young girl, Anna has been a lover of desserts. As an adult, she enjoys
baking a variety of desserts from cakes, cookies, brownies, bread, and more from scratch. She
enjoys sharing her passion for baking with others who also have a sweet tooth. From properly
measuring ingredients to making sure they are the correct temperature, Anna knows the
importance small details can make in baking. She wants to share her experience with others in
hopes they can make the most delicious baked goods. When she’s not busy blogging, Anna
enjoys trying new recipes in the kitchen.


