
Last Updated on April 15, 2020
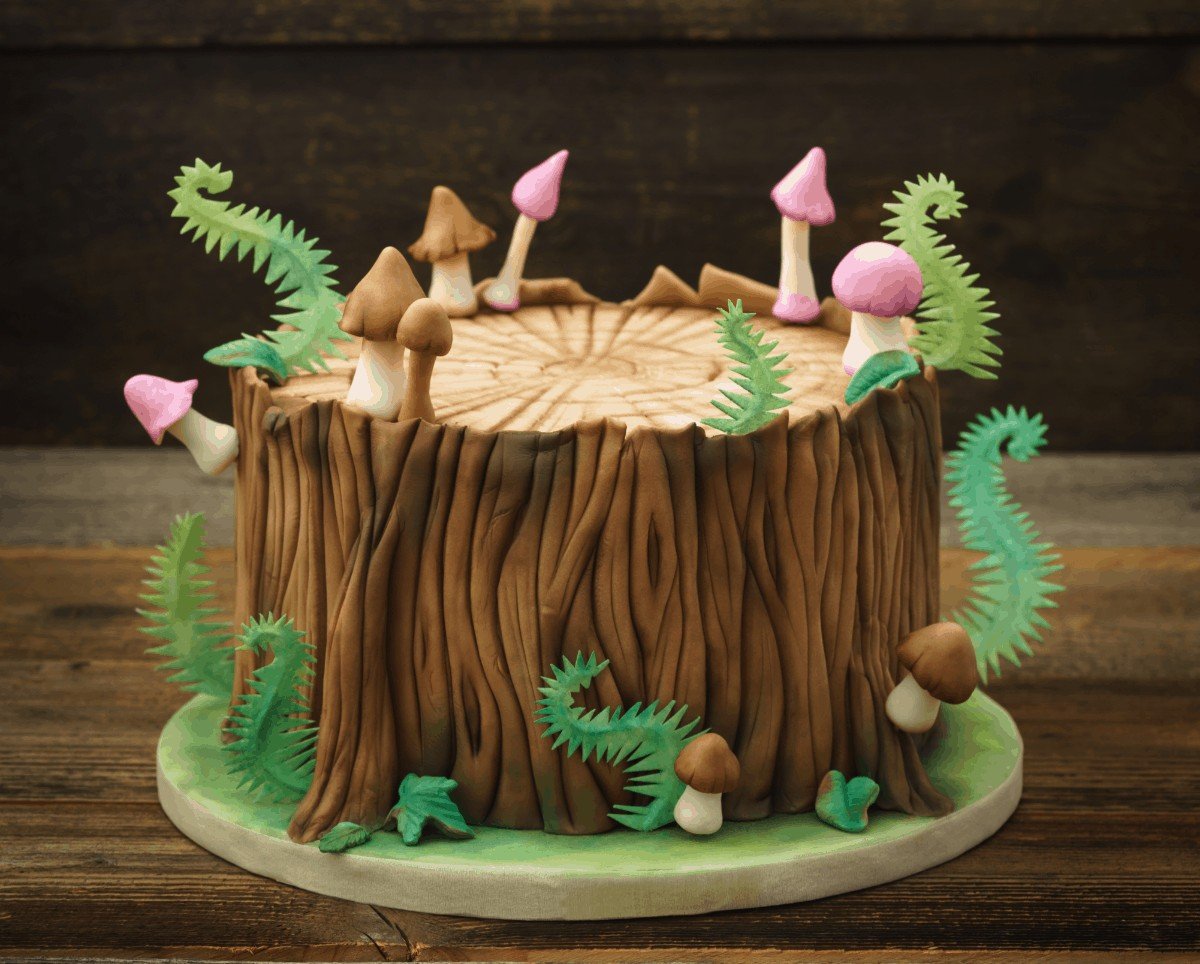
As a baking fan and avid cake decorator, I am always searching for new interesting ways in which I can add a special flair to my next creation. As it turns out, my daughter’s 5-year-old birthday is coming up and she is absolutely obsessed with nature. I mean, it is a struggle to get her inside the house! She will run around in the yard all day. And I thought that, for her birthday cake, I would make a wood cake.
I did not know what I was getting myself into! I had to do some research, but I found a few cool ways on how to make wood grain in buttercream icing and texture the outside like bark that I want to share with you.
These ideas are not only meant for kid’s cakes, though! You can definitely use them to create different themes. Maybe an anniversary cake, with your partner’s and your initials engraved on the side. Or maybe to bring to life something more animated and cartoonish. It’s your choice!
What Tools Do I Need for Wood Cake?
This will obviously depend on what technique you are using, but here are a few suggestions on what tools can help you achieve a woodgrain look on your buttercream. Some of them you definitely have in your own kitchen cabinet right now!
-
A Fork
The easiest, most common of these tools is a fork. It is somewhat rudimentary, but it can definitely help you distress the buttercream in a way that resembles wood.
Bear in mind that using a fork will help you achieve a rougher texture, so I recommend you use it especially for the bark and maybe slightly for the inside of the wood. Maybe just to make some indentations.

If you need to do precision work, we recommend you chill your cake first and let the buttercream set and crust before going on. But if you just want to distress the surface, then you should do it while the buttercream is still soft.
-
Paintbrush
First of all, make sure the brush is good enough quality, so that it won’t shed, and that it is made out of synthetic bristles that will not absorb any of the cream. Pre-wash all your kitchen utensils before actually using them, though!
You also need to use a new brush. If it has been used on, say, acrylics before, we would not recommend you risk using it. You need to use brushes exclusively for this use and edible no-toxic paint.
With a paddle brush, you can create an immense amount of different, interesting textures. You will be able to create smooth channels by applying soft pressure on buttercream that has not crusted yet.
If you want the ridges to be deeper, simply apply more pressure!
For a tree bark texture, use vertically all around your cake to give the illusion that is is actually a tree stump!
You can try airbrushing too.
-
A Silicone Basting Brush
As with a regular brush, a silicone basting brush can be used to texture your buttercream. Make sure you use it while the buttercream is still soft, as its bristles are more flexible and you won’t be able to use it otherwise.

It is not suitable for precision work but it will help you play around and create some interesting ridges. If you tear the buttercream, just brush it back down in the other direction. Also, if it is too stiff, try dipping the brush in some water and flicking the excess off.
It is a perfect tool for beginners!
-
Aluminum Foil
Aluminum foil will let you create very interesting shapes without the need of buying a specific mold. You can fold it whichever way you like and imprint it on the buttercream, like a stamp.
You can also use it as a kind of roller, depending on the shape you create your stamp. You will need to clean it between each pass, though.
To use this tool it is better to let the buttercream crust before you go ahead.
-
Impression Mats
You can also buy customized impression mats from baking specialty stores or online. You will definitely need to wait until the buttercream has crusted to use them, if not you will end up with buttercream all over the little ridges.
They are great but you can achieve an amazing texture without them. It all depends on how big your cake is, or how many cakes you plan on making.

Creating a Woodgrain Effect for Wood Cake
Step 1
Divide your buttercream in thirds. Place two-thirds of the cream in one container and the rest in another.

Step 2
Either color them using gel food coloring or add milk and dark chocolate to each to achieve desired shades. You need more of the lightest color and less of the darker brown.
Step 3
Frost your cake with the lightest shade. Try and make it as smooth as you can.

Step 4
At this point, you can either let it crust or not. Either way, you will then want to pipe thin lines of the darker color on top of the light brown. Try and make this in a natural way, without worrying about it being symmetrical. After all, it is a tree!
Step 5
If you did not let it crust, using a texturing tool then go ahead and distress the surface of the buttercream so that it looks more real. You can see an example in this video.
If you let your cream crust, then you will want to smooth the darker color over the pale with a spatula, so that everything lays flat but you still have the lines going over.
Step 6
Once you have smoothed it out, then go ahead and use a texturing tool to create some ridges that go along the woodgrain. Make this subtle, to achieve a more realistic look.

Wood Cake: Creating the Bark
There are several ways to create the bark. The easiest one is to pipe with a ridged tip. You can also use a texturing tool mentioned above.
Another clever way is to put some tempered chocolate shards on top of your buttercream. This one is harder to do though, because of the chocolate tempering.
Have you tried any of these methods? Post a picture below!

Karen is a passionate pastry chef who loves to create delicious baked goods. She has been in the culinary arts for over 10 years, honing her skills and perfecting her craft. Karen is known for her creativity and attention to detail, creating unique desserts that bring a smile to everyone’s face. She is always looking for ways to challenge herself and come up with new recipes that are both tasty and visually appealing. Karen loves to experiment with different flavors and textures, and she is committed to providing the highest quality of products to her customers.