
Last Updated on March 27, 2022
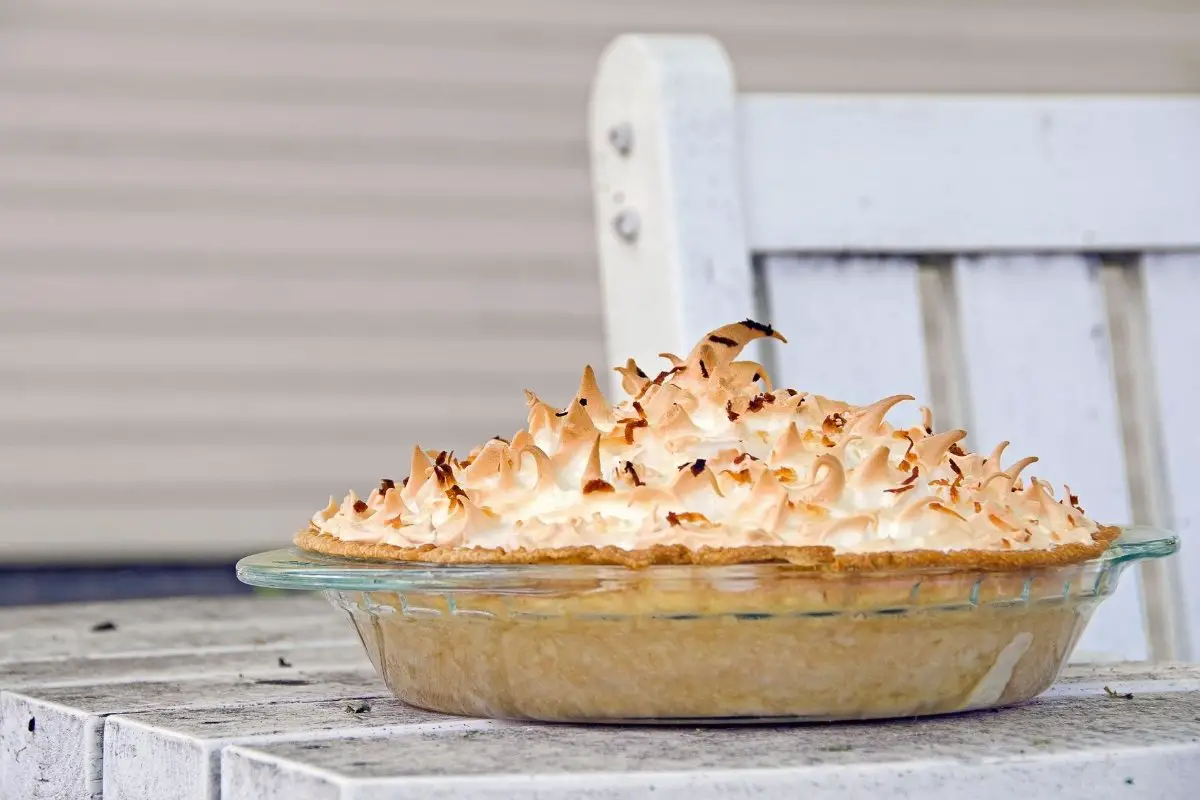
Coconut cream pie with meringue was my grandmother’s favorite pie to make, so it holds a special place in my heart and I just had to learn how to make it. I derive my love for baking from her so it is only natural that I developed my own personal version of it. Today I will share this amazing recipe that I hold very near and dear to my heart.
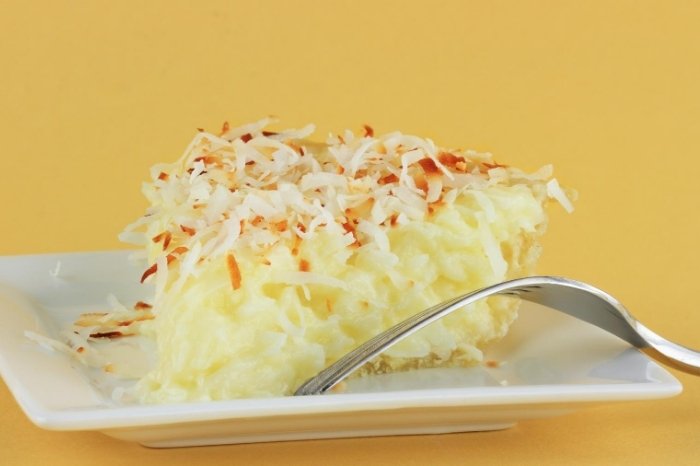
This pie is thick and creamy and the meringue just adds that special extra texture that I absolutely love. Every other person I know likes to top it off with whipped cream but I think that meringue is just THAT much better! If you do not want to make any meringue you can always replace it with whipped cream, but you are missing out.
Here I also include my personal favorite homemade pie crust. I think that making your pie crust from scratch adds a layer of flakiness that is unparalleled. Take the extra effort and avoid using store-bought crust, you will thank me for it later.
Making the Greatest Coconut Cream Pie with Meringue Ever!
This pie recipe will yield 10 servings and it needs to be spread in a few days or in a whole day to work. This is because of the homemade pie crust!
First, the Crust
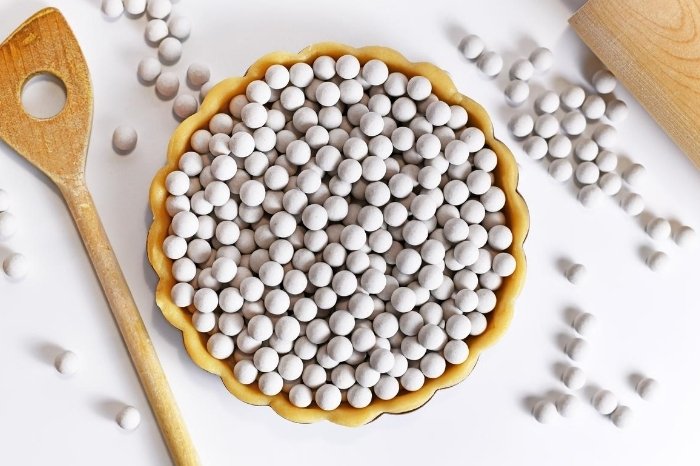
The first thing we need to know is that coconut cream pie is actually a no-bake pie. So we need to fully bake our crust beforehand. For this, we are going to need to blind bake it. Make sure to check out this incredible tutorial to know every trick. For everyone that has no time to read, here are some general rules:
- You will need pie weights. These are heavy balls made out of ceramic or metal that will weight your dough down while you bake it. This is why it is called “blind baking” because you will not be able to check the dough before you take it out of the oven. These are used to keep the base of the pie crust flat and ready to receive the filling. Bear in mind that you need to bake it for about 15 minutes with the weights and then bake it again until it is golden brown. Before you do this, prick the bottom of the pan with a fork to let all the air escape and prevent the crust from inflating.
- Another thing is that pie crust dough needs to be chilled beforehand. It will need at least 2 hours in the fridge before you can roll it out and an extra 30 minutes in the fridge before you can actually bake it. This will keep the flaky layers intact while baking.
- It needs to cool down completely before you can move on to the next step. You can do all of this up to 3 days ahead of time.
Ingredients
- 2 1/2 cups of regular flour, plus extra for rolling
- 8 ounces -2 sticks- of unsalted butter, it should be very cold and cut into small cubes
- 1 tsp of salt
- 1 tsp of sugar
- 6 to 8 Tbls of ice water
How to Make It
Step 1
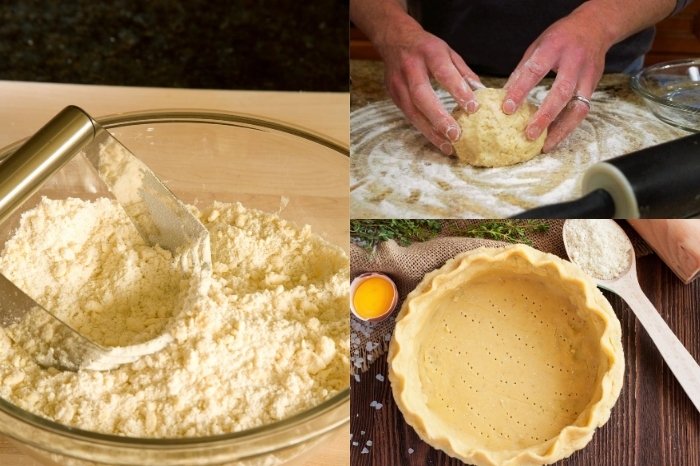
This is easier to make in a food processor. First mix the flour, salt, and sugar together in a bowl. Add the cold butter a bit at a time and pulse until the butter is pea-sized.
Step 2
Sprinkle the icy cold water one tablespoon at a time. Pulse afterwards each time. Do this until it starts to turn into a dough. You will know it is ready if you pinch it and it holds together.
Step 3
Drop the mix onto a cold counter and divide it in two. Gather it together with your hands and create 2 discs of dough. Sprinkle them with flour and wrap them in plastic wrap. Set them to cool in the fridge. If you see small chunks of butter, do not worry! It is great news! This means your crust will be flaky and delicious. You will have an extra pie crust ready to put in the freezer or use in another sweet or savory pie.
Step 4
Leave it cooling off for at least 2 hours. Then take out a disk, let sit for 3 minutes at room temperature and roll it out onto your pie dish. Trim the edges off and blind bake it per the instructions above. Then leave it to cool off completely before adding your pie filling.
Now onto the Coconut Cream Pie with Meringue Filling
This filling is cooked on the stove. That is why we do not need to bake it inside the crust!
Ingredients
- 1 cup of sweetened flaked coconut
- 2 eggs
- 3 cups of half-and-half milk
- ¼ tsp of salt
- 1 cup of white sugar
- ½ cup of all-purpose flour
- 1 tsp of vanilla extract
How to Make It
Step 1
First, you will want to brown your flaked coconut. For this, spread over a baking sheet lined with parchment paper and bake in a low oven for 5-10 minutes or until they are golden brown.
Step 2
Add your half-and-half, the 2 eggs, sugar, salt, and flour into a saucepan and combine it all together. Place it over low heat and bring to a boil. Once it boils, be careful! It can burn really easily so you need to keep stirring for 2 more minutes to make sure everything is cooked.
Step 3
Remove it from the heat and mix in the toasted coconut flakes. Now it is ready to pour on top of your already baked and chilled pie crust. Once everything is at room temperature, put it in the fridge.
Finally, the Meringue
This step is crucial, but it is only Italian meringue. We believe this is the best kind of meringue to top your coconut cream pie with meringue because the egg whites are cooked with the heated sugar syrup and it does not need to go into the oven. To check a full recipe click here. If you believe this is too much work, then just go ahead and use whipped cream. We won’t tell anyone!
Read more about How To Thicken Coconut Milk As Cream
Amazing Coconut Cream Pie With Meringue Topping
Ingredients
Crust
Filling
- 1 cup of sweetened flaked coconut
- 2 eggs
- 3 cups of half-and-half milk
- ¼ tsp of salt
- 1 cup of white sugar
- ½ cup of all-purpose flour
- 1 tsp of vanilla extract
Meringue
- 1 cup sugar
- 1/2 cup water
- 4 room temperature egg whites preferably from fresh eggs (see note)
- 1/2 teaspoon cream of tartar lemon juice from 1 lemon, or 1/2 lemon
Instructions
Crust
- This is easier to make in a food processor. First mix the flour, salt, and sugar together in a bowl. Add the cold butter a bit at a time and pulse until the butter is pea-sized.
- Sprinkle the icy cold water one tablespoon at a time. Pulse afterwards each time. Do this until it starts to turn into a dough. You will know it is ready if you pinch it and it holds together.
- Drop the mix onto a cold counter and divide it in two. Gather it together with your hands and create 2 discs of dough. Sprinkle them with flour and wrap them in plastic wrap. Set them to cool in the fridge. If you see small chunks of butter, do not worry! It is great news! This means your crust will be flaky and delicious. You will have an extra pie crust ready to put in the freezer or use in another sweet or savory pie.
- Leave it cooling off for at least 2 hours. Then take out a disk, let sit for 3 minutes at room temperature and roll it out onto your pie dish. Trim the edges off and blind bake it per the instructions above. Then leave it to cool off completely before adding your pie filling.
Filling
- First, you will want to brown your flaked coconut. For this, spread over a baking sheet lined with parchment paper and bake in a low oven for 5-10 minutes or until they are golden brown.
- Add your half-and-half, the 2 eggs, sugar, salt, and flour into a saucepan and combine it all together. Place it over low heat and bring to a boil. Once it boils, be careful! It can burn really easily so you need to keep stirring for 2 more minutes to make sure everything is cooked.
- Remove it from the heat and mix in the toasted coconut flakes. Now it is ready to pour on top of your already baked and chilled pie crust. Once everything is at room temperature, put it in the fridge.
Meringue
- In a small saucepan, combine sugar and water. Heat over high heat, brushing downsides of the pot as necessary with a pastry brush dipped in water. Cook until sugar syrup registers 240°F on an instant-read or candy thermometer.
- Meanwhile, combine egg whites and cream of tartar or lemon juice in the bowl of a stand mixer fitted with a whisk attachment; alternatively, wipe the mixer bowl with the cut side of 1/2 lemon before adding egg whites (and omit the cream of tartar or lemon juice). Set mixer to medium speed and mix until soft peaks form (when lifted, the head of the mixer should form gentle peaks in the egg whites that very slowly collapse back into themselves), about 2 minutes.
- With the mixer running, carefully and slowly drizzle in hot sugar syrup. Increase speed to high and whip until desired stiffness is achieved.
Notes
- You will need pie weights. These are heavy balls made out of ceramic or metal that will weight your dough down while you bake it. This is why it is called “blind baking” because you will not be able to check the dough before you take it out of the oven. These are used to keep the base of the pie crust flat and ready to receive the filling. Bear in mind that you need to bake it for about 15 minutes with the weights and then bake it again until it is golden brown. Before you do this, prick the bottom of the pan with a fork to let all the air escape and prevent the crust from inflating.
- Another thing is that pie crust dough needs to be chilled beforehand. It will need at least 2 hours in the fridge before you can roll it out and an extra 30 minutes in the fridge before you can actually bake it. This will keep the flaky layers intact while baking.
- It needs to cool down completely before you can move on to the next step. You can do all of this up to 3 days ahead of time.
What do you think about this recipe? Tell us in the comments below!

Karen is a passionate pastry chef who loves to create delicious baked goods. She has been in the culinary arts for over 10 years, honing her skills and perfecting her craft. Karen is known for her creativity and attention to detail, creating unique desserts that bring a smile to everyone’s face. She is always looking for ways to challenge herself and come up with new recipes that are both tasty and visually appealing. Karen loves to experiment with different flavors and textures, and she is committed to providing the highest quality of products to her customers.