

Last Updated on January 27, 2023
If you’re wondering how you should be adjusting baking time for mini loaf pans, then we’ve got the ultimate in-depth article for you.
In today’s article, we’ll be discussing exactly how mini loaf pans differ from regular loaf pans. And, we’ll also have a look at exactly how you should adjust the baking times when using these pans. And believe us, it’s easier than you may think!
What is a Mini Loaf Pan?
These pans are essentially smaller versions of your everyday traditional loaf pan, also known as a bread pan.
Mini loaf pans are baking pans that are usually 5 to 6 inches in length and about 3 inches in width. They are typically fashioned from thin sheets of aluminum or steel. You can also get some other materials, such as silicone, but they are less common and usually more expensive.
Because of the smaller size, these pans are very useful to make smaller portions or servings of loaf-shaped foods and sweetbreads (like banana bread). They can also make the cutest tiny gifts for loved ones or on special occasions. But, with the smaller size also you will be adjusting baking times for mini loaf pans.
Why use a mini loaf pan?
As we have mentioned before, these mini loaf pans can make smaller versions of your favorite baked goods. So, if you’re using them in a restaurant or throwing a dinner party at home, you can make “individual” portions that will be eaten while still warm. This way, you can keep bringing out more fresh goodies as they come out of the oven!
Another reason why you might want to consider using these neat little baking pans is that they can be used to bake little takeaway loaves. A mini loaf can be a wholesome gift for any party guest, friend, or family member. And, not to mention it helps prevent you from over-eating!
How to use these mini loaf pans?
To be honest, we use mini loaf pans in exactly the same way we would use a normal 9 by 5 (inches) baking pan. The only difference is that you will need to make sure that you’re adjusting baking times for mini loaf pans correctly. You will also have to adjust the amount of batter you add, as these pans are smaller and will more easily overflow.
What kind of mini loaf pan should I use? (and why?)
Okay, so this is all up to your personal preference and who you are serving.
If you’re baking for yourself at home, you’d most likely be using either a metal (aluminum or steel) or ceramic mini loaf pan.
This is because both these kinds are reusable and will last you a long time if you take care of them properly. Small ceramic loaf pans are often also pretty. this means that you can present your baked item inside of it, making the overall aesthetic more pleasing. Especially if you’re throwing a tea party at home! Ceramic loaf pans will also likely keep your mini loaves nice and warm for a longer time. This material insulates heat much better as compared to metal versions.
If you’re baking mini loaves to sell, you probably want to use a reusable material. Unless of course, you want to sell your baked items inside the foil pan. Then, use the disposable aluminum foil container. They are cheap, disposable, and recyclable!
Lawei 6 Piece Non-Stick Mini Loaf Pan – 3.5 x 6 Inch Carbon Steel Bread and Toast Mold
Master the Art of Baking With Accurate Timing for Delicious & Safe Meals
Setting the appropriate, or right baking time is essential to ensuring that the food is adequately cooked and perhaps most importantly, safe to eat. Food that is overcooked or undercooked can become tough, dry, or raw in places, which has a big impact on the flavor and texture. Additionally, undercooking certain foods, such as meat or poultry, can lead to food poisoning if harmful bacteria are not killed off during the cooking process.
Is it even necessary to bring up salmonella? A few minutes really make the difference between a healthy and balanced meal and one that is potentially dangerous to your health. It is not uncommon for people to get cramps and stool problems due to insufficiently cooked food, and in some cases, they even need to be hospitalized or take antibiotics. Accordingly, by following general food preparation guidelines and setting the right baking, you can ensure that your food is perfectly cooked and safe to eat.
Petite in size, Big on Taste: How to Adjust Baking Time for Mini Loaf Pans
As already stated, mini loaf pans are ideal for baking relatively small amounts of bread, cakes, and other baked goods that we all love so much. However, considering their size, which is much smaller when compared to the standard one, the baking time may differ. To ensure that your mini masterpieces are cooked to perfection, it is crucial to take care of adjusting the baking time for mini loaf pans. We will teach you how to do it below.
The next time you decide to make a smaller portion of some baked good, for instance, bread, it would be best to reduce the baking time by about 20-25% compared to baking in a classic-size baking pan. Here’s an illustration that should help you comprehend. If a recipe calls for a traditional loaf pan to be baked for 45 minutes, a mini loaf pan should be baked for around 35 minutes. Therefore, the baking time is reduced by 20-25%.
However, this doesn’t mean that you should turn on the oven, put the pan inside and go do chores outside the house. You should always be near the kitchen and keep an eye on your loaf pan as ovens can vary and the bread may be done sooner or later than the recommended time.
Furthermore, if we are talking about loaf cakes, the baking time can also vary depending on the recipe itself. In any case, it would be best to shorten the baking time by around 10-15%. Finally, don’t forget that these pans are much deeper than traditional loaf pans, so the batter may rise higher than you expect, which can greatly affect the baking time. Precisely because of this, it is important to take care of adjusting baking time for mini loaf pans.
Rise and Shine: How to Adjust Baking Time for Full-Size Loaf Pan
Baking a loaf of bread or a cake in a full-size loaf pan is a traditional technique for making wonderful handmade delicacies. However, as you might guess, depending on the recipe and the ingredients used, the baking time for a full-size loaf pan may indeed differ.
The general rule of thumb is to bake it for about 45-60 minutes, but keep an eye on it because the power of the oven greatly affects the baking speed or time. As previously said, ingredients play an important role since baked products containing a lot of liquids or fruits may take longer to bake than those made with largely dry components. Correspondingly, bread whose recipe contains a lot of sugar may take longer to bake than loaves composed largely of flour and water.
Mini Loaf Pans Vs Full-Size Baking Time
When comparing baking times for mini-loaf and full-size loaf pans, take in mind that mini-loaf pans are smaller than full-size loaf pans, which might alter baking time.
In summary, mini loaf pans require less baking time than full-size loaf pans, approximately 20-25% less for bread and 10-15% less for cakes. Keep an eye on the baking time and use a toothpick or cake tester to test for doneness.
Now that you have learned all about adjusting the baking time for mini loaf pans, let’s move on to some more tips that will come in handy the next time you’re in the kitchen.
Adjusting Baking Times For Mini Loaf Pans – How to Do It
Well, when going about adjusting baking times for mini loaf pans, there’s only really one golden rule you need to remember. Don’t change the baking temperature!
Don’t lower the temperature when making adjustments from a standard 9 by 5 loaf pan recipe. We know it’s a smaller loaf but trust us. The recipe should stay exactly the same EXCEPT for the baking time and the amount of batter you use inside the pan.
When adjusting baking times for mini loaf pans, you only need to bake them for 3/4 of the time you would bake a standard-sized loaf.
So, if the baking time for a normal loaf is 40 minutes, you need to bake the mini loaf for 30 minutes.
How to calculate 3/4 of the time?
To calculate the correct amount of time, you simply have to divide the original suggested time by 4, then multiply it by 3. This will give you three-quarters of the time you need.
Remember, when adjusting the baking times for mini loaf pans, always use the baking times in minutes when making these calculations. So, if your standard original baking time is 2 hours, use 120 (minutes) on your calculator.
Tips For Using Mini Loaf Pans
1. Don’t overfill the mini loaf pan
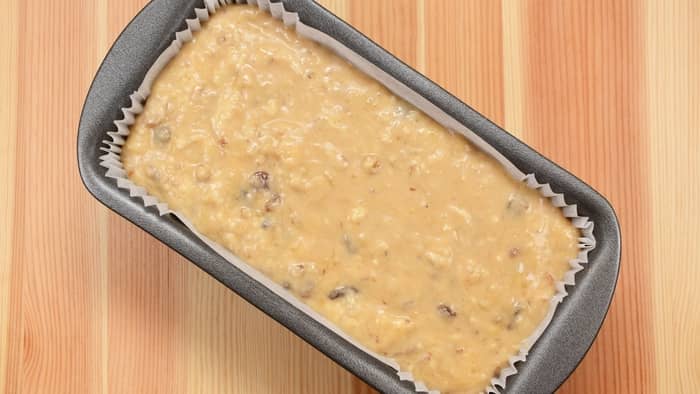
First things first. You should never overfill your mini loaf pan. Only fill it about 3/4 of the way to leave enough space for the batter to rise. However, not all mini loaf pans are the same size.
The best way to prevent overfilling is to measure the volume of the pan exactly. Here is how you can do this:
- Fill the baking pan with water to just below the brim.
- Throw the water into a measuring cup and take the measurement. That’s the maximum volume that your mini loaf pan can take.
- Get your calculator. Divide the max volume by 4 and multiply it by 3. This is the maximum amount of batter/dough you can put into the mini loaf pan.
- When adding batter to your pan, measure it out before adding it to the pan. Remember to scrape the measuring cup or jug to get all of the batters in the pan.
2. Do not use too much cooking spray
Do not get too much nonstick cooking spray on the sides. This will prevent the batter from effectively rising and creating a beautiful product.
3. Check the “readiness” with a toothpick
With most baked loaves, you can generally assume that when the middle has risen and is golden brown, it is most likely ready.
However, we recommend that you insert a toothpick in the center. If the toothpick comes out clean, your item has been fully baked.
How Many Mini Loaf Pans Equal a Regular Loaf Pan?
As you can guess, the number of mini loaf pans that are equivalent to a regular loaf pan varies depending on several factors, the most important of which are the size of the loaf pan and the components in the recipe. In general, one “normal” loaf pan is comparable to three to four mini loaf pans.
Here’s an example of the loaf pan to mini loaf pan conversion that should help you to understand. If a recipe calls for a 9×5 inch loaf pan and you have only four 4×2.5 inch small loaf pans in your kitchen cabinet, feel free to use all four mini loaf pans.
How Far Do You Fill Mini Loaf Pans
As previously indicated in the article, small loaf pans are frequently deeper than full-size loaf pans, which might alter baking time since the batter may rise faster and higher. For this very reason, please don’t neglect to pay attention to the size of the mini pan to be able to adjust the amount of batter and the baking time accordingly. This is the only right technique to get perfectly baked small loaves rather than mushy, overdone, or undercooked ones.
Finally, we have one more thing to mention, along with adjusting the baking time for mini loaf pans. – The size of the pan and the volume of batter are inextricably linked.
Namely, the size of the loaf pan determines the amount of batter required to fill them. For instance, if you use mini loaf pans that are smaller than the ones specified in the recipe, you will need to use less batter in each pan. On the contrary, if you only have pans that are larger than the ones called for in a recipe and don’t intend to buy a smaller one, there’s no need to stop cooking. You just need to use more batter in each pan.
That’s it, now you know everything you should know about adjusting baking time for mini loaf pans!
Conclusion
If you learned something new about adjusting baking time for mini loaf pans, please comment below and share this article with your fellow bakers!
FAQs
Do mini loaf pans take less time to bake?
Yes, mini loaf pans take less time to bake. This is because the smaller pan contains less batter or dough. When there is less batter, the item will take less time to fully bake.
How do you use a mini loaf pan?
Use a mini loaf pan in the same way as a standard-sized bread pan. Just remember to reduce the amount of batter. Only fill the mini loaf pan 3/4 of the way. Also reduce the baking time to 3/4 the time you would've used for the standard-size bread pan.

Lindy Van Schalkwyk is a culinary specialist with a background in Advanced Cooking, Advanced Pâtisserie, Media Communications and Nutrition. She has gained invaluable experience in the culinary industry having worked in some of the top restaurants in Africa in 2016 and 2017. Her expertise in nutrition has enabled her to develop recipes for special dietary needs. In 2018, Lindy began working in the Food Media industry, focusing on recipe development, recipe writing, food writing and food styling.