Homemade Sugar Veil Recipe: Amazing Guide
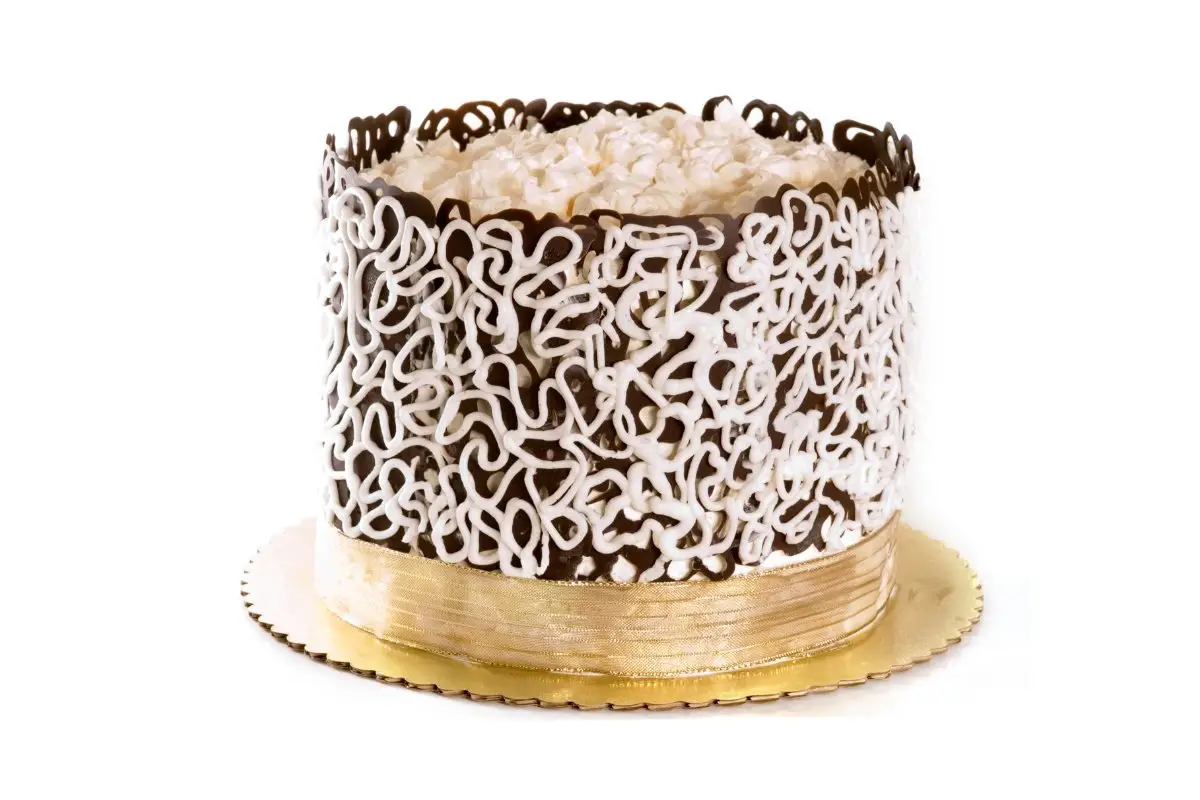
Have you ever seen gorgeous cakes embellished with lace of sugar? And you might be wondering if you can make a homemade sugar veil recipe? Well, sure you can. You can refer to a beautifully intricate lace of sugar as a sugar veil. But, of course, you can also call it sugar lace.
Equipment
- Small bowl
- Small offset spatula
- Measuring Spoons
- Measuring cups
- Rubber spatula (small)
- Silicone mat
- Lace mat
- Clear piping gel or edible adhesive
- Small paintbrush
- Bench scraper
- Baking sheet
Ingredients
- ½ cup of boiling water
- 1 tbsp of tylose powder
- 1 tbsp of powdered sugar
- 2 tbsp of cornstarch
- ½ tsp of light corn syrup
- ½ tsp of clear vanilla or any clear flavor of choice
- White food coloring
- Additional colored food coloring optional
Instructions
- First and foremost, set your oven to 170 degrees Fahrenheit. Then, prepare a dry and clean lace mat that is ready to fill.
- After that, pour 1/4 cup of boiling water. Then, add the tylose powder to a small bowl. And stir it using a fork or a small rubber spatula to combine.
- Afterward, let the mixture sit for about 5 to 7 minutes to become translucent.
- Then, add the powdered sugar and cornstarch to the mixture and mix well until it combines well.
- Next, add the corn syrup, vanilla, and white food coloring. With that, make sure to stir every ingredient until all incorporated completely. In addition to that, you can add white coloring if necessary.
- After that, add one teaspoon of hot water at a time, mixing well after each addition. Remember, you should achieve a thick but spreadable paste consistency. Then, when you are almost at the consistency you are looking for, add the colored food coloring you desire.
- Afterward, press and spread a small dollop of the paste in every nook and cranny of the lace mat. With that, ensure to use an offset spatula.
- Once you fill all the lace mat space, scrape all the excess off using a bench scraper.
- After that, place the lace mat onto a baking sheet and bake for about seven to ten minutes. Or bake it until the edges are dry.
- Then, air dry it until not wet. Do this if you have a sticky center.
- Afterward, flip the lace mat over onto the silicone mat or parchment paper to remove the lace. Then, carefully peel the edge of the lace; pull the lace mat away from the lace. In addition to that, you can use a toothpick on the tricky areas to remove it properly.
- Lastly, you can use the sugar lace on your chilled cake. Or you can store it on parchment placed in an airtight container.
How to Apply Homemade Sugar Veil on the Cake
- To apply the sugar veil, you will need to brush a thin layer of edible adhesive onto your chilled cake.
- Then, gently place the sugar veil onto the edible adhesive. Also, ensure that the bottom lines up with the bottom of the cake. In that regard, work in small sections and support your sugar veil with your free hand.
Notes
You have to make the cake before making the sugar veil. So with that, ensure to stack, crumb coat, and frost the cake. Then, chill it before applying the sugar veil. If you find areas that need more adhesive in applying the sugar veil, reapply it behind the lace. However, be extra careful. Because when the sugar veil comes in contact with the adhesive, it tends to be more delicate.
Moreover, if you have to press the sugar veil onto the cake, use the end of the paintbrush. But, always be gentle. Furthermore, there is a bad chance that your sugar veil will not wrap around the cake completely. To fix this, you will need to cut a second piece of the sugar veil. After that, measure the gap length, observe the sugar veil pattern, and cut where the pattern matches.
Also, you can have easements when cutting since you can trim the excess off. However, do not overbake the sugar veil because it will become brittle. In addition to that, do not air-dry your sugar veil overnight. As a result, it will cause the sugar veil to become fragile.
Want more recipes?Check out Our YouTube Channel!