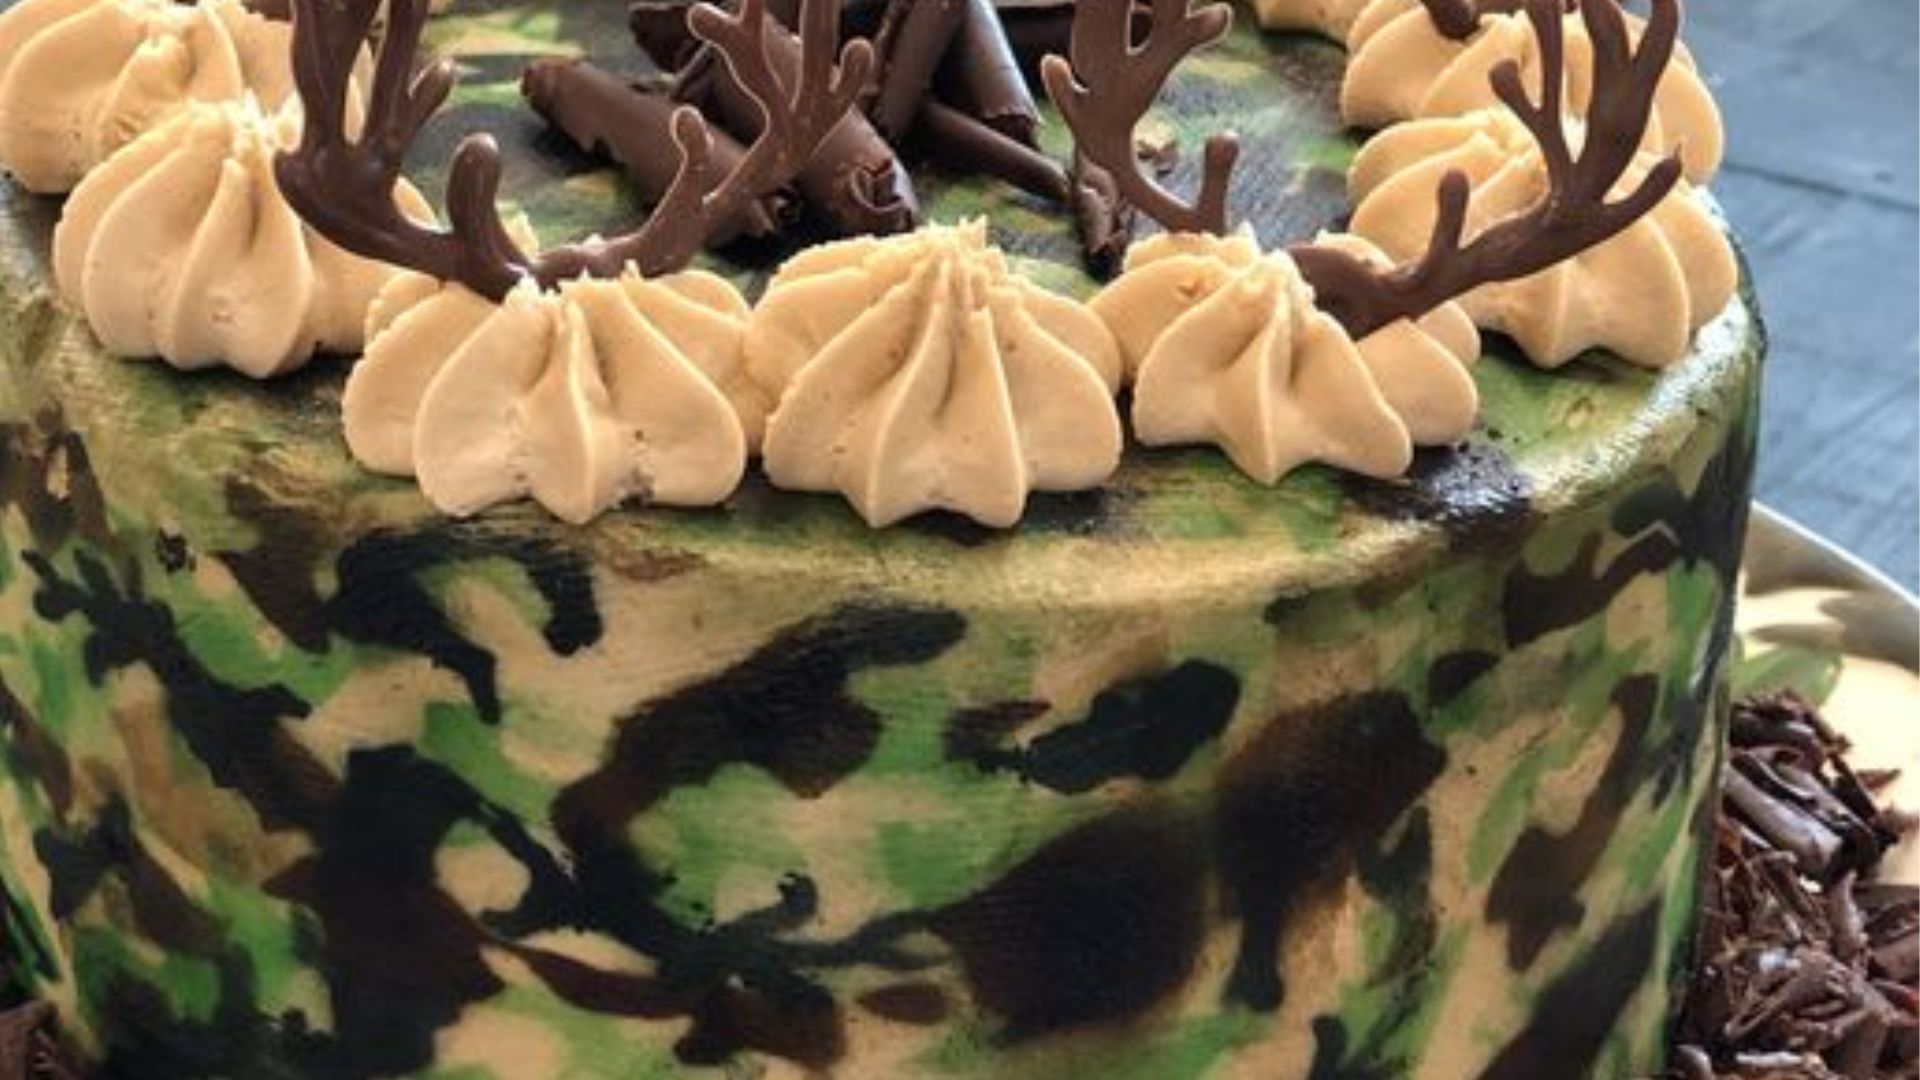
How To Make A Camo Cake With Icing - Easy 5 Shade Cake
Today, we will explore how to make a camo cake with icing. Our technique will create a smooth and authentic camo base for many themed cakes.
It is incredibly easy, quick to pick up, and very versatile. Using just this one technique, you can create thousands of different cakes. So, let's look at how to do it.
Equipment
- Measuring cups and spoons
- Mixing bowls
- Whisks or spoons
- Piping bag and nozzles, optional
- Palette knife
- Large metal cake scraper, optional but recommended
Ingredients
- Baked cake (any size and height that you'd like)
- Crumb coating icing, colored with your lightest camo color
- 4 1/2 cups buttercream icing
- Brown food coloring
- Yellow or beige food coloring
- Black food coloring
- Army green food coloring
Instructions
- Prepare your cake for decoratingBefore we look at how to decorate a camo cake, you first have to prepare all of the elements for the cake. That includes making sure the cake is baked, cooled, and leveled.You can also stack the cake with any frosting or filling of your choice. Then, you can crumb coat and coat the cake with a thin layer of buttercream icing. If you don't already know how to crumb coat a cake, have a look at this article.Baked cake (any size and height that you'd like), Crumb coating icing, colored with your lightest camo color
- Rest your frosted cakeBefore you start decorating the cake with camo motifs, it is crucial that the cake rests. The first coating of frosting shouldn't be too soft, otherwise, it will just come off of the cake as you apply and work the camo icing.
- Divide your icingNext, you can start coloring your icing. The exact shade of your pallet is up to you. We like to make a darker camo cake because it tends to hide fewer flaws.Divide the uncolored buttercream icing between 5 bowls. 4 bowls can have 1 cup of frosting each, and the fifth can only have 1/2 a cup (for the black frosting).4 1/2 cups buttercream icing
- Make the two brown icingsTwo bowls have to have two different shades of brown. One can be slightly darker than the other. All you need to get a lighter color is to add less brown food coloring.Brown food coloring, Yellow or beige food coloring
- Make the beige-brown icingNext, you can make the beige-brown colored icing. To do this, you will need to combine some brown food coloring with either yellow or beige. Keep adjusting the color until you are happy with the shade.Start with a couple of drops of yellow or beige first. Then, slowly add brown until you get the desired shape.
- Make the army green and black frostingFinally, color the 1/2 cup of icing with black food coloring. Then, color the other cup with army-green food coloring.Army green food coloring, Black food coloring
- Place blobs of icing on the cakeNext, you can place random blobs of colored icing on the cake. Make sure that your pattern is random and that the shapes and sizes of the blobs vary too. You can create big color dollops or smaller ones. It's entirely up to you.Start with the lightest color first, the beige-brown. Then the light brown, army green, dark brown, and finally, a couple of spots of black.You should try adding the most of the beige-brown, light brown, and army green. Otherwise, the entire cake is going to be too dark.Once your blobs are completely covering the cake, allow the icing to harden at room temperature for 15-20 minutes.
- Level the icingThe final step for how to make a camo cake with icing is to level the blobs of icing. To start, slightly heat the edge of the metal scraper in hot water.Then, place it level to the cake (at 90 degrees). Slowly turn the cake as the scraper takes off any excess icing and levels the remaining. It will also blend together the colors to create a smooth transition between the blobs.
- Finish the cake with decorationsIf you still have any other decorations you'd like to add to this cake, do so after the camo icing has set at room temperature.
Notes
The crumb coating and outer icing layer of the cake should be the lightest brown color of your camo color pallet. This will help prevent bright white spots from peeking through unfrosted areas.
Don't make the initial buttercream layer too thick (after the crumb coat). Otherwise, the cake will look extremely chunky and be overly sweet once you start layering the camo icing.
You can place the colored icings into piping bags if you'd like. But, it isn't necessary. You can also just place the icing on the side of the cake using a palette knife or butter knife.
When leveling the icing, work in small sections to avoid getting the excess icing on the rest of the cake. Scrape off the excess icing from the scraper and clean it well before moving on to the next section.
Want more recipes?Check out Our YouTube Channel!