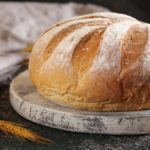
Delicious Bread In A Microwave - Bakes In Under 10 Minutes
We have the quickest bread in a microwave recipe for you! It will save you a ton of time, is super easy, and doesn't require a lot of ingredients!
Now, you can make a delicious quick breakfast, homemade toasted sandwiches, and a gourmet serving platter for any occasion. All without the hassle of sweating away for hours on end!
Servings: 1 large loaf
Equipment
- Measuring cups and spoons
- Mixing bowls
- Sift
Ingredients
- 1 cup cake flour, sifted
- 2-3 teaspoons baking powder
- 1/2 teaspoon fine salt
- 1/2 cup olive oil
- 1/4 cup milk, room temperature
- 1/4 cup water, room temperature
- 3 eggs, room temperature
Instructions
- Make the bread dough.First, start by sifting together the flour, baking powder, and salt in a large mixing bowl. Then, give the ingredients a good stir to make sure they are evenly distributed.In a separate bowl, whisk together the olive oil, milk, water, and eggs. Make sure you have a uniform wet mixture. Then, add the wet ingredients to the dry ingredients. Mix them until you start forming a smooth dough.1 cup cake flour, sifted, 2-3 teaspoons baking powder, 1/2 teaspoon fine salt, 1/2 cup olive oil, 1/4 cup milk, room temperature, 1/4 cup water, room temperature, 3 eggs, room temperature
- Knead and shape the dough.Once you have a dough ball, you can dust some flour on a flat surface. Start kneading the dough until it has a smooth surface. This kneading process helps develop gluten and makes the strands more elastic (to help give more rise). The kneading process will take roughly 8-10 minutes.Then, once your dough is properly kneaded, you can shape it into a perfect oval or circle (depending on the shape of the microwave-safe dish or the shape that you want).Once shaped, place the bread in a lined microwave-safe dish and you score the surface. Simply make two or three parallel slices or a cross over the surface. The slices should not be very deep. Allow the bread to rest for 20 minutes while it is simultaneously proofing.
- Bake your bread in a microwave.Finally, your microwave should be set on high heat. Then, microwave your loaf for at least 6-8 minutes. Keep a close eye on the bread through the glass to see how it's doing.If you are nearing the end of the time but the dough has clearly not cooked for long enough, you can easily add more seconds to it.
- Test the doneness.To test the doneness of the bread, first, feel the weight of your loaf. If the load feels heavy, it can still be baked for additional time. But, if it feels lighter than it did, it has finished baking.Then, you can also test the bread with a toothpick. Insert the toothpick in the center at the thickest part. If the toothpick comes out completely clean, the bread is done baking.Finally, all that is left to do is allow the loaf of bread to cool slightly before slicing and serving it immediately.
Notes
You cannot use a traditional metal bread loaf pan to make this bread in a microwave. Metal is not compatible with this appliance. So, you will have to find other microwave-safe materials. It usually states it on the bottom of the bowl glass or ceramic loaf pan or bowl.
You can adjust the amount of baking powder used for this recipe. Naturally, the less you add the less your loaf will rise. However, this isn't necessarily a bad thing. You can customize the loaf entirely to your liking. Remember, this is still a microwave cheat bread, so it will never be the same as a baked one.
When kneading dough for making bread, you always have to get it to a smooth surface consistency. This is when the gluten strands have become elastic and will provide you with a nice internal crumb. Another test to see if you've kneaded the dough enough is to gently press on its surface. When it immediately bounces back to almost its original place, the dough is ready.
Want more recipes?Check out Our YouTube Channel!
