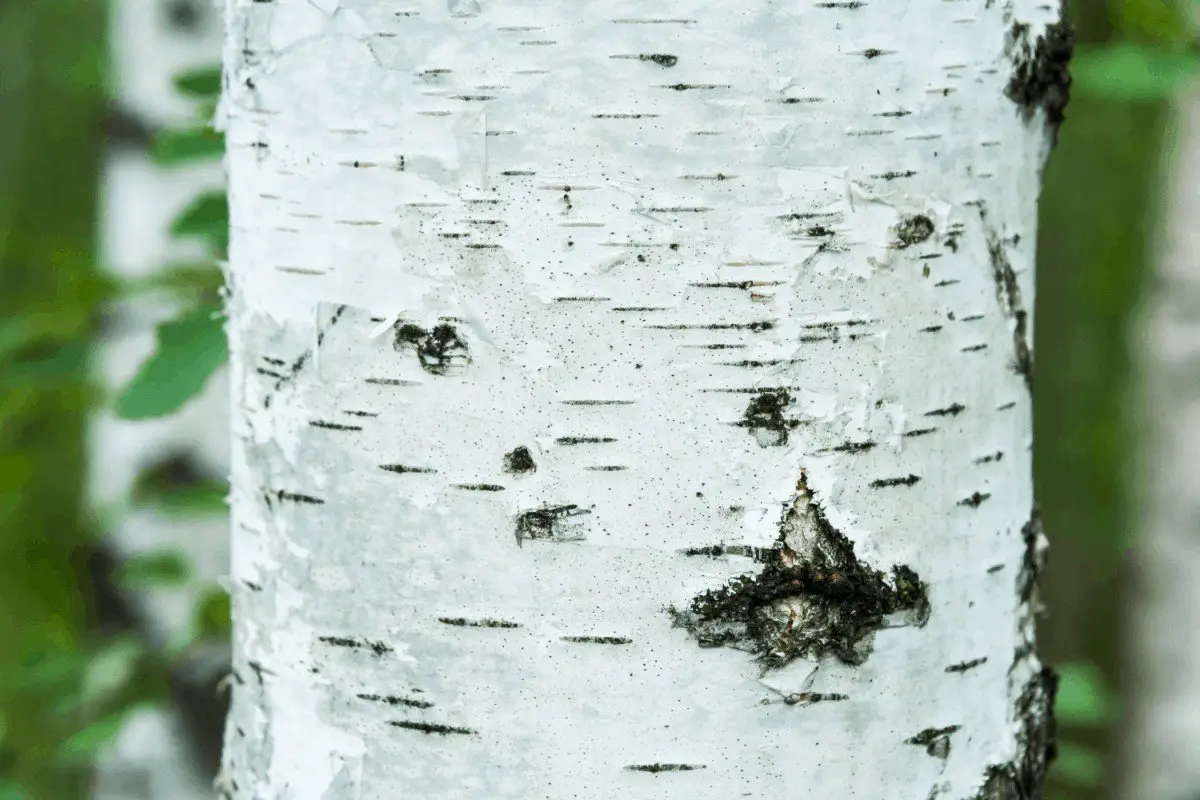
Birch Tree Cake: Awesome Recipe to Create Gorgeous Wood Effect
Looking for the perfect way to decorate your cake? Want something with a natural look? Then this tutorial for how to make a buttercream birch tree cake will help you create the perfect cake.
Equipment
- Piping bags
- Turntable
- Flat edge
Ingredients
- Round cake crumb coated
- ½ cup light brown buttercream
- ½ medium brown buttercream
- 1 cup dark brown buttercream
- 1 cup white buttercream
- Brown food coloring
- Food grade paintbrush
Instructions
- Step One: Crumb Coat the Cake
- Place the cake on the turntable and add a thin layer of white buttercream, creating a crumb coat.
- Step Two: Prepare the Frostings
- Add approximately 20 drops of food coloring to one cup of buttercream for dark brown, five drops to half a cup for medium brown and three drops to have a cup for light brown. You can adjust to your reach your desired shades. You may also use chocolate buttercream instead.
- Step Three: Frost the Top of the Cake
- Fill a piping bag with light brown and another piping bag with medium brown frosting. Pipe a circle in the middle with medium brown buttercream. Pipe a few rings of light brown buttercream, then one of medium brown buttercream and then finish with more light brown rings.
- Step Four: Smooth Out the Rings
- Using the straight icing spatula, gently smooth out the rings. Position the tip of the spatula over the center and tilt the blade of spatula up. Carefully place the lower flat edge of the spatula on the buttercream and slowly spin the turntable, smoothing the lines out.
- Step Five: Apply the White Buttercream
- Apply a thick layer of white buttercream along the sides of the cake. Try not to let the buttercream go above the top, but it is alright if it pokes up some over the top.
- Step Six: Smooth the Cake
- Using the straight icing spatula, smooth the sides of the cake and around the top.
- Step Seven: Pipe Dark Brown Buttercream
- Pipe the sides of the cake with dark brown streaks. Pipe the streaks going horizontal around the cake, making them thin and random.
- Step Eight: Smooth the Frosting
- Use a flat edge to smear the brown lines on the cake. Repeat until the cake reaches the birch appearance you desire.
- Step Nine: Add Finishing Touches
- Use the back end of a paint brush to create a small hole that only goes through the white layer of frosting. Repeat as you feel necessary. If you wish, add buttercream leaves or carve initials into the side.
- Birch tree cakes make for beautiful wedding cakes. They have a natural woodland look that many people love.
Notes
- It is important to crumb coat a cake because the base frosting coat allows it to catch any crumbs that might appear through the frosting. It is an easy way to ensure a smooth cake. Adding a crumb coat is a good practice to do when frosting any cake you plan to decorate.
- This cake can be stored in an airtight container for two to three days at room temperature. It may be stored in the fridge for up to a week and in the freezer for up to six months. If you stored your cake in the fridge or freezer, allow it to reach room temperature before serving.
- Buttercream frosting does not hold up well in the heat. If you are serving this cake outside on a summer day, keep it inside or in a fridge until it is ready to serve. This will help prevent any melting of the frosting and allow it to keep its natural look.
- Birch tree cakes give you a lot of freedom to add decorations you like. You can add buttercream frosting leaves, real leaves, sculptured or fondant creatures or mushrooms, initials, sugar ferns or whatever you like.
- If you want to use white buttercream for all the frosting layers, you can buy brown food coloring to achieve all the different shades of brown. You can buy brown food coloring in most grocery stores and online.
- Liquid gel food coloring is generally the best food coloring to use with buttercream frosting. It takes less drops to achieve your desired color and has less impact on the flavor of the frosting. However, any type of food coloring will work.
Want more recipes?Check out Our YouTube Channel!